Setting Up a Tripod
170 likes | 289 Vues
Setting up a tripod correctly is essential for achieving stable and high-quality shots. Begin by loosening the center knob at the collapsed base and extending the legs to your desired height. Ensure to adjust and lock the leg locks. For camera positioning, loosen the handle to tilt up and down, and lock it when stable. Use the panning knob for left-right adjustments, securing it afterwards. Attach the hot shoe to your camera securely and use the bubble level for perfect alignment. Finally, switch to camera mode and start recording with the red circle button.

Setting Up a Tripod
E N D
Presentation Transcript
Unscrew the center knob at the collapsed tripod base to loosen, and then re-tighten it once all the legs are fully extended.
Pull the leg locks up to adjust tripod to the desired height. Then press the leg locks in again.
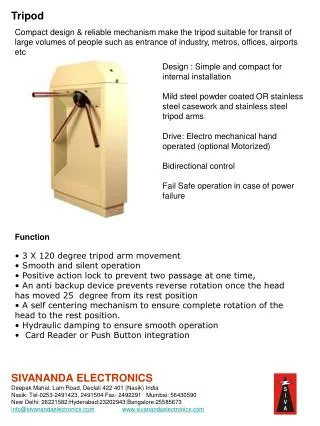
This is what the tripod should look like when it is fully extended.
Turn the handle to the Left to loosen for tilting the camera up and down. Make sure this is locked at a somewhat level position before securing the camera onto the tripod.
The knob below the hot-shoe loosens to permit panning from left to right or vice-versa. Make sure this is also locked before securing the camera to the tripod.
You have to unlock the hot-shoe in order to remove it from the tripod.
You will have to wind the screw to the bottom of the camera before placing the hot-shoe back onto the tripod.
It is very important to make sure that the hot-shoe is locked tightly on top of the tripod and that the tripod is steady.
With the tripod level, press the green button on the dial in to turn the dial to camera mode.
Press the red circle to begin recording and you will see REC appear either through the viewfinder or on the LCD screen. Press the red circle again to stop recording and the letters STBY will appear.