1. Define important words in this chapter
1.3k likes | 1.62k Vues
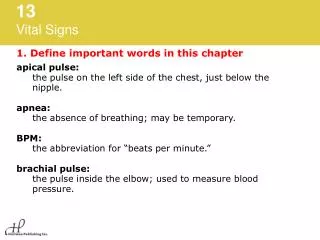
1. Define important words in this chapter. apical pulse the pulse on the left side of the chest, just below the nipple. apnea the absence of breathing. BPM the medical abbreviation for “beats per minute.” brachial pulse the pulse inside the elbow; about 1 to 1½ inches above the elbow.

1. Define important words in this chapter
E N D
Presentation Transcript
1. Define important words in this chapter • apical pulse • the pulse on the left side of the chest, just below the nipple. • apnea • the absence of breathing. • BPM • the medical abbreviation for “beats per minute.” • brachial pulse • the pulse inside the elbow; about 1 to 1½ inches above the elbow.
1. Define important words in this chapter • bradycardia • a slow heart rate—under 60 beats per minute. • Celsius • the centigrade temperature scale in which the boiling point of water is 100 degrees and the freezing point of water is 0 degrees. • Cheyne-Stokes respiration • type of respiration with periods of apnea lasting at least 10 seconds, along with alternating periods of slow, irregular respirations and rapid, shallow respirations.
1. Define important words in this chapter • diastolic • second measurement of blood pressure; phase when the heart relaxes. • dilate • to widen. • dyspnea • difficulty breathing. • eupnea • normal respirations.
1. Define important words in this chapter • expiration • the process of exhaling air out of the lungs. • Fahrenheit • a temperature scale in which the boiling point of water is 212 degrees and the freezing point of water is 32 degrees. • hypertension • high blood pressure, measuring 140/90 or higher. • hypotension • low blood pressure, measuring 100/60 or lower.
1. Define important words in this chapter • hypothermia • a condition in which body temperature drops below the level required for normal functioning; severe sub-normal body temperature. • inspiration • the process of inhaling air into the lungs. • orthopnea • shortness of breath when lying down that is relieved by sitting up. • orthostatic hypotension • a sudden drop in blood pressure that occurs when a person stands or sits up; also called postural hypotension.
1. Define important words in this chapter • prehypertension • a condition in which a person has a systolic measurement of 120–139 mm Hg and a diastolic measurement of 80–89 mm Hg; indicator that the person is likely to have high blood pressure in the future, even though he or she does not have it now. • radial pulse • the pulse on the inside of the wrist, where the radial artery runs just beneath the skin. • respiration • the process of inhaling air into the lungs (inspiration) and exhaling air out of the lungs (expiration).
1. Define important words in this chapter • sphygmomanometer • a device that measures blood pressure. • stethoscope • an instrument used to hear sounds in the human body, such as the heartbeat or pulse, breathing sounds, or bowel sounds. • systolic • first measurement of blood pressure; phase when the heart is at work, contracting and pushing blood out of the left ventricle. • tachycardia • a fast heartbeat—over 100 beats per minute.
1. Define important words in this chapter • tachypnea • rapid respirations—over 20 breaths per minute. • thermometer • a device used for measuring the degree of heat or cold. • vital signs • measurements (body temperature, pulse, respirations, blood pressure, and pain level) that monitor the function of the vital organs of the body.
2. Discuss the relationship of vital signs to health and well-being • Define the following term: • vital signs • measurements (body temperature, pulse, respirations, blood pressure, and pain level) that monitor the function of the vital organs of the body.
2. Discuss the relationship of vital signs to health and well-being • Know that vital signs consist of the following: • Taking temperature • Counting pulse • Counting rate of respirations • Taking blood pressure • Observing and reporting pain level
2. Discuss the relationship of vital signs to health and well-being • REMEMBER:A change in vital signs is often the first indication that someone is ill.
Transparency 13-1: Ranges for Adult Vital Signs • Temp. Site Fahrenheit Celsius • Oral 97.6° - 99.6° 36.5° - 37.5° • Rectal 98.6° - 100.6° 37.0° - 38.1° • Axillary 96.6°- 98.6° 36.0° - 37.0° • Normal Pulse Rate: 60-100 beats per minute • Normal Respiratory Rate: 12-20 respirations per minute • Blood Pressure • Normal • Systolic: 100-119 • Diastolic: 60-79 • Low • Below 100/60 • Prehypertensive • Systolic: 120-139 • Diastolic: 80-89 • High • 140/90 or above
3. Identify factors that affect body temperature • Remember that these factors affect body temperature: • Age • Amount of exercise • Circadian rhythm • Stress • Illness • Environment
3. Identify factors that affect body temperature • Define the following term: • hypothermia • a condition in which body temperature drops below the level required for normal functioning; severe sub-normal body temperature.
3. Identify factors that affect body temperature • Know the signs of hypothermia: • Shivering • Numbness • Quick and shallow breathing • Slow movements • Mild confusion • Changes in mental status • Pale and cyanotic skin
4. List guidelines for taking body temperature • Define the following terms: • thermometer • a device used for measuring the degree of heat or cold. • Fahrenheit • a temperature scale in which the boiling point of water is 212 degrees and the freezing point of water is 32 degrees. • Celsius • the centigrade temperature scale in which the boiling point of water is 100 degrees and the freezing point of water is 0 degrees.
4. List guidelines for taking body temperature • Know the four main sites for measuring temperature: • Mouth • Rectum • Armpit • Ear
4. List guidelines for taking body temperature • Remember these points about different types of thermometers: • Mercury-free thermometers can be used to take an oral, rectal, or axillary temperature. • Mercury-free thermometers are usually green for oral thermometers and red for rectal. • Digital thermometers are commonly used for oral, rectal, and axillary temps. They register temperature within two to 60 seconds. • Digital thermometers require a sheath to cover the probe. • Electronic thermometers are commonly used for oral, rectal, and axillary temps. They register temperature within two to 60 seconds.
4. List guidelines for taking body temperature • Different types of thermometers (cont’d.): • Electronic thermometers require a probe cover that must be discarded after a single use. • Disposable thermometers can be used to take oral or axillary temps. • Disposable thermometers are used once and disposed of. They do not require a disposable sheath. • Tympanic thermometers are fast and accurate. • Temporal artery thermometers are moved across the forehead and are non-invasive.
4. List guidelines for taking body temperature • Do not take an oral temperature on a person who • Is unconscious • Is using oxygen • Is confused or disoriented • Is paralyzed from stroke • Has facial trauma • Is likely to have a seizure • Has a nasogastric or orogastric tube (Chapter 26) • Is younger than six years old • Has sores, redness, swelling, or pain in the mouth • Has an injury to the face or neck
Measuring and recording oral temperature • Equipment: clean mercury-free, digital, or electronic thermometer, gloves, disposable sheath/cover for thermometer, tissues, pen and paper • Do not take an oral temperature on a resident who has smoked, eaten or drunk fluids, chewed gum, or exercised within the last 10–20 minutes. 1. Identify yourself by name. Identify the resident. Greet the resident by name. 2. Wash your hands.
Measuring and recording oral temperature 3. Explain procedure to resident. Speak clearly, slowly, and directly. Maintain face-to-face contact whenever possible. 4. Provide for the resident’s privacy with a curtain, screen, or door. 5. Put on gloves.
Measuring and recording oral temperature 6. Mercury-free thermometer: Hold thermometer by stem. Before inserting thermometer in resident’s mouth, shake thermometer down to below the lowest number (at least below 96°F or 35°C). To shake thermometer down, hold it at the end opposite the bulb with the thumb and two fingers. With a snapping motion of the wrist, shake the thermometer. Stand away from furniture and walls while doing so.
Measuring and recording oral temperature Digital thermometer: Put on disposable sheath. Turn on thermometer. Wait until “ready” sign appears. Electronic thermometer: Remove probe from base unit. Put on probe cover. 7. Mercury-free thermometer: Put on disposable sheath, if applicable. Gently insert bulb end of thermometer into resident’s mouth. Place it under tongue and to one side. Resident should breathe through his or her nose.
Measuring and recording oral temperature Digital thermometer: Insert end of digital thermometer into resident’s mouth. Place under tongue and to one side. Electronic thermometer: Insert the covered probe into resident’s mouth. Place under tongue and to one side.
Measuring and recording oral temperature 8. Mercury-free thermometer: Tell resident to hold thermometer in mouth with lips closed. Assist as necessary. Ask the resident not to bite down or to talk. Leave thermometer in place for at least three minutes.
Measuring and recording oral temperature Digital thermometer: Leave in place until thermometer blinks or beeps. Electronic thermometer: Leave in place until you hear a tone or see a flashing or steady light.
Measuring and recording oral temperature 9. Mercury-free thermometer: Remove the thermometer. Wipe with tissue from stem to bulb or remove sheath. Dispose of tissue or sheath. Hold thermometer at eye level. Rotate until line appears, rolling the thermometer between your thumb and forefinger. Read temperature. Remember the temperature reading.
Measuring and recording oral temperature Digital thermometer: Remove the thermometer. Read temperature on display screen. Remember the temperature reading. Electronic thermometer: Read the temperature on the display screen. Remember the temperature reading. Remove the probe. 10. Mercury-free thermometer: Clean thermometer according to facility policy. Return it to plastic case or container.
Measuring and recording oral temperature Digital thermometer: Using a tissue, remove and discard sheath. Clean thermometer according to facility policy. Replace thermometer in case. Electronic thermometer: Press the eject button to discard the cover. Return the probe to the holder. 11. Remove and discard gloves. Wash your hands. 12. Make resident comfortable. Remove privacy measures.
Measuring and recording oral temperature 13. Leave call light within resident’s reach. 14. Wash your hands. 15. Be courteous and respectful at all times. 16. Report any changes in the resident to the nurse. Document procedure using facility guidelines. Record the resident’s name, temperature, date, time and method used (oral).
4. List guidelines for taking body temperature • Remember these points about taking rectal temperature: • Rectal temperatures are most accurate. • You must explain what you will do before starting. • Be reassuring. • You must hold onto the thermometer at all times. • Gloves must be worn. • Thermometer must be lubricated for this procedure. • The privacy of the resident is important. • Thermometer must be held the entire time it is in the rectum.
4. List guidelines for taking body temperature • Remember this point about tympanic temperatures: • The tip will only go into the ear 1/4 to 1/2 inch. • Remember these points about axillary temperatures: • Axillary temperatures are not as accurate as other sites. • Axillary area must be clean and dry.
Measuring and recording rectal temperature • Equipment: clean rectal mercury-free, digital or electronic thermometer, lubricant, gloves, tissue, disposable sheath/cover, pen and paper 1. Identify yourself by name. Identify the resident. Greet the resident by name. 2. Wash your hands. 3. Explain procedure to resident. Speak clearly, slowly, and directly. Maintain face-to-face contact whenever possible. Remind resident that the procedure will take only a few minutes.
Measuring and recording rectal temperature 4. Provide for the resident’s privacy with a curtain, screen, or door. 5. Adjust bed to safe working level, usually waist high. Lock bed wheels. 6. Help the resident to left-lying (Sims’) position. 7. Fold back linens to expose only rectal area. 8. Put on gloves.
Measuring and recording rectal temperature 9. Mercury-free thermometer: Hold thermometer by stem. Shake thermometer down to below the lowest number. Put on disposable sheath. Digital thermometer: Put on disposable sheath. Turn on thermometer. Wait until “ready” sign appears. Electronic thermometer: Remove probe from base unit. Put on probe cover. 10. Apply a small amount of lubricant to tip of bulb or probe cover (or apply pre-lubricated cover).
Measuring and recording rectal temperature 11. Separate the buttocks. Gently insert thermometer one-half to one inch into rectum. Stop if you meet resistance. Do not force the thermometer into the rectum. 12. Replace sheet over buttocks while holding on to the thermometer. Hold onto the thermometer at all times.
Measuring and recording rectal temperature 13. Mercury-free thermometer: Hold thermometer in place for at least three minutes. Digital thermometer: Hold thermometer in place until thermometer blinks or beeps. Electronic thermometer: Leave in place until you hear a tone or see a flashing or steady light. 14. Gently remove the thermometer. Wipe with tissue from stem to bulb or remove sheath or cover. Dispose of tissue or sheath.
Measuring and recording rectal temperature 15. Read thermometer at eye level as you would for an oral temperature. Remember the temperature reading. 16. Mercury-free thermometer: Clean thermometer according to facility policy. Return it to plastic case or container. Digital thermometer: Clean thermometer according to facility policy. Replace thermometer in case. Electronic thermometer: Press the eject button to discard the cover. Return the probe to the holder.
Measuring and recording rectal temperature 17. Remove and discard gloves. 18. Wash your hands. 19. Make resident comfortable. 20. Return bed to lowest position. Remove privacy measures. 21. Leave call light within resident’s reach. 22. Wash your hands.
Measuring and recording rectal temperature 23. Be courteous and respectful at all times. 24. Report any changes in the resident to the nurse. Document procedure using facility guidelines. Immediately record the resident’s name, temperature, date, time and method used (rectal).
Measuring and recording tympanic temperature • Equipment: tympanic thermometer, gloves, disposable sheath/cover, pen and paper 1. Identify yourself by name. Identify the resident. Greet the resident by name. 2. Wash your hands. 3. Explain procedure to resident. Speak clearly, slowly, and directly. Maintain face-to-face contact whenever possible.
Measuring and recording tympanic temperature 4. Provide for the resident’s privacy with a curtain, screen, or door. 5. Put on gloves. 6. Put a disposable sheath over earpiece of the thermometer. 7. Position the resident’s head so that the ear is in front of you. Straighten the ear canal by gently pulling up and back on the outside edge of the ear. Insert the covered probe into the ear canal. Press the button.
Measuring and recording tympanic temperature 8. Hold thermometer in place until thermometer blinks or beeps. 9. Read temperature. Remember the temperature reading. 10. Dispose of sheath. Return thermometer to storage or to the battery charger if thermometer is rechargeable. 11. Remove and discard gloves. Wash your hands. 12. Make resident comfortable. Remove privacy measures.
Measuring and recording tympanic temperature 13. Leave call light within resident’s reach. 14. Wash your hands. 15. Be courteous and respectful at all times. 16. Report any changes in the resident to the nurse. Document procedure using facility guidelines. Immediately record resident’s name, temperature, date, time, and method used (tympanic).
Measuring and recording axillary temperature • Equipment: clean mercury-free, digital or electronic thermometer, gloves, tissues, disposable sheath/cover, pen and paper 1. Identify yourself by name. Identify the resident. Greet the resident by name. 2. Wash your hands. 3. Explain procedure to resident. Speak clearly, slowly, and directly. Maintain face-to-face contact whenever possible.
Measuring and recording axillary temperature 4. Provide for the resident’s privacy with a curtain, screen, or door. 5. Adjust bed to safe working level, usually waist high. Lock bed wheels. 6. Put on gloves. 7. Remove resident’s arm from sleeve of gown. Wipe axillary area with tissues.
Measuring and recording axillary temperature 8. Mercury-free thermometer: Hold thermometer by stem. Shake thermometer down to below the lowest number. Put on disposable sheath, if applicable. Digital thermometer: Put on disposable sheath. Turn on thermometer. Wait until “ready” sign appears. Electronic thermometer: Remove probe from base unit. Put on probe cover.
Measuring and recording axillary temperature 9. Position thermometer (bulb end for mercury-free) in center of the armpit. Fold resident’s arm over chest. 10. Mercury-free thermometer: Hold thermometer in place, with the arm close against the side, for eight to ten minutes. Digital thermometer: Hold thermometer in place until thermometer blinks or beeps. Electronic thermometer: Leave in place until you hear a tone or see a flashing or steady light.
Measuring and recording axillary temperature 11. Mercury-free thermometer: Gently remove the thermometer. Wipe with tissue from stem to bulb or remove sheath. Dispose of tissue or sheath. Read temperature. Remember the temperature reading. Digital thermometer: Remove the thermometer. Read temperature on display screen. Remember the temperature reading. Electronic thermometer: Read the temperature on the display screen. Remember the temperature reading. Remove the probe.