Loading and Using an iPod in the Classroom
430 likes | 535 Vues
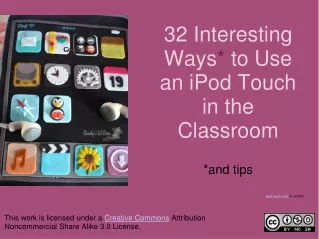
Learn how to navigate the click wheel, encode CDs, create playlists, store files, add YouTube videos, charge, and more for educational purposes.

Loading and Using an iPod in the Classroom
E N D
Presentation Transcript
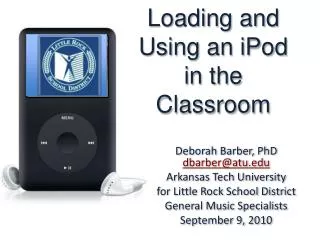
Loading and Using an iPod in the Classroom Deborah Barber, PhD dbarber@atu.edu Arkansas Tech University for Little Rock School District General Music Specialists September 9, 2010
Coming Up… • Navigating the click wheel • Encoding an audio CD • Making playlists • Storing files on the iPod (Disk mode) • Putting youtube videos on the iPod • Notation files played on the iPod • Charging and disconnecting
Navigating the Click Wheel • Begin by checking the hold switch at the top of the iPod. When the switch indicator is red, the buttons on the click wheel will be inactive. To activate the click wheel, slide the hold switch to where the indicator is white.
Navigating the Click Wheel • Start the iPod by pressing the circular button at the center of the click wheel. Hold this button down until the Apple logo appears. After a moment or two, the main menu will light up.
Navigating the Click Wheel • Navigate your way up and down the menu list by using the touch-sensitive click wheel. Without pressing down, slide your finger over the gray circular area. • Clockwise motions will take you down the menu list, while counter-clockwise circles will take you back up.
Navigating the Click Wheel • Click the center button to choose the highlighted selection on the menu. • The center button and touch-sensitive motions will continue to serve you as you navigate your way through the various menus. Choose = Center
Navigating the Click Wheel • Click the top of the wheel marked "Menu" to be taken back to the previous menu screen. To get back to the initial menu screen, click the menu button until the top of the screen reads "iPod.”
Navigating the Click Wheel • Click the Play/Pausebutton on the bottom of the wheel to play and pause music, movies and videos. Pressing and holding the play/pause button will put the iPod into standby mode. Activate the hold switch when the iPod is put on standby.
Navigating the Click Wheel • The buttons on the left and right of the click wheel are for track back andtrack forward. Click these to skip songs or move to various scenes of a movie or video.
Navigating the Click Wheel • FROZEN? • Use the click wheel to reset your iPod if it has frozen. Begin by toggling the hold switch on and off. Next, press and hold the menu and center buttons, simultaneously, for about 6 seconds. Hold the buttons until the Apple logo appears on your screen. • Read more: How to Use the iPod Click Wheel | eHow.com http://www.ehow.com/how_2217213_use-ipod-click-wheel.html#ixzz0yvIzUmqP
Encoding tracks from a CD
1. Encoding tracks from a CD • Open iTunes • iTunes > Preferences > General > Import Settings
2. Change to MP3 from AAC
3. Insert Audio CD Follow my instructions for deselecting all tracks. Importing all tracks takes a bit of time. Do this later. Click one track and then hit Import CD button
Playlists Playlists can be used for a group of lessons or just one lesson. When you are teaching folk dances it is great to create a playlist and add a song two or three times. It will play as many times as it is in the playlist. A great help is to put the tune you are teaching at the bottom of the playlist. When it is through you do not have to run to stop the program from playing another song.
Playlists To create a new playlist click + at lower left of sidebar. You will see a new “Untitled Playlist” appear in the “Source” column on the left side. The text will be highlighted already, so start typing and give it a name. Ideas: Halloween, Animal Songs, Folk Dances, Valentine’s Day, Sing-Along Songs, … Songs can be in multiple playlists.
Storing Files on an iPod
Cynthia’s Question • Is it possible to add more music without deleting what is already on the iPod without keeping that original folder of music? • If you use your iPod as an external harddrive this is possible. iTunes only changes the items it controls. Folders of music on your harddrive can be saved on the iPod by dragging and dropping using the finder. • This also works for movies and PPTs.
To Use iPod as a Portable Storage Device • Note: Syncing music to iPod is a one way street. You cannot copy music from an iPod to a computer unless you enable your iPod as a hard disk first and then copy music files to its disk volume. • OR use an application like senuti (iTunes backwards) to upload iTunes contents from iPod to another computer. Works when you keep all your files in iTunes. • However, to store BIG files or lots of files use your iPod as an external harddrive.
To Use iPod as a Portable Storage Device • Using your iPod as a storage device allows you to transfer stuff to other Macs and PCs. You can back up your data, move files and folders, and even transfer music copied onto the hard drive. • Bummer. You can't use your iPod to access data you copy in this way onto your iPod. The files are on there, but you wouldn't know it by using your iPod. Even if you copy music onto your iPod through the Finder, you won't be able to access it through the iPod's interface. You have to have a computer to access it.
To Use iPod as a Portable Storage Device Here's how to do it: Connect your iPod to your Mac. Open iTunes if it isn't already running. Select your iPod in the left-hand sidebar. http://www.macinstruct.com/node/189
To Use iPod as a Portable Storage Device From the Summary tab, select Enable Disk Usage. Now, in the Finder, you'll see your iPod mounted as a hard drive. Copy whatever you want onto your iPod: File, folders, applications. Your iPod will take them all.
1. Enable disk use 1. Attach iPod via USB cable. 2. In iTunes go to My Devices and click on your iPod 3. Under Summary tab, move slider bar down to locate Enable disk use and click the box .
1. Enable disk use Files stored in this location outside of iTunes will not be affected by Sync. You will drag them from location on your harddrive to a folder on your iPod. You can put them on another computer by Save As or dragging.
2. When using the iPod as a storage device you access the files through the My Computer or Finder (Mac). Add files by dragging from window to window.
1. Bring ingt to School Find a video on youtube.com Copy address (URL). Control + c Go to zamzar.com Click second tab – Download Videos – 1. Enter address of file (Ctrl+v), 2. Choose .mov format, 3. Enter e-mail address, 4. Convert When you receive e-mail that file is ready click link in e-mail. Download converted file. Rename it! Save it to the iPod or desktop. Add to your iPod’s disk space by dragging or Save As…
Notation Files played on iPod • Sibelius, Finale, or MuseScore
Sibelius to MP3 • Export Sibelius file as a MIDI • Go to http://solmire.com/midi-to-mp3 • SolMiRe is a free website that converts MIDI files to MP3 format. • Rename after downloading to iTunes
Finale to MP3 • http://www.finalemusic.com/finale/features/sharingyourmusic/saveasaudio.aspx • Or same method as Sibelius
MuseScore • Freenotation application http://musescore.org/ • Saves As… .wav • Set your iTunes to play .wav files • Add to a playlist • MuseScore can save files to PDF format to e-mail to friends or put on webpages.
Download iTunes at Home • http://www.apple.com/itunes/
Charging • Built-in rechargeable lithium-ion battery • Music playback time: Up to 36 hours when fully charged • Video playback time: Up to 6 hours when fully charged • Accessories: Plug-in chargers for home & car, case, headphones, microphone (Blue Mikey)
Disconnecting Click here to eject and save changes.
Extras! • Smithsonian Global Sound: Listen to and learn about music styles from all over the world by checking out the downloads available at the Smithsonian’s Global Sound site.
Extras! • Mogopop: Use this online program to enhance iPod learning by adding notes, video and illustrations to audiobooks and study notes.
Extras! • Librivox.org • iTunes Store – Audiobooks: Find audiobooks on any subject at the iTunes Store, including news, sports, technology, travel, languages, drama and poetry and more.
Extras! • iPodSync: Sync up your work or school Outlook accounts with your iPod by installing iPodSync. You can get automatic updates and transfers for notes, calendar appointments, e-mail, news feeds and more.
Extras! • Anapod: If you’re a Windows user but love your iPod, use the Anapod to transfer files back and forth, including class notes, Web clips and more. • http://www.bspcn.com/2008/02/16/100-ways-to-use-your-ipod-to-learn-and-study-better/
Extras! • iPod in the Classroom: Take a look at Apple’s collection of lesson plans for teachers who want to use their iPod for classroom work.