Epi Info™ 7 Introductory Training
Epi Info™ 7 Introductory Training. Harold Collins. Information Technology Specialist Module 1: Introduction 12 June 2012. Office of Surveillance, Epidemiology, and Laboratory Services. Epidemiology and Analysis Program Office. Introductions. Your name Your organization


Epi Info™ 7 Introductory Training
E N D
Presentation Transcript
Epi Info™ 7 Introductory Training Harold Collins Information Technology Specialist Module 1: Introduction 12 June 2012 Office of Surveillance, Epidemiology, and Laboratory Services Epidemiology and Analysis Program Office
Introductions • Your name • Your organization • What you hope to get out of this course
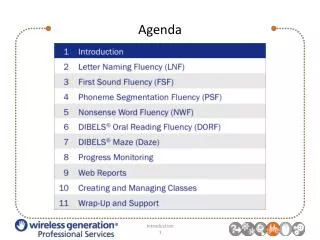
Module 1 Outline • Purpose of the Course • Explanation of Course Material • Course Instruction Methods • Quick Overview: What is Epi Info™ 7? • Downloading and Installing Epi Info™ 7 • Resources
Objectives of this Course • To provide broad overview of the software’s features and functions • To provide hands-on experience with the software • Designing simple data entry forms • Implementing simple data entry validation • Basic analysis and data management • Basic mapping
Objectives of this Course • After completing this course the participant will be able to: • Understand the workspace of the different modules and identify its key features • Design simple data entry forms using the Form Designer • Implement intelligence to data entry forms using Check Code • Enter records into an Epi Info™ 7 form • Read multiple data sources and utilize the Visual Dashboard and/or Classic Analysis modules for manipulating, managing, and analyzing data • Generate statistics like Frequencies, 2x2 Tables, and Means • Output results into HTML, Excel or Word formats • Generate cluster case or choropleth maps using Epi Map
Explanation of Course Materials • Training Agenda for Epi Info™ 7 • Copy of the Epi Info™ 7 Quick Start Guide (Optional) • Epi Info™ 7 PowerPoint Slides • Student Worksheets
Module 1 – Introduction Instruction Methods
Modules • This course is broken down into eight sections: • Introduction • Designing Forms • Adding validation logic to forms • Data Entry • Using the Dashboard • Classic Analysis • Maps • Best Practices
Method of Instruction • This is an introductory session • Students will be exposed to a broad overview of the features and functions in Epi Info™ 7 • Hold questions until Question and Answer Sessions • Order of instruction for each module: • PowerPoint Presentation • Demonstration • Practice • End-of-Lesson Questions
Module 1 – Introduction What is Epi Info™?
What is Epi Info™? • A suite of free data management, analysis, and visualization tools designed specifically for the public health community. • Features include: • Rapid electronic form creation & data entry • Statistical analysis • Mapping & visualization • Used extensively throughout CDC, domestically and internationally.
System Requirements • Generally, any Windows computer that has recently run Windows Update. • Specifically: • Windows XP, Windows Vista, Windows 7 • .NET Framework 3.5 • 256 MB of RAM
Epi Info™ 7 – Core Principles • Free • Easy to use • Flexible • Lightweight & Agile – when responding to emergencies • Robust – when performing large-scale, multi-user data collection • Standards based • No “IT guys” needed in most cases
Form Designer Used to create electronic data entry forms. Templates can be utilized to facilitate form design. The data entry experience can be tailored with intelligence, such as skip patterns, logical branching, and automatic calculations.
Enter Used to collect data into the form. Addresses can be geocoded into latitude and longitude. Data entry follows the Intelligence rules tailored in the Form Designer.
Classic Analysis Used for data management and analysis. Can read data, relate data tables, perform comparisons and run a wide variety of statistics. Supported data types include text files, Excel spreadsheets, Access databases, and MS SQL Server databases. Output is saved as HTML.
Visual Dashboard Used for quick analysis where only minimal data management is needed. Supports almost all of the statistics as Classic Analysis and supports the same data types. Output is saved as HTML.
Maps Used to create case cluster or choropleth maps. Time lapse functionality is supported. Choropleth maps can be generated using shape files or from map servers such as nationalmaps.gov.
StatCalc Basic Statistical Calculator. Can perform analyses of single or stratified two-by-two tables, determine sample size for studies, and more.
Epi Info™ 7 Projects • Projects are the standard file format in Epi Info™ 7, much like DOCX files are the standard file format used in Microsoft Word. • Certain Epi Info™ 7 modules can also work with data that resides in other formats. • A project may contain one or more data entry forms. These forms are created in the Form Designer module.
Epi Info™ 7 Forms • Forms may have one or more pages • Each page on the form has its own “data table” • As users enter data into a form, the collected data is stored within that page’s corresponding data table
How data is stored • The data you collect must be stored somewhere and in some sort of standard format. • Epi Info™ 7 collects two different types of data: • Metadata: The data that describes the number of pages in a form and the placement and size of the questions that appear on the form. • Collected data: The data that is entered into that form.
How data is stored (continued) • Both metadata and collected data are stored in a single database. • Each Epi Info™ 7 project contains a “pointer” to this database. • Allowable databases include Microsoft Access and Microsoft SQL Server. • Access does not need to be installed in order to use Access databases.
To sum it up… • Your Epi Info™ 7 Projects consist of two files: The project file and the database. • The database contains all of the information about how to display the form AND contains all the data entered into that form. • The project file contains a pointer to the database. • Projects may contain one or more forms. • Forms may contain one or more pages. • Each page has it’s a corresponding table in the database that stores data collected into that page.
Why use Microsoft SQL Server? • MS SQL Server can collect far larger quantities of data than Access databases. • Better management tools for MS SQL Server and more powerful queries are available. • Similar to “Proc-SQL” in SAS • It’s much faster, meaning data analysis is quicker. • A free version is available – SQL Server Express • http://www.microsoft.com/sqlserver/en/us/editions/express.aspx
Module 1 – Introduction DOWNLOADING AND INSTALLATION
Downloading and Installing • Epi Info™ 7 program files can be accessed on the Web • http://www.cdc.gov/epiinfo/7/index.htm • Setup Installation (.exe file) • Provides standard way of installing Windows applications. • Requires administrator privileges to run. • Zip File Deployment (.zip file) • Comes in a standard “zip” archive. • Does not require administrator privileges to run. • Needs one folder with read/write/execute privileges. • Can usually be placed on the desktop.
Using the ZIP File Deployment • Steps: • Navigate to the CDC Epi Info™ website at http://wwwn.cdc.gov/epiinfo/7/index.htm • Click on the ZIP file download. • When prompted, select “Open” (or “Run”). After the download finishes, an explorer window opens to reveal the files in the ZIP archive. • Double-click on the “Epi Info 7” folder in the explorer window. • Drag the files you see to your desktop. • Double-click on the “Launch Epi Info” icon.
Step 1: Navigate to the website Visit http://www.cdc.gov/epiinfo/7/index.htm
Step 3: Opening the package Select “Open” (or “Run”) when prompted, depending on your web browser. Internet Explorer 8 is shown here.
Step 4: Viewing the contents Double-click the “Epi Info 7” item in the explorer window. Note that on some computers, this file may have opened in another ZIP archive program.
Step 5: Drag the files to your desktop Select the two items in the folder and drag them to your desktop.
Step 6: Run the “Launch” program Double-click on the “Launch Epi Info 7” icon to start!
Module 1 – Introduction Resources
Resources and Technical Support • Download at http://www.cdc.gov/epiinfo • Helpline: epiinfo@cdc.gov or call 404.498.6190 • Epi Info™ Community of Users in phConnect http://www.phconnect.org/group/epiinfo • Send your comments and suggestions to hcollins@cdc.gov or epiinfo@cdc.gov
This Slide Presentation • This slide presentation can be downloaded from the Epi Info™ Community of Users in phConnect: http://www.phconnect.org/group/epiinfo/forum/topics/epi-info-7-training-module-1
http://www.youtube.com/watch?v=-uTHl9E6NK8&feature=player_embeddedhttp://www.youtube.com/watch?v=-uTHl9E6NK8&feature=player_embedded Epi Info™ 7 – DemonstrationOn YouTube
Questions? The findings and conclusions in this report are those of the authors and do not necessarily represent the official position of the Centers for Disease Control and Prevention. Office of Surveillance, Epidemiology, and Laboratory Services Epidemiology and Analysis Program Office