MEDPROS DATA ENTRY TUTORIAL
MEDPROS DATA ENTRY TUTORIAL. Table of Contents MEDPROS Data Entry Tutorial. MEDPROS Command Prompt Shortcuts MEDPROS Function Keys MEDPROS Immunization Tables Immunization Specifications Table Exception Reason Codes Table Manufacturer Codes Military Personnel Codes (MPC) Table


MEDPROS DATA ENTRY TUTORIAL
E N D
Presentation Transcript
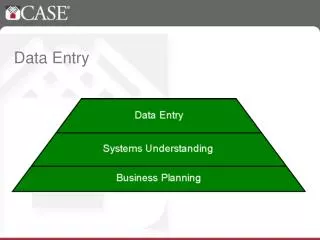
Table of ContentsMEDPROS Data Entry Tutorial • MEDPROS Command Prompt Shortcuts • MEDPROS Function Keys • MEDPROS Immunization Tables • Immunization Specifications Table • Exception Reason Codes Table • Manufacturer Codes • Military Personnel Codes (MPC) Table • MEDPROS Immunization Module • Post Individual Shot Record • Post Individual Exception Record • Create/Update Task Force • Create/Update Immunization Profile • Query and Retrieve Immunization Records from DEERS • MASS Update Unit/TF Smallpox Reactions Note: You can click on any of the links to jump to a specific area
MEDPROS Command Prompt Shortcuts • MEDPROS Mainframe Command Prompt (==) Shortcuts • Type “=NNN” at the Command Prompt (where “NNN” is the three letter code of the module you want to jump to) and press the Enter key. • =FRM – Immunization Main Menu • =FTM – Medical Readiness Main Menu • =SOP – System Option Panel • Type P + the page number (i.e. P15)and press the Enter Key to jump to a certain page in a multiple page report or roster. • Type F + Name (i.e. F Smith) and press the Enter key to jump to a person’s name on a roster.
MEDPROS Function Keys • MEDPROS Function Keys • F1 – Pressing F1 provides user with online Help screens for the current module of MEDPROS • F2 – Takes User back to System Option Panel, the “table of contents” on the Mainframe • F3 – Takes User back to Previous Module • F4 – Shows History of Modules Visited • F5/F6 – Functions of these keys differs depending on current module, usually loads information (immunization dose/route, Phys/PA name) or provides a roster (Task Force Module) • F7 – Takes User Up One Page in Roster or Multiple Page Reports • F8 – Takes User Down One Page in Roster or Multiple Page Reports • F9 – Loads Roster (Task Force & DEERS Query Modules) • F10 – Takes User One Page to the Left • F11 – Takes User One Page to the Right
Accessing the Immunization Specifications Table • To access the Immunization Specifications Table, type “=FRV” at the Command Prompt of any MODS/MEDPROS Screen.
Reading the Immunization Specifications Table • HeaderExampleExplanation • CODE ANT The 3 letter code used to Post Anthrax in MEDPROS • D_NUM 024 The 3 number HL7 code assigned by the CDC • PRIM 6 Number of doses to complete the Primary series for • this vaccine. • MIN 3 This minimum number of doses gets soldier well on their • way to full immunity, but be sure to complete the • primary series on schedule along with boosters where • applicable.
Reading the Immunization Specifications Table (cont.) • HeaderExampleExplanation • DOSE 0.5 CC Manufacturer recommended dose for this vaccine • ROUTE SC Manufacturer recommended route for vaccination • BOOST Annual Booster required annually after completion of Primary • series. • NOTES ADULT >18 YR Vaccine only approved for soldiers 18 years of age or older
Reading the Immunization Specifications Table (cont.) • HeaderExampleExplanation • DOSE INTERV +2wk +2wk +5mo Manufacturer recommended intervals while giving • +6mo +6mo the primary series. • It is always optimal to stay on this schedule; can give • shots at increased time intervals; avoid administering • shots earlier than shown in schedule. • Short Desc Anthrax Short Name/Description of Vaccine (CDC HL7 table) • Long Desc Anthrax Vaccine Long Name/Description of Vaccine (CDC HL7 table) • Type Flag A Legend at bottom of every screen, A=Common Adult • category
Accessing the Exception Reasons Code Table • To access the Exception Reasons Code Table, type “=FRC” at the Command Prompt of any MODS/MEDPROS Screen.
Reading the Exception Reasons Code Table • HeaderExampleExplanation • CODE AP The 2 letter code used to Exception in MEDPROS • DESCRIPTION ADMIN PCS Short Description of Exception Code (press F1, Helo for • detailed description) • MAX DURATION 090 Days Max number of days for exception (999=permanent).
Reading the Exception Reasons Code Table (cont.) • By pressing the F1, Help button, users see these four pages of Exception Reason codes expanded definitions. In our example, AP, the definition is for soldiers in a Permanent Change of Station status (enroute from on assignment to another. Press F8 to page down through other definitions listed alphabetically by reason code.
Accessing the Vaccine Manufacturer Codes • To access the vaccine Manufacturer Codes, press the F1, Help key while in the FRK, Post Individual Shot Record Screen.
Accessing the Vaccine Manufacturer Codes (cont.) • When on the Help Screen, type P7 (page 7) and press the Enter key to jump to the beginning of the Manufacturer Codes (pages 7-11)
Accessing the Vaccine Manufacturer Codes (cont.) • Pages 7-11 have all the manufacturer codes posted in alphabetical sequence. Press F8, Page Down to see other pages of Manufacturer Codes. Obtain Manufacturer from the vaccine vial. Use codes when posting vaccines in MEDPROS.
Accessing the Military Personnel Codes • You will need to populate the MPC code when adding an individual to a Task Force. While in a TF Roster Screen (FRU), press the F1, Help button.
Accessing the Military Personnel Codes (cont.) • Go to page 2 of the online help by pressing F8, page down. Use the appropriate codes shown here when adding personnel to Task Forces in MEDPROS.
MEDPROS Immunization Module The Immunization Tracking System Main Menu, or “FRM” screen is the portal that allows you to perform all tasks related to posting Immunizations and exceptions for an individual or by mass updates; creating or updating Immunization Profiles; selecting, creating or updating Task Forces; querying the DEERS data base for immunizations posted in other Services tracking systems; and mass updating Smallpox reactions
Posting an Individual Shot Record To post immunizations to an individual shot record, tab to the SSN Field on this screen and type the soldier’s SSN, then tab to the underscore to the left of the FRK, Post Individual Shot Record line, type an “S” and press the Enter key.
Posting an Individual Shot Record The first line is the personnel data identifying that particular soldier, to include their SSN, Name, Rank, Military Personnel Code (MPC), and assigned Unit Identification Code or UIC. The second thru fifth lines on this screen are used by the MEDPROS data entry person to post new immunization to an individual soldier’s record.. The bottom portion of this screen, below the ***Immunization Record*** line, will show all of the immunizations currently posted on the soldier’s MEDPROS Record. This portion of the record displays the Immunization name, Type code, date the immunization was given, date the next immunization in that series is due, the lot number, zip code where it was administered, and the ordering Physician or Physician’s Assistant. When this screen is full, a new screen (accessible by pressing the F8, Page Down” key) will appear. Records of career soldiers may have several pages of immunizations, but you can only view twelve at time. They are listed alphabetically by shot name, then chronologically with the most recent immunization listed at the top.
Posting an Individual Shot Record To post an immunization to an individual’s shot record: Tab to the underscore to the right of the NEW SHOT-TYPE CODE and type in the three letter code for the immunization given. Your cursor should move to the underscore under the “U” on next line. Type an “A” (for add) in that field (your cursor should move to the blank field under the date (CCYYMMDD) Type in the date the immunization was given (not the date it is being posted, the system will automatically create that date). Your cursor should automatically move to the MANU (Manufacturer) field. Type in the Manufacturer’s code, determined by looking at the vaccine vial and looking up the code from the table. You must then tab to the Lot # field. Type in the Lot Number of the Vaccine given (taken from the packaging or vaccine vial. Tab four times to move your cursor to the ZIP/APO field. Type in the Zip Code or APO code where the vaccination was given (not where it is being recorded). Tab to the ORDER SSN field. CONTINUED ON NEXT SLIDE…
Posting an Individual Shot Record Type in the SSN of the Physician or PA directing the vaccine be administered. If the SSN is not know, type in nine zeroes in this field, then manually type in the Physician or Physician Assistants name in the PRD PHY/PA field. Tab to the ADMIN PROVIDER field. Type in the Rank and Name of the person administering the vaccination. Press the F% function key – this will automatically load the Dose and Route from the Immunization Specifications Table as well as the Physician/PA name from the personnel database if not previously manually typed in that field after entering all zeroes in the ORDER SSN field.
Posting an Individual Shot Record If the SSN entered matches one in the Army database identified as a Physician or PA, you will see the confirmation message similar to the one shown the under the screen name. If the SSN does not match (as would be the case if entering all zeroes and manually typed the name), you will see the message, “Warning – Not a military physician/PA” . To add the shot to the soldier’s record, type a “U” at the Command Prompt and press the enter key
Posting an Individual Shot Record Side 2 of the Immunization record retains all the information on the top portion of the screen, but adds different fields to the Immunization Record such as the Dose, Route, Vaccine Manufacturer, the Admin Provider, and the Logon ID/Recorders Name. Press F11 one more time to see additional information on Page 3 of the Immunization record.
Posting an Individual Shot Record Side 3 of the record provides data on reactions for the Smallpox Vaccination to include the type Reaction (Major, Equivocal, or None), the Zip Code where the reaction was read, and the date the reaction was read. You will learn more about posting Smallpox reactions in a separate module. In addition, since MEDPROS is fed immunization data from other systems, the Source field identifies the system where each vaccination was posted. In this example, most shots were posted directly into MODS, but the Influenza Shot was imported from MedBase, a immunization tracking system utilized at Fort Sam Houston, Texas.
DELETING AN IMMUNIZATION IN MEDPROS To delete an immunization that was erroneously posted, type a “D” (for delete) to the left of that immunization in the Immunization Record section of the immunization record. Press the Home key to return to the Command Prompt. Type a “U” for Update and press the Enter key.
DELETING AN IMMUNIZATION IN MEDPROS Your confirmation message will appear showing, SUCCESSFUL UPDATE Your confirmation message will appear showing, SUCCESSFUL UPDATE: ADD – 0 CHNG = 0 DEL = 1 You can also see that the immunization no longer appears in the record section at the bottom of the screen. Press F3 to return to the Immunization Tracking System Main Menu (FRM Screen)
POSTING EXCEPTIONS TO AN INDIVIDUAL’S SHOT RECORD To post exceptions to an individual’s shot record, type their SSN in the SSN field and tab down to the underscore to the left of the FRD, Update/View Individual Exception Record type an “S” and press the Enter key.
POSTING EXCEPTIONS TO AN INDIVIDUAL’S SHOT RECORD A four page alphabetical listing of all immunizations in MEDPROS will appear. Any exceptions already posted will appear at the top of page one of these screens. In this example, there are none currently posted, but we want to post an exception for the Anthrax Vaccine for a soldier who has departed on a Permanent Change of Station (PCS) and can no longer be vaccinated at our site. Posting this exception will prevent this person from appearing on any overdue rosters in MEDPROS. To post the exception, tab to or click on the one character underscore to the far left of the Anthrax line as shown here, then type an “A” (for “Add”). Your cursor should move to the “Until” field. Continued on next slide…
POSTING EXCEPTIONS TO AN INDIVIDUAL’S SHOT RECORD In the Until field, you want to enter the date that exception will expire, in this case Aug 2004, typed in as 200408. Your cursor should move to the Exception Reason Code (RSN) field. Type in the two letter exception code from the exception reason codes table available for download from the web site. When you are ready to update, press the “Home” key on your keypad to move the cursor to the Command line. Once it is flashing on the Command Line, type the letter “U” (for update) and press the enter key.
POSTING EXCEPTIONS TO AN INDIVIDUAL’S SHOT RECORD You will receive a confirmation message directly under the Command Prompt that states, “Update Successful INS 1 CHG 0 DEL 0. That line will also give you the Logon ID and name of the person who posted the exception. Let’s continue by adding a permanent exception for a person who has had a positive Titer for the Adult Hepatitis B vaccine.
POSTING EXCEPTIONS TO AN INDIVIDUAL’S SHOT RECORD Tab or click on the underscore in the “S” column to the left of the HB3, Hep B, adult. Then type six (9s) in the “Until” field to indicate that this exception is permanent an will not expire. Enter “MI” (for Medical Immune”) in the Reason (RSN) code field. Press the Home Key to return to the Command prompt, type a “U” for update and press the Enter key.
POSTING EXCEPTIONS TO AN INDIVIDUAL’S SHOT RECORD Once again you will get a confirmation message under the Command Prompt letting you know that you were successful in entering the exception code. Also note that the exceptions posted always come to the top of page one of these four pages so you do not have to page down to view them. NOTE: If only one person has posted exceptions for a soldier, their LID and Name will appear at the top right of the screen. However, if more than one person has posted exceptions, you can find out who posted and exception by placing your cursor over the “E” for that exception and pressing the “F9” (recorder) key – the name and LID of the person who posted that exception will appear under the Command Prompt. Press the F3 Key to return to the Immunization Tracking System Main Menu.
POSTING EXCEPTIONS TO AN INDIVIDUAL’S SHOT RECORD To look at the impact posting these exceptions had on the individuals shot record, tab to the SSN field and type their SSN, then type an “S” on the underscore to the left of the FRK, Post Individual Shot Record line as shown here, then press the Enter key.
POSTING EXCEPTIONS TO AN INDIVIDUAL’S SHOT RECORD The individual shot record now shows the MEDPROS User that this individual has Exceptions posted to their record. If it were only one, the exception code and expiration date would appear in the top right hand corner, but this screen says “Many” next to the Excp field and provides a function key (F9) that will allow you to quickly go to their exception record to see what exceptions they have. Press the F9 key to jump to the individual’s Exception Record.
POSTING EXCEPTIONS TO AN INDIVIDUAL’S SHOT RECORD This jumps you directly to the soldiers Exception Record and precludes you from having to go back to the Immunization Tracking System Main Menu to access it.
DELETING AN EXCEPTION To delete an Exception from the Exception Record, overtype the “E” to the left of that immunization, press the Home key to go to the Command Prompt, type a “U” for Update and press the Enter key.
DELETING AN EXCEPTION Your confirmation message will appear under the command prompt showing UPDATE SUCCESSFUL INS = 0 CHG = 0 and Del = 1 Note that the remaining permanent exception moves over to the top left position on the screen. Press F3 twice to return to the Immunization Tracking System Main Menu (FRM Screen).
CREATE A TASKFORCE To create a task force, create and type a task force name in the Task Force Field, tab to the FRT module, type an S, and press the Enter key.
CREATE A TASKFORCE Tab to Task Force Name and type in a more descriptive name for your task force. NOTE: TF will expire (and disappear) after one year. Tab to Update Y/N and indicate whether you want the weekly personnel updates to update your task force (recommend you select “No”. Tab to underscore to left of UIC & type A (add), then tab and enter your first UIC. Press the F5 key to load the Unit Name.
CREATE A TASKFORCE Type a U at the command prompt and press the Enter Key.
CREATE A TASKFORCE A confirmation msg appears under the command prompt. It also tells you how many SSNs (soldiers) were added to the Task Force. Press the F6 key to see a list of personnel in the Task Force,
CREATE A TASKFORCE The roster appears in purely alphabetical order, regardless of UIC.