Diagnostic Laparoscopy
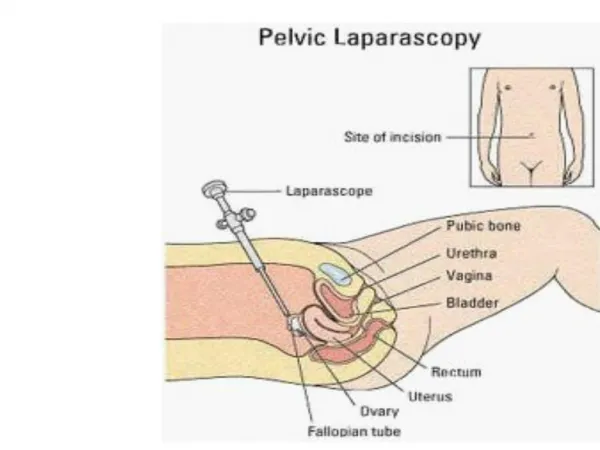
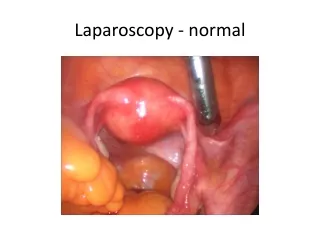
Diagnostic Laparoscopy. Alexander Parata. Diagnostic Laparoscopy. - a procedure that allows a health care provider to look directly at the contents of a patient's abdomen or pelvis, including the fallopian tubes, ovaries, uterus, small bowel, large bowel, appendix, liver, and gallbladder.

Diagnostic Laparoscopy
E N D
Presentation Transcript
Diagnostic Laparoscopy Alexander Parata
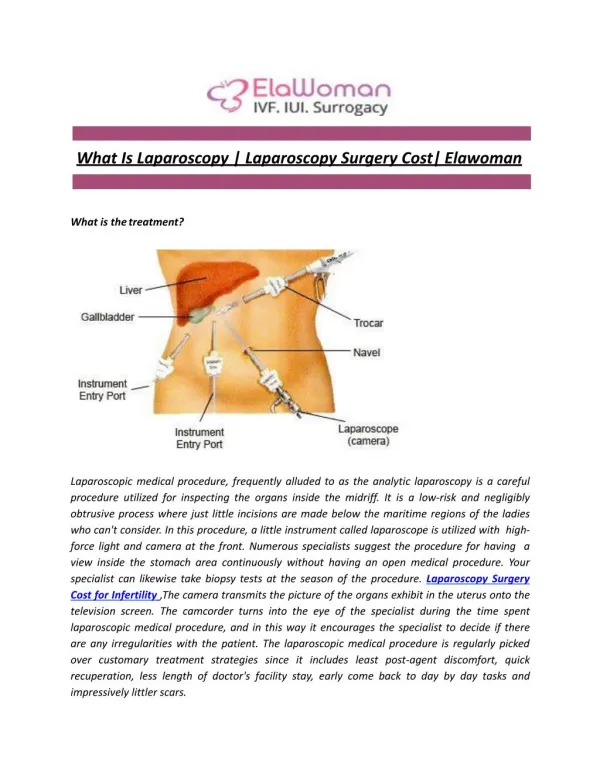
Diagnostic Laparoscopy - a procedure that allows a health care provider to look directly at the contents of a patient's abdomen or pelvis, including the fallopian tubes, ovaries, uterus, small bowel, large bowel, appendix, liver, and gallbladder.
Basic Equipment • Camera/Laparoscope • Video Monitor • Insufflator • Light source • ESU • Stirrups
Basic Instruments • Laparotomy set • Laparoscopy set • Vaginal Tray • Auvard Weighted Speculum • Sims Uterine sound • Cervical dilators • Tenaculum forceps
Anesthesia : General/local • Position: lithotomy • Prep: Laparotomy + Vaginal Prep • Draping: Laparotomy + Lithotomy drapes • 1x urethral catheterization done prior to prep
1. Handheld vaginal retractor (Auvard Weighted Speculum) placed posteriorly in the vagina and the cervix is grasped with a tenaculum. 2. Uterine manipulator is placed into cervix. 3. Anterior abdominal wall is elevated (use 2 towel clips)
4. Midline incision is made with #11 blade. 5. Veress Needle in inserted to fascia in order to enter the abdominal cavity. 6. abdominal cavity is inflated with 3 liters of CO2 (pressure 12-15 mmHg)
7. Remove veress Needle and extend the incision to 1 cm (length). To insert Laparoscopic trocar+Sleeve into the abdominal cavity. 8. The trocar is removed from the sleeve and is replaced with at laparoscope. - co2 line connected to valve on sleeve -laparoscope connected w/ light source, camera, monitor.
9. After operative intervention the CO2 is released and all ports are removed. 10. Close incision (suture/steri strips)
PACU • Return to normal activities Possible COMPLICATIONS: -Hemorrhage -Wound infection -Perforation of viscus