Urban Low Impact Development
Urban Low Impact Development. Parking Lot Case Study. English + Associates Owner Architect Construction EcoServices Storm-water Tank Contractor General Contractor T&T Construction Dominion Interests MEP Engineers. What is Low Impact Development?.

Urban Low Impact Development
E N D
Presentation Transcript
Urban Low Impact Development Parking Lot Case Study English + Associates Owner Architect Construction EcoServices Storm-water Tank Contractor General Contractor T&T Construction Dominion Interests MEP Engineers
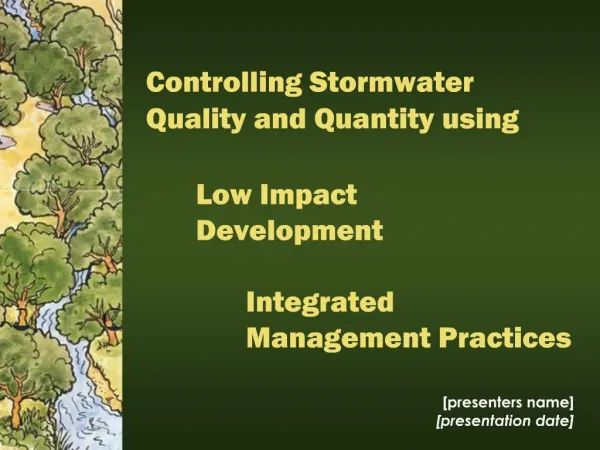
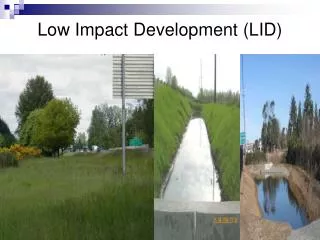
What is Low Impact Development? • Low Impact Development (LID) is a storm-water management and land development strategy that focuses on conservation and use of on-site natural features to more closely mimic the pre-developed condition of the site. Virtually anything that touches the ground can make its way into the storm water drainage system and flow directly into our bayous, streams and ultimately, into the bay. If storm-water is contaminated by contact with pollutants, it stays contaminated because storm-water is not treated at a treatment plant.
Low Impact Development Influences • Flooding by reducing Storm-water rate and peak flow • Pollution by improving Storm-water quality and reducing total rate • Heat Island Effect by reducing site and local temperature • Destruction of Natural Habitat By retaining or restoring natural habitat
Developer Benefits Low Impact Development Benefits Reduce city flash-flood incidents Longer retention of water on site reduces flooding of local waterways. Increase developable land Less expensive on site storm water cleaning systems More attractive site Increases property values Low maintenance cost Protect downstream water quality Pollutants are filtered before reaching fishing areas. Protect natural habitats More of the natural landscape remains than in traditional parking lot design. Community Benefits
Run-off Hydrograph Conventional Developed condition Maximum water shed capacity QUANTITY Pre-Developed or LID Condition TIME
LEED™ Points contributed To by this technology Total Points Contributed To: 7
Case study of an Urban Site Site Specific Problems • Existing surface conditions did not mitigate storm water by percolation or retention. • Presence of expansive clay soils posed a danger to foundation of the adjacent building. • Adjacent historical building has a basement which suffers occasional flooding due to underground hydrostatic pressure.
1919 Decatur Parking Lot • Parameters • Parking lot with 23 spaces • 100’ x 100’ Lot – 10,000SF • Conditions • Crushed gravel Parking lot • Age: 40-50yrs • Goals • To provide adequate, smooth parking for office • To mitigate storm water run-off • Provide green space • Retain Storm water for irrigation
Alternatives Considered Collection • Large pre-constructed metal plastic underground tank. • Large aggregate rock bed • 4’ dia. HDPE closed pipe array • Modular Atlantis RainTank System Conveyance • Pervious pavement over gravel/crushed rock • Unit pavers with voids and gravel/rock base • Conventional concrete sloped to landscaped filtration beds • Conventionalconcrete sloped to gravel filtration beds
ATLANTIS RAINTANKS How we fit it in Design superimposed over original parking lot Design of underground water retention and water inlets arrows reflect direction of water flow
Breaking Ground – Basic Drainage slope Breaking Ground
Breaking Ground – Basic Drainage slope Excavation Excavation of pit for Rain Tanks
Breaking Ground – Basic Drainage slope Sand-Gravel Layer Excavation of pit for Rain Tanks A gravel and sand mixture goes on the bottom of the pit as leveling material
Breaking Ground – Basic Drainage slope Shipment of Tanks Excavation of pit for Rain Tanks A gravel and sand mixture goes on the bottom of the pit as leveling material Atlantis Rain Tanks Ship flat on a truck bed to be assembled onsite.
Breaking Ground – Basic Drainage slope Assembly Excavation of pit for Rain Tanks A gravel and sand mixture goes on the bottom of the pit as leveling material Atlantis Rain Tanks Ship flat on a truck bed to be assembled onsite. Assembly is timely and simple.
Breaking Ground – Basic Drainage slope EcoFabric Liner Excavation of pit for Rain Tanks A gravel and sand mixture goes on the bottom of the pit as leveling material Atlantis Rain Tanks Ship flat on a truck bed to be assembled onsite. Assembly is timely and simple. Added a under liner to protect the impermeable layer
Breaking Ground – Basic Drainage slope Impermeable Layer Excavation of pit for Rain Tanks A gravel and sand mixture goes on the bottom of the pit as leveling material Atlantis Rain Tanks Ship flat on a truck bed to be assembled onsite. Assembly is timely and simple. Added a under liner to protect the impermeable layer An impermeable layer at the side and bottom of the tank to keep the water from seeping into the soil
Breaking Ground – Basic Drainage slope Liner Wrap Excavation of pit for Rain Tanks A gravel and sand mixture goes on the bottom of the pit as leveling material Atlantis Rain Tanks Ship flat on a truck bed to be assembled onsite. Assembly is timely and simple. Added a under liner to protect the impermeable layer An impermeable layer at the side and bottom of the tank to keep the water from seeping into the soil. Layer of the Geo-Textile fabric.
Breaking Ground – Basic Drainage slope Tank Sequence Excavation of pit for Rain Tanks A gravel and sand mixture goes on the bottom of the pit as leveling material Atlantis Rain Tanks Ship flat on a truck bed to be assembled onsite. Assembly is timely and simple. Added a under liner to protect the impermeable layer An impermeable layer at the side and bottom of the tank to keep the water from seeping into the soil. Layer of the Geo-Textile fabric. Placement of the Atlantis Rain Tanks
Breaking Ground – Basic Drainage slope Compacted Sand Excavation of pit for Rain Tanks A gravel and sand mixture goes on the bottom of the pit as leveling material Atlantis Rain Tanks Ship flat on a truck bed to be assembled onsite. Assembly is timely and simple. Added a under liner to protect the impermeable layer An impermeable layer at the side and bottom of the tank to keep the water from seeping into the soil. Layer of the Geo-Textile fabric. Placement of the Atlantis Rain Tanks Placement of the Atlantis Rain Tanks Fabric Seams are taped and sand is compacted along the perimeter of the tank.
Breaking Ground – Basic Drainage slope D-Cells Water Inlet Excavation of pit for Rain Tanks A gravel and sand mixture goes on the bottom of the pit as leveling material Atlantis Rain Tanks Ship flat on a truck bed to be assembled onsite. Assembly is timely and simple. Added a under liner to protect the impermeable layer An impermeable layer at the side and bottom of the tank to keep the water from seeping into the soil. Layer of the Geo-Textile fabric. Placement of the Atlantis Rain Tanks Fabric Seams are taped and sand is compacted along the perimeter of the tank. The D-Cells convey filtered water from gravel beds to tank
Breaking Ground – Basic Drainage slope Concrete Placement Excavation of pit for Rain Tanks A gravel and sand mixture goes on the bottom of the pit as leveling material Atlantis Rain Tanks Ship flat on a truck bed to be assembled onsite. Assembly is timely and simple. Added a under liner to protect the impermeable layer An impermeable layer at the side and bottom of the tank to keep the water from seeping into the soil. Layer of the Geo-Textile fabric. Placement of the Atlantis Rain Tanks Fabric Seams are taped and sand is compacted along the perimeter of the tank. The D-Cells convey filtered water from gravel beds to tank Concrete placement
Breaking Ground – Basic Drainage slope Completed Pavement Excavation of pit for Rain Tanks A gravel and sand mixture goes on the bottom of the pit as leveling material Atlantis Rain Tanks Ship flat on a truck bed to be assembled onsite. Assembly is timely and simple. Added a under liner to protect the impermeable layer An impermeable layer at the side and bottom of the tank to keep the water from seeping into the soil. Layer of the Geo-Textile fabric. Placement of the Atlantis Rain Tanks Fabric Seams are taped and sand is compacted along the perimeter of the tank. The D-Cells convey filtered water from gravel beds to tank Concrete placement
Before After