Download
1 / 54
570 likes | 763 Vues
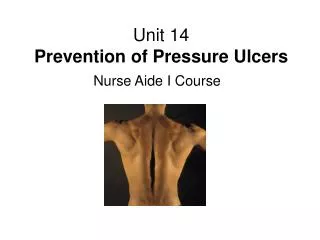
Unit 14 Prevention of Pressure Ulcers. Nurse Aide I Course. As a direct care giver, the nurse aide will be the key team member in the prevention of pressure ulcers.

E N D
Unit 14Prevention of Pressure Ulcers Nurse Aide I Course
As a direct care giver, the nurse aide will be the key team member in the prevention of pressure ulcers. Knowledge of the relationship between blood supply and tissue destruction, as well as the skills necessary to properly position residents to minimize the effects of pressure, are essential. Introduction Prevention Of Pressure Ulcers
Objective 14.0 Discuss pressure ulcers and methods used to prevent them. TEXT: pages 790…
Pressure Ulcers • Previously called decubitus ulcers or bed sores • Caused by pressure on area of skin that interferes with circulation
Objective 14.1 Identify areas where pressure ulcers most frequently occur.
Pressure Ulcers(continued) • Occur where bones come close to the skin surface. • toes, heels, ankles, knees • hips, elbows, shoulders • spine (especially tailbone area) • ears, cheeks, collarbone area • back of head
Pressure Ulcers(continued) • Can develop where areas of body rub together and moisture collects, especially in obese residents • Under breasts • Between folds of abdomen • Between crease of buttocks • Between thighs
Objective 14.1.2 List the methods used to prevent the formation of pressure ulcers.
Methods Used To PreventPressure Ulcers • Keep skin clean and dry • Reposition residents at least every two hours • Keep linen dry and free of wrinkles and objects that cause pressure to the skin • Clean urine and feces from skin as soon as possible
Methods Used To PreventPressure Ulcers(continued) • Make sure clothing and shoes do not bind or constrict • Pat skin dry when bathing; never scrub • Encourage adequate nutrition and fluids
Methods Used To PreventPressure Ulcers(continued) • Massage pressure points when the resident is repositioned • Report any changes in skin condition immediately
Objective 14.1.3 Identify devices used to prevent pressure ulcers.
Preventive Devices Used To Prevent Pressure Ulcers • Bed cradle • Heel and elbow protectors • Flotation pads or cushions • Pillows • Water beds • Alternating pressure mattresses • Eggcrate mattresses
Pressure Ulcers: Stages Of Tissue Breakdown And Treatment Prevention is best treatment
Objective 14.1.4 Review the four stages of tissue breakdown and identify the nurse aide’s role in assisting with treatment.
Pressure Ulcers: Stages Of Tissue Breakdown And Treatment • Tissue breakdown occurs in stages • Stage One - red, darkened or non-blanchable skin, which is still present 30 minutes after pressure relieved
Pressure Ulcers: Stages Of Tissue Breakdown And Treatment(continued) • Tissue breakdown occurs in stages • Stage One (continued) • position off area and report; do not massage • observe every 2 hours and report changes to supervisor
Pressure Ulcers: Stages Of Tissue Breakdown And Treatment(continued) • Tissue breakdown occurs in stages • Stage Two - addition of blister-like lesions; skin may be broken • position off area at all times • report need for dressing changes • report odor, drainage, any change in size
Pressure Ulcers: Stages Of Tissue Breakdown And Treatment(continued) • Tissue breakdown occurs in stages • Stage Three - skin tissue is destroyed and fatty tissue may be involved; infection and eschar (scab) may result • continue prevention practices • report any changes in area
Pressure Ulcers: Stages Of Tissue Breakdown And Treatment(continued) • Tissue breakdown occurs in stages • Stage Four - skin, fatty tissue destroyed and muscle and bone involved. • continue prevention practices • report any changes in area
Pressure Ulcers: Stages Of Tissue Breakdown And Treatment(continued) • Tissue breakdown occurs in stages • Stage Four (continued) • report any signs of systemic infection, including but not limited to: • wound odor • pain • elevated temperature with confusion
Objective 14.2 Identify three purposes for positioning residents.
Positioning • Purposes • Assist with examinations • Assist with procedures • Prevent pressure on skin for prolonged periods of time
Objective 14.2.1 Discuss the various types of positions and suggest reasons for use.
Types Of Positions • Dorsal recumbent position • flat on back • knees slightly separated and flexed • feet flat on bed
Types Of Positions(continued) • Horizontal recumbent position – supine • flat on back • legs slightly separated and extended
Types Of Positions(continued) • Prone position • flat on abdomen with head turned to side • arms at sides or flexed on either side of head
Types Of Positions(continued) • Side lying position • positioned on either side • head in straight line with spine • pillows used to support head, back, arm, and leg
Types Of Positions(continued) • Lateral position • positioned on either side • bottom arm extended behind back, top arm flexed in front of body • top leg slightly flexed
Types Of Positions(continued) • 30 Lateral Reclined Position • hips rotated 30 degrees • pillow between knees • pillow under arm for comfort and to relieve pressure on elbow • pressure relieved from sacrum and hip
Types Of Positions(continued) • Fowler’s position • sitting position in bed with head elevated at 45-60 degree angle. • knees slightly flexed • position causes pressure on sacrum and buttocks
Types Of Positions(continued) • Sim's position • positioned on left side • left arm extended behind body • right arm flexed in front of body • right leg flexed toward abdomen • used for enema administration
Moving, Turning, Positioning And Lifting
Objective 14.3 Discuss moving, turning, positioning and lifting residents.
Moving, Turning, PositioningAnd Lifting • Good body mechanics necessary • Prevents injury to resident • Protects nurse aide from injury • Good body alignment promotes comfort for resident
Moving, Turning, PositioningAnd Lifting(continued) • Safety major consideration • Get help if needed • Receive directions from supervisor regarding any restrictions for positioning or movement
Moving, Turning, PositioningAnd Lifting(continued) • Safety major consideration (continued) • Protect and secure any special equipment being used by the resident prior to movement (e.g., drainage tubes). • Elevate bed to comfortable working level
Moving, Turning, PositioningAnd Lifting(continued) • Safety major consideration (continued) • Protect skin from friction • roll when possible • lift with assistance • prevent sliding • use turning sheet
Moving, Turning, PositioningAnd Lifting(continued) • Use postural supports as directed: • Rolled blankets • Pillows • Rolled towels • Footboards • Bed cradles
Moving, Turning, PositioningAnd Lifting(continued) • Reposition at least every two hours or as directed • Eliminates pressure on bony areas • Provides comfort • Exercises muscles • Moves joints • Stimulates circulation
Moving, Turning, PositioningAnd Lifting(continued) • Coordinate lifting and moving • Move on a certain count, usually count of three • Gain cooperation of resident • Have residents help themselves as much as possible
Moving, Turning, PositioningAnd Lifting(continued) • Coordinate lifting and moving (continued) • Use transfer belt (gait belt) when appropriate • When in doubt, always ask for assistance from co-workers
Demonstration and Return Demonstration
Objective 14.4 Demonstrate the procedure for moving the resident up in bed.
Objective 14.5 Demonstrate the procedure for moving a resident up in bed using a turning sheet.
Objective 14.6 Demonstrate the procedure for positioning a resident on side.
Repositioning Resident in Chair or Wheelchair
Objective 14.7 Discuss repositioning the resident in a chair or wheelchair.