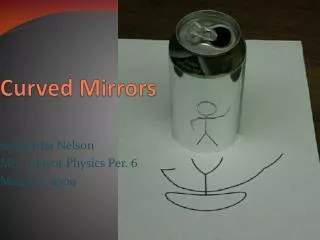
Curved mirrors
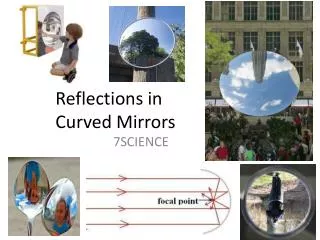
Curved mirrors. General info Drawing ray diagrams. LOCATION OF CURVED MIRRORS IN THE WORLD. Other objects that act like a curved mirror. Example where the concentration of light to one location (focal point) is used to heat water. Solar oven. Focal point.


Curved mirrors
E N D
Presentation Transcript
Curved mirrors General info Drawing ray diagrams
Example where the concentration of light to one location (focal point) is used to heat water
Focal point Place where all parallel light rays meet after they reflect off a concave mirror Distance from mirror to closest point on mirror is focal length
The reverse is also true If light passes through or originates from the focal point, then the reflected rays will be parallel to the PA
OTHER PARTS OF THE ELECTROMAGNETIC SPECTRUM ACT THE SAME WAY AS LIGHT
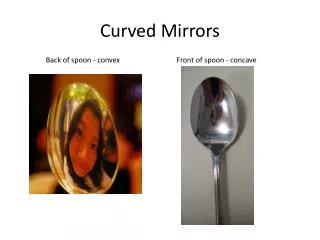
Convex and Concave Convex Concave
5 concave Locations for the object Beyond CP At CP Between CP and FP At FP Between FP and V
When object is between V and F Rays will diverge To find virtual image, extend the reflected rays across the mirror to the opposite side These extensions are called the apparent light rays and are used by the mind to form virtual image
Draw 2 more diagrams 1 where the object is far away from the mirror 1 where the object is close to the mirror
Convex mirror ray diagrams Different side of the curve is mirrored
RAY DIAGRAMS FOR CURVED MIRRORS Graphical interpretation of the reflection of light off curved mirrors
Determine location of images Two methods Graphical Mathematical
Graphical Method to determine image characteristics This method will be able to determine images: Location Relative size (compared to object) Orientation (relative to Principal axis) if image is Virtual or Real
General preparations Find something that can be used to make the curve of the mirror Fold paper hot-dog style Draw line down fold, label principal axis
Principal axis Line that splits mirror in half Goes through vertex point Label vertex point V
Drawing the mirror We will work with a cross-section image of the mirror Show the paths of light rays that reflect off mirror Curved section of protractor becomes cross section of mirror
Draw a concave mirror on your paper Place protractor on right end of paper Center protractor on Principal axis (PA) Make sure mirror is concave towards rest of the paper
Location of vertex Intersection of principal axis and mirror
Center Point of curvature DO NOT remove protractor from paper Mark the center point of the protractor on the PA. Label “C” This is the center point
Focal point Point in front of the mirror, where all rays parallel to principal axis will reflect through
Location of focal point Focal point is located halfway between the center point and the vertex
Draw an object Need to draw a cross section of an object Bottom rests on PA Try a banana, rectangle or arrow Draw about ¾ of an inch high Location of object relative to mirror will be different for each diagram
For each drawing: Title in upper left corner of drawing PA, C, F, V all drawn or labeled 3. 2 light rays must be drawn 4. Image drawn in correct place, orientation
Hints for good drawings: Use a thin object ¾ to 1 inch tall Need one more type of ray path that does not involve the focal point Most mirrors drawn to the far right of paper Except for the object place between F and V Put mirror in middle of paper
General idea Light can bounce off an object and travel in all possible directions To find the position of the image, find the location where at least 2 light rays intersect that reach your eyes
The 4 easiest rays to draw Of all the countless possible rays to use, 4 paths are used because they pass through specific points, move parallel to the principal axis and/or where angle of incidence = angle of reflectance
Remember Virtual images are formed in your mind, where apparent light rays meet. Real images are formed when real light rays that bounce off the mirror intersect in space.
Converging rays, diverging rays Converging rays come together at a point Diverging rays do not intersect
Where is image formed from sunlight, moonlight or the light of stars? The distance from those objects to earth can be considered infinitely far away. The only rays of the sun that intersect one point of the earth are all parallel to each other The image will form on a plane perpendicular to the principal axis that includes the focal point
Spherical Aberration Inaccuracies introduced into the diagrams because the curve used was part of a circle instead of a parabola All intersections of light paths will not form on the image plane We use a circle because it is easier to create with the material at hand