
SlideServe
Menu
Préférences
© SlideServe · v2026

Authentic 2004 Desktop Edition Download Guide

tilden avatar
15 diapositives · 265 Views · Aug 10, 2014

Learn how to download and install Authentic 2004 Desktop Edition with step-by-step instructions and license activation details.
Authentic 2004 Desktop Edition Download Guide - slide 1
01 / 15Authentic 2004 Desktop Edition Download Guide
1 / 17

Télécharger la présentation

Authentic 2004 Desktop Edition Download Guide
Une image / un lien ci-dessous est fourni (tel quel) pour télécharger la présentation

Politique de téléchargement : le contenu du site vous est fourni TEL QUEL pour votre information et votre usage personnel ; il ne peut être vendu, concédé sous licence ni partagé sur d’autres sites sans l’accord de son auteur.Le contenu vous est fourni TEL QUEL, pour votre information et votre usage personnel uniquement. Téléchargez la présentation en cliquant sur ce lien. Lors du téléchargement, si vous ne parvenez pas à télécharger une présentation, l’éditeur a peut-être supprimé le fichier de son serveur.Pendant le téléchargement, si vous ne parvenez pas à obtenir une présentation, le fichier a peut-être été supprimé par l’éditeur.

F I N

Plus de contenu associé

Transcription de la présentation
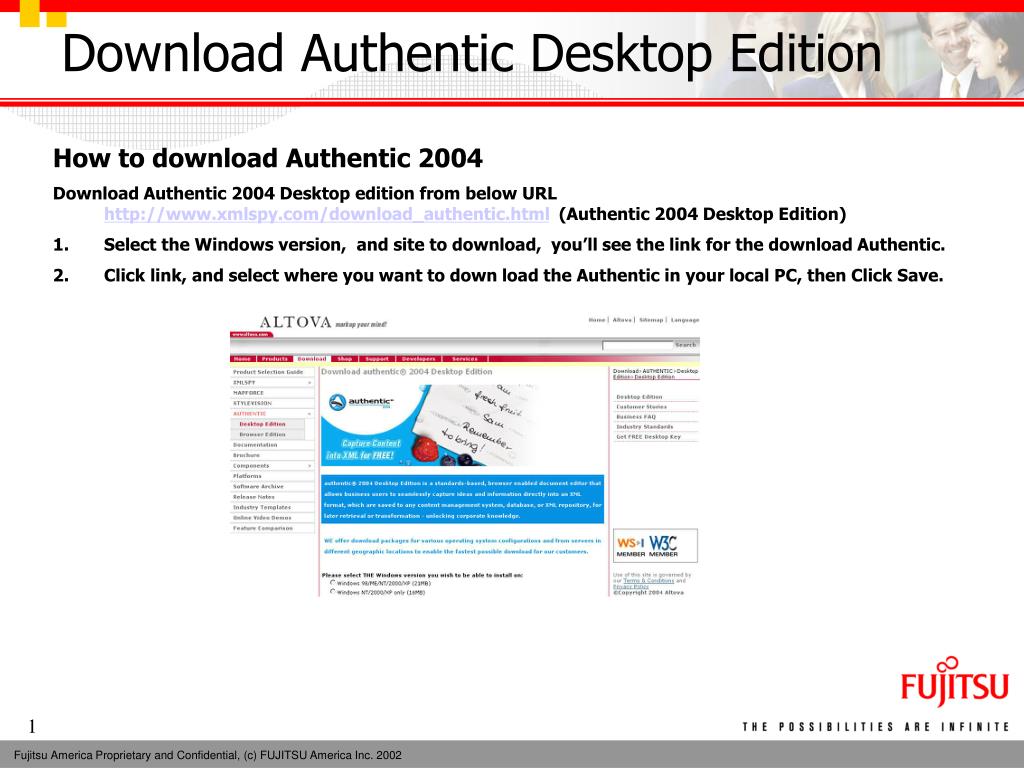
  1. Download Authentic Desktop Edition How to download Authentic 2004 Download Authentic 2004 Desktop edition from below URL http://www.xmlspy.com/download_authentic.html (Authentic 2004 Desktop Edition) • Select the Windows version, and site to download, you’ll see the link for the download Authentic. • Click link, and select where you want to down load the Authentic in your local PC, then Click Save.

  2. Available License Information To activate your software, please go back to your installed AUTHENTIC software and enter these values into the 'Registration' dialog that will automatically pop up upon program startup: User Name: Emilia Georgieva Company: FAI E-Mail: egeorgieva@us.fujitsu.com Key-Code: PhA4P1-0a92zB-uDtPMB-sFc0Mh-AuhzC2

  3. Request the Free License Request a free desktop license. ⑥Enter the number of users ⑦ Enter the mandatory information, and click “Accept” ⑧ You’ll receive a license key code information via e-mail.

  4. Enter the License Information After installing Authentic, and opening the program for the first time, the window below will display. ⑦Click “ENTER a new key code”, enter license key code, user name, and company name from e-mail.

  5. Install and configure TortoiseCVS Download TortoiseCVS from the following URL http://www.tortoisecvs.org/download.shtml Select the Stable (for deployment) - TortoiseCVS-1.6.7.exe - 4.3 MB - 13th March 2004 version. After installing it, create a folder called ‘CVS’ and open it. Right click inside the empty folder and select CVS Checkout:

  6. Install and configure TortoiseCVS (2) To obtain a module from the CVS server for the first time, is known as a checkout. In order to checkout a module, user needs to provide information for the 1. Protocol 2. Server 3. Repository folder 4. User name 5. Module Name

  7. Information Specific to the Training 1. Protocol: Password Server (:pserver:) 2. Server: cvs-jp.fbf.fai.fujitsu.com 3. Repository folder: /CVS 4. User name: th1 (Thailand), vn1 (Vietnam), sg1 (Singapore) 5. Module Name: FBF_TH (Thailand), FBF_VN (Vietnam), FBF_SG (Singapore) NOTE: Password information will be send to each user in a separate email!

  8. Install and configure TortoiseCVS (3) The user will see a checkout dialog and will be asked to enter a password.

  9. Install and configure TortoiseCVS (4) After all the files are checked out the user will see a message ‘Success, CVS operation completed’ in the checkout dialog and the green colored folder the same as the Module name.

  10. Basic Use of TortoiseCVS (1) Task: How to add an image and commit back to the CVS repository • Open a folder called ‘images’ and add an image to the folder • Notice that the new image has an ‘?’ above the image type.

  11. Basic Use of TortoiseCVS (2) Right click on the Image name and select ‘+CVS Add…’ The dialog pane will open to confirm the list of files to add to the CVS repository.

  12. Basic Use of TortoiseCVS (3) After the check-in dialog and the message ‘Success, CVS operation completed’ the image will be colored in RED.

  13. Basic Use of TortoiseCVS (4) To completely submit the image to the CVS repository, the user needs to commit the image. Right click on the image name and click ‘CVS Commit’.

  14. Basic Use of TortoiseCVS (5) The Commit dialog pane will ask if the user wants to add some comment for other users or future reference, e.g. if the user checked out a file and did some change to it, the message can contain information what type of change was done.

  15. Basic Use of TortoiseCVS (6) Color schema and meaning in TortoiseCVS