Download
1 / 36
390 likes | 475 Vues
Learn how to create open, abstract plaster sculptures through drawing sketches, molding techniques, and safe carving practices. Understand the stages of plaster, from mixing to drying, and follow detailed steps for carving and shaping your sculpture. Ensure safety precautions are taken to avoid hazards when working with plaster. Watch useful tutorial videos for practical guidance throughout the process.

E N D
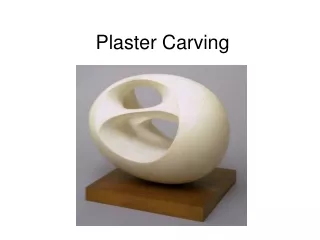
Requirements: • Create a carved plaster sculpture in the round. • The sculpture has to be OPEN. Meaning you must be able to see through at least one part of the sculpture.
Today: • Draw at least three different abstract OPEN sculpture sketches. • Sketches must be bigger than your fist in size. Think abstraction
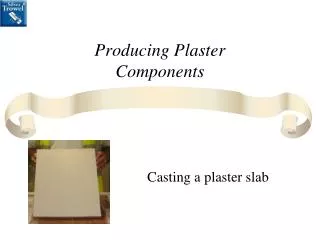
Day Two • Making the mold • Plaster and Plaster Stages • Pouring the Mold • Initial Planning & Carving
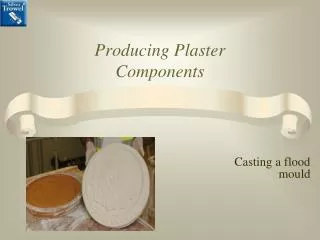
The Mold • If you do not have a carton for making a mold, you will have to share with someone that has one or get a milk carton from the cafeteria. • You can also make a container from cardboard but it will have to be lined with wax paper.
Plaster • Avoid getting plaster on clothing or other items of value. It can be very difficult to remove from fabric and other porous surfaces. However, if there is an accident and it spills on fabric, it's worth trying to remove it. Don't automatically deem any soiled item ruined. • Always wear a dust mask as the inhaled plaster dust particles will mix with fluid in your lungs and harden there. This is very dangerous and easily avoided. • NEVER use hands to mix plaster or apply plaster to set directly on any body parts or skin- serious burns have occurred resulting in amputation of fingers and limbs. • Never pour plaster down a sink or other drain. It can solidify and ruin the plumbing. Dispose of unused plaster in the trash. Rinse wet plaster off hands in a bucket of water before washing them in the sink.
Plaster Stages From the moment you begin to mix until it is set, plaster goes through a number of stages: 1. The liquid stage: This stage occurs immediately after mixing with water. The mixture at this stage can be poured, brushed and thrown. It lasts about 15 minutes. 2. The putty stage: The plaster thickens to the consistency of toothpaste. In this stage, plaster can be applied with a putty knife or spatula, and it can be modeled like clay. It lasts about 5 minutes. 3. The rigid stage: Occurs once the mixture begins to set. The plaster becomes brittle and it can be cut with a knife or dug into with a spoon. The plaster is very fragile and should not be vibrated, dropped or have pressure on it. 4. The set stage: The plaster begins to heat up and obviously hardens. The heat that is radiated depends on the size of the mixture and the setting speed. When the plaster cools, it is a good time to remove it from the mold and trim any unwanted edges since it is still very pliable. 5. The cure stage: Lasts from the time the plaster cools until it dries completely. The mixture hardens substantially and metal tools are required for its manipulation. Because it still contains about 18% water, the tools get clogged and require cleaning quite often. 6. The dry stage: The plaster no longer contains moisture and it is at maximum strength and very brittle at this stage. It can be sanded with sandpaper or painted.
Pouring the Mold • Make sure the container is clean before filling the container ¾ full of water. • Add teaspoons of plaster powder to the water in the milk carton sifting it evenly. Continue until there is a "little mountain" that rises in the middle. Sprinkle in a few more teaspoons around the sides. • Stir the mixture slowly with the spoon without lifting it from the carton to keep as many air bubbles out as possible. Check the spoon several times to see if any lumps appear at the end of it. Stop when the spoon shows only a smooth, stirred mixture. • Use a fettling knife to swat the container on the outside from the bottom upward many times to release air bubbles. You can see them popping. • Set containers aside to harden.
http://www.youtube.com/watch?v=C2pvq_RC3uwhttp://www.youtube.com/watch?v=R9h4qVfXx2ghttp://www.youtube.com/watch?v=C2pvq_RC3uwhttp://www.youtube.com/watch?v=R9h4qVfXx2g
Carving Steps • With a pencil draw your form on three sides of your plaster mold. Front view, side view and top view. • Initial planning and cutting out of form with the fettling knife. • After shaping has been roughly determined, rasps are used to reform and more clearly define the sculpture's contours. The tools will have to be cleaned frequently. Material is damp to this state. • Plaster is allowed to dry. Medium sandpaper removes the marks from the rasps which had made many fine, linear cuts. This is followed by fine sandpaper removing the previous marks.