Handcuffing
1.37k likes | 3.34k Vues
Handcuffing. 1) To learn different handcuffing techniques. 2) To Demonstrate the techniques in handcuffing. Today's Objective. Why is handcuffing an important thing to do right? What are you taking away from them?. Know the suspect’s mental attitude/behavioral disorders Time and location

Handcuffing
E N D
Presentation Transcript
1) To learn different handcuffing techniques. 2) To Demonstrate the techniques in handcuffing. Today's Objective
Why is handcuffing an important thing to do right?What are you taking away from them?
Know the suspect’s mental attitude/behavioral disorders Time and location If the subject is intoxicated Officer’s attitude Risk Factors in Handcuffing
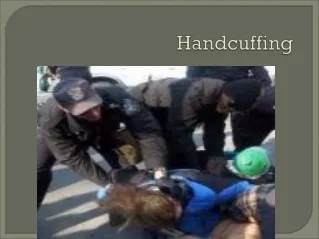
Wait for a back up unit, if possible. When making the approach, remain alert and evaluate the suspect’s demeanor and physical conditioning. Initiating the Apprehension
Maintain a safe distance during the initial contact. Advise the subject of the offense while they are handcuffed. Take actions quickly and remove the subject to a safe place to avoid bystander interference. Initiating the Apprehension
Advantage Observe all movements Disadvantage Lose surprise element and vulnerable to resistance Direct Approach
Advantages Surprise Reduces probability of direct attack Disadvantages May provoke physical response Rear Approach
Advantages Keeps subject off balance Disadvantages Cannot observe all movements Side Approach
3 Positions 1) Standing 2) Kneeling 3) Prone Handcuffing
3 types of people 1) Yes 2) No 3) Maybe – it depends on the officer Handcuffing
Rules 1) Give loud verbal commands. 2) Never slap the handcuffs on the wrist. 3) Always double lock the handcuffs. 4) As you take them off, close one cuff at a time. Handcuffing
5) Put handcuff on last notch. 6) Go back and tightened them after. Handcuffing
Load handcuffs – Getting them in ready position with single blade facing forward. Make sure they are unlocked Check your stance Hands in interview position Slowly move in to handcuff the subject. Preparing for Handcuffing
Grab the subjects right thumb on the right hand. Place the bottom handcuff on the subjects right wrist. Shake the left hand and place the top handcuff on the left wrist. Never let go of the handcuffs and never hold them in the middle of the handcuffs. DOUBLE LOCK THE HANDCUFFS Preparing for Handcuffing
STANCE: Bladed position At the 2 ½ position VERBAL COMMANDS: Get your hands out of your pockets. Turn around. Spread your feet apart. Bend over at the waist Put your hands behind your back Palms towards the sky Look to the left/right STANDING HANDCUFFING
Drop to your knees Hands out of pockets Cross your feet Ben over at the waist Look to the left Put your hands behind your back Palms towards the sky Spread your hands apart Approach the suspect Handcuff suspect DOUBLE LOCK THE CUFFS KNEELINGHANDCUFFING
Drop to your knees Cross your legs Lay flat on your stomach Spread your hands and feet out to your side. Put your palms towards the sky. Look to your left. PRONE HANDCUFFING
Check your stance. Load your handcuffs Lower your center of gravity (squat as you go in) Slowly move in dragging your gun side leg Grab the right/left thumb. Place the bottom handcuff on the subject. Approaching at Prone Position
Drop down without putting any weight onto the subject. Place the handcuffed hand and arm as close to the left/right leg as possible. Tell the subject to bring his/her other hand to the middle of their back. Shake the hand and place the other handcuff onto the subject. DOUBLE LOCK THE HANDCUFFS WHILE THE PERSON IS STILL DOWN. Search the subject. Approaching at Prone Position
http://www.youtube.com/watch?v=-0ivvHwWu9Y&feature=related http://www.youtube.com/watch?v=oa8gNK8co6U http://www.youtube.com/watch?v=laIMejcJaFw Videos
Keep your Balance Keep Subject off balance Watch head and shoulders of subject for movement Keep commands brief Searching Apprehended Subjects
Grab and squeeze the clothing then go into the clothing Find out what is inside the pockets or clothing Always search from the rear. Search males and Females alike and try to do it in front of the squad car camera. Searching Apprehended Subjects
Start with the subject’s head, hair and hat using a bladed hand Move down to the neck area When you search or frisk/pat down the waistband, start with the right front side of the suspect first then Standing Search Position
Search the right back of the subject Search the waist band Search the right outside leg of the suspect Search the inner right leg. Search the foot area checking the socks and inside the shoe. Standing Search Position
Search the left side of the body the same as you searched the right side. Make sure you have your right foot on their foot to prevent them kicking you. Standing Search Position
Keep gun side away from the suspect. Always have the suspects hands while searching. Check their mouth for handcuff keys. Standing Search Position
Remove the subject to the side of the patrol unit. Direct the subject to bend at the waist and place their upper body against the side of your patrol unit. Begin your search using the same order and procedure as the standing Search Position Bent at the Waist Search Position