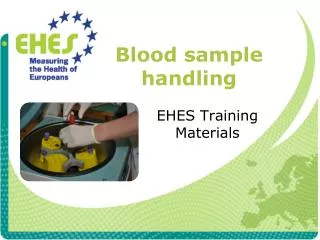
Blood sample handling
Blood sample handling . EHES Training Materials. Equipment. Centrifuge Empty tubes for re-centrifugation (only needed if gel serum tubes are used) Storage tubes Pipette Storage boxes Disposable gloves. Before centrifugation of blood tubes.

Blood sample handling
E N D
Presentation Transcript
Blood sample handling EHES Training Materials
Equipment • Centrifuge • Empty tubes for re-centrifugation (only needed if gel serum tubes are used) • Storage tubes • Pipette • Storage boxes • Disposable gloves
Before centrifugation of blood tubes • After blood drawing store the tubes at room temperature in a vertical position at least 30 minutes for the blood in serum tubes to be clotted. • Do not prolong the waiting time over 60 minutes! • Adjust centrifuge speed 2000-2200 g RCF
Centrifugation of blood tubes (1/2) • After the waiting period, centrifuge • The serum tube • The fluoride-citrate tube • The 1st EDTA tube • Do not centrifuge the last two EDTA tubes designated for HbA1c and DNA extraction!
Centrifugation of blood tubes (2/2) • Place theserum tube and the fluoride-citrate and the 1st EDTA plasma tube in the centrifuge • Check that all tubes are resting on the bottom of the centrifuge rack • Check that the centrifuge rotor and tubes are in balance. • Centrifuge the tubes 2000 g for 10 minutes at room temperature
Sample handling after centrifugation • After the centrifugation, check that the serum is separated properly • Pour the serum from the 2 serum collection tubes into the pooling tube, mix gently by swirling the contents • Note! If one of the serum tubes is haemolysed, do not mix them together
Labelling storage tubes • Place the storage tubes in a tube rack according to the pipetingscheme • No need to label all tubes if blood collection is incomplete • Place the bar code labels in an upright direction, so that the scale marks remain visible
Handling blood collection tubes with gel • The temperature during centrifugation should be at least 20-22 °C • Inspect the gel tube after centrifugation for: • Gel surface horizontal • Serum and cell layers separated clearly • No red cells visible on top of the gel • No fibrin strands in the serum • Serum liquid, not clotted
Hemolysed samples • Do not pool a hemolysed serum sample with non-hemolysed samples • Several hemolysed samples can be pooled • Document hemolysed aliquots • Use the colour guide to document the degree of hemolysis
Pipette aliquots into storage tubes • 2 x 1,5 ml serum from the pooling serum tube into the 3 ml plastic tube and 1,5 ml aliquots into the 1,5 ml storage cryotubes • 2 x 1 ml from fluoride-citrate plasma tube into two 1,5 ml cryotubes • 2 x 1,5 ml from the EDTA tube into two 1,5 ml cryotubes • Close the cryotubes with caps and freeze the tubes at once
Transferring storage tubes into freezers • Place the tubes without delay into the boxes in the freezer • Label boxes before placing them into the freezer because labels will not stick on a wet/cold surface
Sample shipment • To the national HES laboratory • In dry ice • Packed in leak proof secondary packaging • To the EHES Reference Laboratory • Packed according to the IATA regulations, according to Pecking Instruction 650 for diagnostic specimens • Place one tube upside down in every box
Recording Record: • The amount of the collected serum and plasma • Visible attributes (haemolysis, lipemia, icterius) • Deviations from the sample handling protocols, if any • Your initials/personnel code to identify who handled the samples
Acknowledgements • Slides • Laura Lund, Päivikki Koponen • Photographs • Hanna Tolonen • Demonstration • Saara Vallivaara