Download

1 / 17
170 likes | 278 Vues
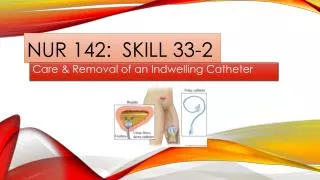
NUR 111 SKILL 5-1. For this power-point presentation, I’m going to focus on the following: Measuring Body Temperature. NUR 111 – Skill 5-1 : Measuring Body Temperature. Skill 5-1 : Measuring Body Temperature

E N D
NUR 111 SKILL 5-1 For this power-point presentation, I’m going to focus on the following: Measuring Body Temperature
NUR 111 – Skill 5-1 : Measuring Body Temperature • Skill 5-1: Measuring Body Temperature • For this power-point presentation, I will be focusing on Skill 5-1. These skills often go hand in hand with Pulse, Respiration & Blood Pressure, so after reading through Skill 5-1, Please see Skill 5-2. • The link for the video, for taking temperatures, is included in this power-point presentation. Please watch the video and practice in the skills lab, as well. An accurate temperature is vital when it comes to patient care, so it is vital that this skill is learned properly. • Thank you.
SKILL 5-1: MEASURING BODY TEMPERATURE • Planning: • Explain to patient the way you will measure temperature & the importance of maintaining proper position until reading is complete. • Collect & bring appropriate supplies to the patient’s bedside. • Verify that patient has not had anything to eat or drink and did not chew gum or smoke a cigarette within the past 15 minutes of having oral temperature measured. • Oral food & fluids, smoking & gum can alter temperature measurement.
MEASURING BODY TEMPERATURE • IMPLEMENTATION: • Perform Hand Hygiene • Assist patient to comfortable position that provides easy access to temperature measurement site. • Obtain temperature reading. • Assess Oral Temperature (Electronic) • 1. Apply clean gloves when there are respiratory secretions or facial or mouth wound drainage. 2. Remove thermometer pack from charging unit. Attach oral thermometer stem (BLUE TIP) to thermometer unit. Grasp top of probe stem, being careful not to apply pressure on ejection button. 3. Slide disposable plastic probe cover over thermometer probe stem until cover locks in place.
MEASURING BODY TEMPERATURE – CONT’D • 4. Ask patient to open mouth; gently place thermometer probe under tongue in posterior sublingual pocket lateral to center of lower jaw. • 5. Ask patient to hold thermometer probe with lips closed. • 6. Leave thermometer probe in place until audible signal indicates completion and patient’s temperature appears on digital display; remove thermometer probe under patient’s tongue. • The probe goes under the tongue in posterior sublingual pocket! 7. Push ejection button on thermometer probe stem to discard plastic probe cover into appropriate receptacle. 8. If wearing gloves, remove & dispose in appropriate receptacle & perform hand hygiene. 9. Return thermometer probe stem to storage position of thermometer unit.
ASSESSING RECTAL TEMPERATURE (ELECTRONIC) • 1. Draw curtain around bed & or close room door. Provide privacy for the patient & assist patient to side-lying or Sims’ position with upper leg flexed. Move aside bed linen to expose only the anal area. Keep patient’s upper body & lower extremities covered with sheet or blanket. • 2. Perform Hand Hygiene & apply clean gloves. • Cleanse anal region when feces and/or secretions are present. • Remove soiled gloves & reapply clean gloves. 3. Remove thermometer pack from charging unit. Attach rectal thermometer probe stem (red tip) to thermometer unit. Grasp top of probe stem, being careful not to apply pressure on ejection button. 4. Slide disposable plastic probe cover over thermometer probe stem until cover locks in place. 5. Using a single use package, squeeze a liberal amount of lubricant on tissue. Dip probe cover of thermometer, blunt end, into lubricant, covering 2.5 to 3.5 cm (1 to 1 ½ inches) for adult.
ASSESSING RECTAL TEMPEARTURE (ELECTRONIC) – CONT’D • 6. With non-dominant hand, separate patient’s buttocks to expose anus. Ask patient to breathe slowly & relax. • 7. Gently insert thermometer into anus in direction of umbilicus 3.5 cm (1 ½ inches) for adults. Do not force thermometer. • 8. If you feel resistance during insertion, withdraw immediately. Never force thermometer (This prevents trauma to mucosa). • Clinical Decision Point: If you cannot adequately insert thermometer into rectum or resistance is felt during insertion, remove thermometer & consider alternative method for obtaining temperature. • 9. Once positioned, hold thermometer probe in place until audible signal indicates completion & patient’s temperature appears on digital display; remove thermometer probe from anus.
ASSESSING RECTAL TEMPERATURE (ELECTRONIC) – CONT’D • 10. Push ejection button on thermometer stem to discard plastic probe cover into appropriate receptacle. Wipe probe stem with alcohol swab, paying particular attention to ridges where probe stem connects to probe. • 11. Return thermometer stem to storage position of recording unit. • 12. Wipe patient’s anal area with soft tissue to remove lubricant or feces & discard tissue. Assist patient in assuming a comfortable position. • 13. Remove & dispose of gloves in appropriate receptacle. Perform Hand Hygiene.
ASSESSING AXILLARY TEMPERATURE - ELECTRONIC • 1. Draw Curtain around bed/ and / or close room door. Assist patient to supine or sitting position. Moving clothing gown away from shoulder & arm. • 2. Remove thermometer pack from charging unit. Attach oral thermometer probe stem (blue tip) to thermometer unit. Grasp top of thermometer probe stem, being careful not to apply pressure on ejection button. • 3. Slide disposable plastic probe cover over thermometer stem until cover locks in place. • 4. Raise patient’s arm away from torso. Inspect for skin lesions and excessive perspiration; if needed, dry axilla. Insert thermometer probe into center of axilla (See illustration), lower arm over probe, and place arm across patient’s chest. • Clinical Decision Point: Do not use axilla if skin lesions are present because local temperature is sometimes altered area & are may be painful to touch.
ASSESSING AXILLARY TEMPERATURE – ELECTRONIC – CONT’D • 5. Once thermometer probe is positioned, hold it in place until audible signal indicates completion & patient’s temperature appears on digital display; remove thermometer probe from axilla. • 6. Push ejection button on thermometer stem to discard plastic probe cover into appropriate receptacle. • 7. Return thermometer stem to storage position of recording unit. • 8. Assist patient in assuming comfortable position, replacing linen or gown. • 9. Perform hand hygiene
TAKING A TEMPERATURE – quick summary: • Remember, these power point presentations should not be solely relied upon in order for you to pass your skills. • I highly recommend that you watch the following video (see below) and you must practice in the nursing skills lab, as well, in order to pass this skill, or any other skill, for that matter. • While I truly believe that these power points will help you, you also need to help yourselves, by practicing the skill you wish to pass, as well as watching the videos that are supplied to you in the book! • Video website for watching the temperature skill: • http://booksite.Elsevier.com/Perry-Potter/ClinicalSkills/video01.php • Elsevier: Perry-Potter: Clinical Nursing Skills and Techniques, 8e-5.1 Measuring Body Temperature
ASSESS TYMPANIC MEMBRANE TEMPERATURE: • 1. Assist patient in assuming comfortable position with head turned toward side, away from you. If patient has been lying on one side, use upper ear. Obtain temperature from patient’s right ear if you are right-handed. Obtain temperature from patient’s left ear if you are left-handed. • 2. Note: If there is an obvious presence of cerumen (earwax) in patient’s ear canal. • 3. Remove thermometer handheld unit from charging base, being careful not to apply pressure to ejection button. • 4. Slide disposable speculum cover over the otoscope-like lens tip until it locks in place. Be careful not to touch lens cover.
ASSESSING TYMPANIC MEMBRANE TEMPERATURE – CONT’D • 5. Insert speculum into ear canal following manufacturer instructions for tympanic probe positioning: • A. Pull ear pinna backward, up, and out for an adult. For children less than 3 years of age, pull pinna down & back, point covered probe toward midpoint between eyebrow and sideburns. For children older than 3 years, pull pinna up & back. • B. Move thermometer in a figure-eight pattern. • C. Fit speculum tip snug in canal, pointing toward the nose.
ASSESS TYMPANIC MEMBRANE TEMPERATURE – CONT’D • 6. Once positioned, press scan button on handheld unit,. Leave speculum in place until audible signal indicates completion and patient’s temperature appears on digital display. • 7. Carefully remove speculum from auditory meatus. Push ejection button on handheld unit to discard speculum cover into appropriate receptacle. • 8. If temperature is abnormal or second reading is necessary, replace probe cover & wait 2 minutes before repeating in same ear or repeat measurement in other ear. Consider an alternative temperature site or instrument. • 9. Return handheld unit to thermometer base. • 10. Help patient assume a comfortable position. • 11. Perform hand hygiene.
ASSESS TEMPORAL ARTERY TEMPERATURE • 1. Ensure that forehead is dry; dry with a towel if needed. • 2. Place sensor firmly on patient’s forehead. • 3. Press red scan button with your thumb. Slowly slide thermometer straight across forehead while keeping sensor flat & firmly on skin.
ASSESSING TEMPORAL ARTERY TEMPERATURE – CONT’D • 4. If patient is diaphoretic, keeping scan button depressed, lift sensor after sweeping forehead & touch sensor on neck just behind the earlobe. Peak temperature occurs when clicking sound during scanning stops. Release scan button. • 5. Gently clean sensor with alcohol swab & perform hand hygiene. • INFORM PATIENT OF TEMPERATURE READING & RECORD MEASUREMENT. • Return thermometer to charger.
END OF SKILL FOR TEMPERATURE Thank you for reviewing this skill. For the next skill: SKILL 5-2: Assessing Radial Pulse, that will be on a new power point presentation. Don’t forget to watch the video on temperature taking. The link is in this power point presentation. THANK YOU