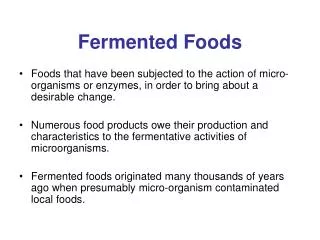
Fermented Foods at Home
180 likes | 490 Vues
Fermented Foods at Home. Lunch & Learn 12 noon to 1 pm August 18, 2014. Audio Setup. Computer (VoIP) Audio. Phone Audio. 1. 1. Click on the Audio Setup Wizard button in the Audio & Video Panel. Click on the blue telephone icon in the Audio & Video Panel. 2. 2.

Fermented Foods at Home
E N D
Presentation Transcript
Fermented Foods at Home Lunch & Learn 12 noon to 1 pm August 18, 2014
Audio Setup Computer (VoIP) Audio Phone Audio 1 1 Click on the Audio Setup Wizard button in the Audio & Video Panel. Click on the blue telephone icon in the Audio & Video Panel. 2 2 Dial the telephone number and PIN provided. Click to talk. 3 A icon by your name means your mic is on.
Need Help with Today’s Program? • Help Desk: 800-442-4614 • Phone in to today’s program • Toll: 630-424-2356 • Toll Free: 855-947-8255 • Passcode: 6774570# • Program will be archived: http://fyi.uwex.edu/safepreserving/
Resources • Homemade Pickles and Relishes (UWEX) http://fyi.uwex.edu/safepreserving/ (see the Recipes tab) Step by step instructions for making genuine fermented dill pickles. Also Make Your Own Sauerkraut (UWEX) • How Do I…Ferment www.uga.edu/nchfp Tips on making fermented dill pickles, sauerkraut and yogurt. • NEW – Making Table Wine at Home (Univ of California) - Making Homemade Cheese (New Mexico State Univ)
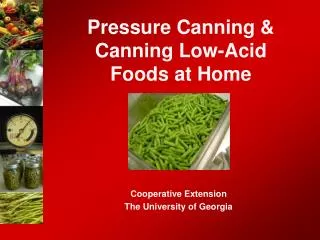
Vegetable Fermentation Bacteria Cabbage + Salt Sauerkraut Cucumbers Dill pickles • Salt selects for the right kind of bacteria & keeps the spoilage bacteria at bay • Good bacteria convert sugar to lactic acid • Over time, enough acid is produced to ensure safety & a tangy flavor • Fermentation traditionally took place in a ceramic crock. Now, many people use a food-grade glass or plastic pail, or you can even ferment in the jar. Do not use a metal container. • A brine-filled bag is the best way to seal the crock or pail and keep the product from spoiling. 68-72°F
Making Sauerkraut at Home • Sauerkraut is manufactured via a natural fermentation. The bacteria required for fermentation are already present on the cabbage at harvest. • Use large, firm, freshly harvested heads for the best kraut (red or green). Napa cabbage or other loose-leafed varieties are not recommended. • Shredding cabbage allows salt to draw out the juice (and sugar!) for successful fermentation. • Salt is the only added ingredient (other than cabbage). • The right amount and type of salt is key (2.25%). • Salt selects the right kind of bacteria for fermentation, keeps pathogens from growing, and helps to draw out the sugars.
Salt is Key! • Add the right amount, and type, of salt • Use a clean, food-grade container • Don’t use a landscape planter, a plastic garbage bag, a heavily pitted crock, or a galvanized steel or iron bucket! • Place crock at a temperature best for bacteria to grow and ferment sugar to acid • Below 60° - fermentation will slow or stall • Above 78° - it’s too warm for fermentation and spoilage takes over
Microbial Evolution of Sauerkraut Over 2-4 weeks at ~70°F, a microbial succession takes place. • L. mestenteriodesgrows first until acid reaches 1%. It then declines. • Lactobacillus plantarumsteps in and grows until acid reaches ~2%. L. brevis grows, producing acetic acid. • Final pH of ~3.5 is safe for canning in a boiling water canner.
More key concepts • Cover the crock to seal out air, help bacteria growth, and keep spoilage at bay. Be sure to skim skum. • Traditional – an inverted plate with a weight on top • Modern – a food-grade plastic bag filled with brine • Sauerkraut brine: 6 Tablespoons salt + Gallon of water Dill brine: ½ C. salt + ¼ C. vinegar + 8 cups of water OLD NEW
Genuine (crock) Dills • Choose very fresh cucumbers for pickling. Rinse well and remove 1/16th inch from the blossom end to help prevent softening. [Alum is not recommended.] • Add the correct proportion of salt (8%) and choose a cool (~70°F) room for fermentation. • After 3-4 weeks, you’ll know when the pickles are ready….by tasting! • Heat process pickles for storage (best) or move them to the refrigerator (2nd best) • Prepare fresh brine, heat, pour over cukes and process in a boiling water canner, OR • Heat fermentation brine to boiling and fill jars packed with cukes; process in a boiling water canner
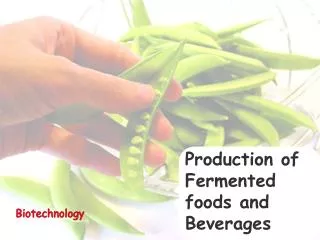
More on vegetable fermentation • At this time, no tested recipes exist for safe extended fermentation of carrots, beets, greens or other vegetables. • Fresh kimchi can be prepared as long as standing in salt is limited to 24 hours at room temperature. https://www.exploratorium.edu/cooking/pickles/recipe-kimchi.html • Do not use salt substitutes in fermented products. Rinsing prior to eating can reduce salt by ~40%. • Hollow pickles usually result from a delay from harvest to processing. • Never use an oven or dishwasher to ‘can’ your fermented products. • Using a vacuum sealer to seal jars is not an acceptable substitute for canning.
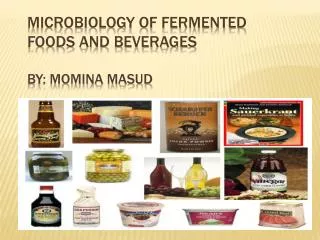
Making Yogurt at Home www.uga.edu/nchfp/or fyi.uwex.edu/safepreserving/ Historically yogurt was naturally spoiled milk; now we can control the process for high quality product every time. • Yogurt is a controlled fermentation. We add good bacteria to pasteurized milk for the desired flavor, aroma and texture. • For safety, use pasteurized milk. Try whole, lowfat or nonfat milk. • Use a food thermometer to measure temperature.
Recipe for Homemade Yogurt • Mix: 4 cups milk 1/3 cup nonfat dry milk • Heat together to 200°F (a double boiler works best). Stir to avoid scorching. • Hold for 10 minutes (thin yogurt) or 20 minutes (thicker yogurt). • Cool rapidly to 112-115°F. • Add ¼ cup yogurt starterto 1 cup heated milk. • Add warmed starter/milk back to rest of milk. • Pour into clean, warm containers and incubate 105-115°F. • After 4 hours (just set) yogurt will be slightly tart and silky. • After 8 hours, yogurt will be tart and firm. Store refrigerated. • Add fruit as a topping or base on serving. Fruit added prior to fermentation can produce a weak, watery gel.
Next…in our Lunch & Learn Series September 8, 2014 12 noon to 1 pm Storing Fruits and Vegetables