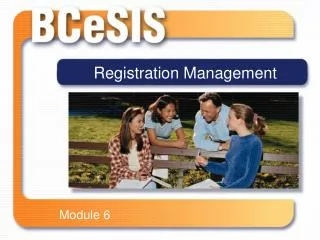
Enterprise Registration Management
Enterprise Registration Management. System Review. Ahmed Elazab. Delivery Consultant. Agenda. Welcome and introductions SME description and responsibilities Introduction to the Cerner tools Solution ULearn WBT introduction Registration benefits Solution key terms and concepts

Enterprise Registration Management
E N D
Presentation Transcript
Enterprise Registration Management System Review Ahmed Elazab Delivery Consultant
Agenda • Welcome and introductions • SME description and responsibilities • Introduction to the Cerner tools • Solution ULearn WBT introduction • Registration benefits • Solution key terms and concepts • Solution demonstration • Introduction to Data Collection Workbooks (DCW) • Introduction to Design Decision Matrix (DDM) • Session wrap Up and next Steps
Introduction to the Cerner Tools MethodM
Introduction to the Cerner Tools (MethodM) • Cerner’s approach to working with clients to deliver value through our Millennium solutions. • MethodM Online is the tool that brings the events, project assignments and intellectual capital to the user to the project team resources allowing them to collaborate throughout the project.
Introduction to the Cerner Tools (MethodM) • Each event has three distinct sections • Plan • Planning activities • Preparation meetings • Event • Events with specific objectives • Defined timeline, duration, and agenda • Location depends on whether it is a Cerner Build or Client Build implementation • Agenda includes joint sessions and solution specific sessions • Attendees vary based on event objectives & team responsibilities • Post • Post event and follow-up tasks • Predefined due dates
Introduction to the Cerner Tools (MethodM) • Methodology and/or Process Specific • Client Orientation Guide • Engagement Management Guide • Escalation Management • Event Specific • Event Guides • Agendas – High Level and Detailed • Other supporting project management materials • Solution Specific • Design Decision Matrix • Standard process flows • Open House scripts
Solution ULearn WBT Introduction • Provides continuous learning • Web-based health training, formal instructor-led courses, the Cerner Health Conference and more. • Offers a personalized educational experience • Synchronizes all learning throughout Cerner
Registration Benefits • Reduced Registration and Scheduling Time • The integration between Registration and Scheduling allows for a seamless user workflow for scheduling and registration tasks. • The use of the Pre-registration conversation is recommended to help reduce registration time when the patient presents. • Reduced Number of patients discharged without a Full Registration • Data gathering for statistical and Reporting purposes • Reduction in paper and form expenses • Decreased Accounts Receivable. • Decreased Denials • Decreased Days from Discharge to Final Bill (DNFB).
What is Enterprise Registration management? • There are four main parts within Registration Management: • The Conversation – one or more screens which prompt the data capture necessary to complete a transaction related to Admit, Discharge, Transfer..etc. Appropriate documentation prints at the close of the transaction. • The Bed Board - provides a view of beds including their status and occupancy information at the nurse level. • The Work List - allows the user to pull out particular information from the database for review and auditing purposes, “clean-up,” or corrective maintenance. • The Report Manager – provides information on a single patient or groups of patients in the form of a printed report, online query or patient document.
Types of Transactions/Conversations • Add Newborn • Add/Modify Encounter • Add/Modify Person • Bed Swap • Cancel Encounter • Cancel Encounter Discharge • Cancel Encounter Transfer • Cancel Leave of Absence • Discharge Encounter • Leave of Absence (LOA) • Modify Encounter • Modify Person • Transfer Encounter • Reactivate Cancelled Encounter • View Only Conversations • View Person • View Encounter
Conversation Layout • Field Types • Required: maybe highlighted in yellow. Must be completed in order to finish the conversation. • Optional: have no highlight. These do not have to contain data for the conversation to be completed, but they are often helpful information to record if it is available. • Display Only: The information contained in these fields cannot be changed using this conversation. • Codified: a drop down box from which data responses must be selected. These boxes can be completed in two ways: • Click the arrow then select the correct choice, or • Type in the first letter or two of the correct choice until the computer fills in the box correctly • Date fields: require a 4-digit year. Type the date or select it from the calendar (available by clicking on the large arrow).
The Main Application – PMOffice.exe • Conversation tab • Worklist tab • BedBoard
Patient Journey • Pregnant Shirin Nasser begins having stomach discomfort. • She decides to go to a clinic to see a local doctor. • The registration clerk searches for Shirin. • The clerk adds Shirin to the database, along with her demographic information, next of kin, insurance coverage, emergency contact, etc.
Register Patient • Launch PMOffice by double-clicking on the icon in the application folder.
Register Patient • Enter the user name and password.
Register Patient • Open the Register Patient conversation from the conversation banner by double-clicking on it.
Register Patient • Enter the patient’s name “SHIRIN NASSER”, and then click Search. This will begin the search for a match.
Register Patient • There is not a match so click Add Person. Type Baseline East on the Facility tab then click the ellipses.
Register Patient • Complete all required fields on the current screen. • Enter Gender as female. • Enter the social security number. • Enter Spanish as the primary language and that an interpreter is required.
Register Patient • Enter the Encounter Information • Select “Yes” for Display in Directory • Select “Outpatient” for Patient Type.
Register Patient • Enter the Guarantor Information • Click the drop down arrow on the Patient’s Relationship to Guarantor field and select “SELF”.
Register Patient • Enter the Insurance Information • Select the relationship of Spouse then click the Search for Subscriber button. • Select “AHMED KHALIFA” as the subscriber. • Click the “Search for Health Plan” button. Select an address for “Blue Care”. • Skip Verify Status, Assignment of Benefits, and Authorization Required(Submitted).
Register Patient • Save the full registration by clicking OK. Select “Self” as the relationship. • The Documents Selection window displays with the available documents to print. Check “Do not print documents” and click OK
The attending physician determines that Shirin is in labor and needs to be admitted to the hospital. • The registration clerk opens Register Patient conversation and changes Shirin’s patient type from outpatient to inpatient and assigns her to 1N, 101 A in the BE Hospital building. • The financial counselor checks her Auth Incomplete work list. She sees Shirin on the queue of patients who need to be authorized and calls the insurance company again. • From the work list, she accesses the Register Patient conversation and records the authorization information.
Admit to Floor • Open the Register Patient conversation from the conversation banner by double-clicking on it.
Admit to Floor • Select your patient in the search, and then double-click on the appropriate encounter.
Admit to Floor • Click on the Encounter Information tab. • Change the Patient Type to Inpatient, select Gynecology-Obstetrics as the Medical Service.
Admit to Floor • Enter the patient’s location by changing the Building field to BE Hospital and the Nurse\Ambulatory field to 1N or 1S. • Click the Bed Availability button. • Select an available bed and click OK.
Admit to Floor • Complete any other required fields, including the Inpatient Admit Date and Time. • Click OK to save the conversation. OK to print these documents.
Patient Journey • Early in the morning Shirin gives birth to a healthy boy. • The unit clerk on the floor opens the Newborn conversation and registers the new baby, Mohamed Khalifa.
Register Newborn • Double-click the Newborn conversation on the conversation menu.
Register Newborn • Type the mother’s name in the search box. Click OK to add a newborn.
Register Newborn • Complete all required fields, setting the Patient Type to Inpatient and choosing BE Hospital for building and Nursery as the location. Click OK to save the conversation.
Patient Journey • After Shirin begins to recover, she is transferred to a new room. • The doctor enters the order and bed control pends her to bed 119 A on the same unit. • When the patient arrives, the clerk on the receiving unit completes the pending transfer. • The clerk also re-prints a Facesheetand Wristband with the new location information.
Bed Transfer • Open Bedboard from PMOffice and Click on the appropriate Facility/Building to get to the Nurse/Ambulatory unit level. • Double-click on the nurse unit where the mother was placed
Bed Transfer • Highlight your patient, right click, and select Pending Transfer from the list of conversations.
Bed Transfer • Enter the Location Information, reason for the transfer request, and when the transfer took place
Patient Journey • Dr. Mayer decides that Shirin and Mohamed are ready to go home and writes discharge orders. • The unit clerk opens the Discharge conversation and discharges both patients.
Discharge • Highlight your patient on the bed board. • Right click, hover over Conversation, then click on Discharge Encounter.
Discharge • Complete the required fields and then click OK to discharge your patient.
Discharge • When the Newborn Discharge Dialog screen appears, highlight the baby’s name, right-click and choose Copy Discharge.
Data Collection Workbooks (DCW) Three Main DCWs: • Data Collection Workbook – HMC Registration Management Conversations • Data Collection Workbook – HMC Registration Management Code Sets • Data Collection Workbook – HMC Registration Management Design Workbook