P ertemuan 02 Introduction to Basic Lighting (with 1 point light )
120 likes | 275 Vues
P ertemuan 02 Introduction to Basic Lighting (with 1 point light ). Matakuliah : fotografi 2 Tahun : 2010. Key-points covered in this session Submission of group names & allocation of studio time slot Artificial Lighting Equipments Using Incident Light Meters Digital Camera Equipment

P ertemuan 02 Introduction to Basic Lighting (with 1 point light )
E N D
Presentation Transcript
Pertemuan 02Introduction to Basic Lighting (with 1 point light) Matakuliah : fotografi 2 Tahun : 2010
Key-points covered in this session • Submission of group names & allocation of studio time slot • Artificial Lighting Equipments • Using Incident Light Meters • Digital Camera Equipment • DSLR menu setting for studio lighting • Lighting Diagram for assignment submission • Standardized template & methods for assignment submission • Assignment Grading & Critique guideline – grading based on FA only
Things you need to have for class • Compact Flash – if you decide to use the DSLR from the lab • Statue for 1 point, 2 point lighting exercise • Clothing for the statue • Lighting Diagram Template • Team work
Before using the DSLR camera in the studio • Reset the Menu to the Default Factory setting • Set the camera function to Manual • Set the image quality to JPEG Large • Set the white balance to Daylight , Flash or 5000 Kelvin • Set the shutter speed setting between 1/30 – 1/200
Before using the Incident light meter in the studio • Make sure that the half dome is closed covering the meter sensor • Set the mode to Flash or Flash C (if you are using the sync) • Set the ISO number to 100 or identical with DSLR setting • Set the shutter speed setting at 1/125
Flash (5200K - 5800K) • AC discharge / HMI (5600K) • Fluorescent (3800K) • Photoflood (3400K) • Tungsten (3200K)
Comparison Standard reflector Spotlight (conical snoot)
Comparison Softbox 1x1 m Umbrella silver
Didalamfotografi, pencahayaanadalahelemen yang paling penting (essential). Tanpacahaya, makafotografitidakakanpernahterjadi. • Cahaya yang keluardarisumbercahayaakanmemberikankualitas. Secarateoridikatakanbahwasemakinkecil area yang mengeluarkancahayadarisumbercahayamakasemakinkerascahaya yang keluar. • Semakinbesararea yang mengeluarkancahayadarisumbercahayamakasemakinlembutcahaya yang keluar. Dari teoritersebutmakakualitascahayaterbagimenjadiduabagian: hard lightdansoft light.
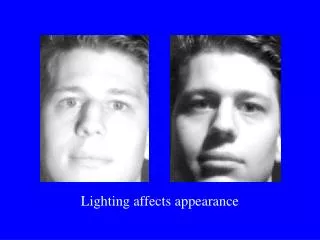
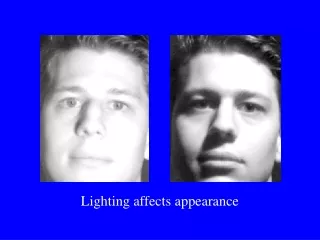
Light Direction - Frontal lighting - Side lighting - Back lighting - Top lighting - Low lighting - Double-rim lighting