SMART Infusion Pump
SMART Infusion Pump. Administration of Intravenous Therapy & Medications at North York General Hospital. January 2013. Purpose of Using SMART Pumps. SMART pumps are a Patient Safety Initiative.

SMART Infusion Pump
E N D
Presentation Transcript
SMART Infusion Pump Administration of Intravenous Therapy & Medications at North York General Hospital January 2013
Purpose of Using SMART Pumps • SMART pumps are a Patient Safety Initiative. • “SMART medication delivery systems have the potential to dramatically improve patient medication safety”. (OHTAC, July 2009) • Traditional pumps are volumetric – SMART pumps are dose specific. • Types of alerts are directly related to Drug Library and Dose Error Reduction Systems (DERS).
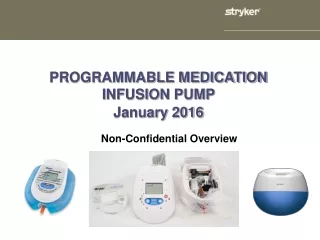
SMART Pump Technology SMART pumps are infusion pumps that allow intravenous (IV) medications to be delivered at precise rates or in specific amounts. SMART pump technology offers: • Separate Clinical Care Areas (CCA) • Customized drug libraries • Listing of medications used in particular CCA • TALL-man lettering for look–alike medications • Soft and/or hard drug limits on each medication • Priority listing of medications that are most frequently used • Standardized IV concentrations specific to NYGH
Policy All regulated health care providers (RHCP) may operate infusion pumps (other than syringe pumps) according to their scope of practice once the following competency requirements are met: • Self-Directed Infusion Pump e-Learning Module on My Learning Edge (MLE) • Passing score of 80% on the Infusion Pump quiz • Submit the completed/signed Infusion Pump Competency Checklist to the Clinical Nurse Educator and/or the charge nurse from Medical Imaging • Annual recertification on Infusion Pump education on MLE
Infusion Standards An infusion pump and tubing should be used for all patients receiving IV medications, solutions and blood/blood products. In emergency situations, IV infusions may be administered without an infusion pump in order to prevent delay of treatments. BD Nexiva closed catheter system – SINGLE lumen must be used to deliver IV infusions. Exceptions: IV infusions in Day Surgery, Operating Room, Post Anaesthesia Care Unit, Endoscopy, Child and Teen Unit, and NICU All RHCPs should select the appropriate CCA on an infusion pump which should correspond to the nursing area that they are working in. Infusion pumps MUST BE used on: • High alert medications/infusions (Medication Administration Policy II-226). • Medications which specifically state “infusion pumps required” in the IV manuals posted on the Intranet. • Paediatric/neonatal patients who require IV infusions and medications. Exceptions: An infusion pump will not be used in Day Surgery, Operating Room, Post Anaesthesia Care Unit, and Endoscopy. IV infusions will be administered via gravity using a buretrol in these areas.
Symbology • Primary line icon • Bolus icon • Piggyback icon • On/Off button • Silence button • Emergency stop button • Load/Eject button ! • Lock/Unlock button – password activated
Symbology OVERRIDE SYMBOLS indicate that the programmed dose or rate is outside the predefined parameters • Upper Soft Limit • Lower Soft Limit • Upper Hard Limit • Lower Hard Limit • No Rule Set icon is displayed when pump is being operated without rule sets.
Symbology • Batterysymbol is displayed bottom right. Symbol will begin to turn black as battery is depleted. • Wireless Connection Available icon is displayed when the device is connected to a wireless network. • Soft dose limits indicate that dosage is outside the recommended range but can be overridden. • Hard dose limits indicate that dosage is unsafe and cannot be overridden.
Priming an Administration Set Note: All administration sets are LATEX FREE. • Close all clamps and the Flow Stop. • Spike the IV bag, squeeze the drip chamber to fill to score mark. • Invert the cassette with the purple collar facingdown. • Open the Flow Stop and any other clamps and allow fluid to flow freely. • Tap the cassette to release any residual air. • Close Flow Stop. Drip Chamber Purple Collar Cassette (Flow Stop within cassette) Roller Clamp
Loading Infuser Cassette Note: The IV pump must be powered on to load or unload the cassette. • Press the On/Off button for 2-3 seconds to power on the infuser. • Press the Load/Eject button. • Grasp the tubing above the cassette with one hand and below the cassette with the other hand. Insert the cassette in the carriage with the purple collar facing upwards and the white Flow Stop facing inwards toward the infuser. Ensure the cassette is seated at the bottom of the carriage and the tubing is aligned vertically. • Press the Load/Eject button or wait for the carriage to close automatically (approximately 10 seconds). • Secure administration set in upper tubing guide located below the display screen. Purple Collar Flow Stop
Removing Infuser Cassette • Confirm the infuser is in STOP mode, and close the roller clamp prior to removing the cassette from the infuser. • Press Load/Eject to open the cassette carriage. Ensure the cassette carriage is fully opened. CAUTION: Do not remove the administration set until the movement of the cassette carriage has stopped. • Grasp the tubing above and below the cassette. Slide the cassette upwards out of the cassette carriage. • The cassette carriage will close automatically in approximately 10 seconds or press Load/Eject to close the cassette carriage sooner. • To discontinue use of the device, press and hold the On/Off button for 2-3 seconds to power down. Discard the administration set and IV bag as per hospital guidelines.
Basic Infusion Power Button Powering the pump on • PressOn/Offbutton for 2-3 seconds to power on. • The New Patient dialog box defaults to Yesonly if pump has been off for less than 5 hours. If you don’t see this screen, please move to next page. The pump settings are cleared when pump has been off for 5 hours or more. • PressContinueto clear all previous program info. To retainprevious program parameters and settings: • Press the New Patient field and select No. • Press Continue to display the Patient Information screen.
Basic Infusion Selecting CCA (Clinical Care Area) PressSelect CCAfield. Scroll down by continually pressing the down arrow, select appropriate CCA. PressDone.
Basic Infusion Single channel infuser automatically moves to program screen. On a double infuser, touch anywhere within the “A” screen to select channel A. Note tabs across top of Channel A: • Bolus • Basic(same as primary infusion and is already selected) • Piggyback PressSelect Infusion field.
Basic Infusion • To scroll through Drug List a full screen at a time (6 medications), use dark orange arrows. • To scroll one medication at a time, use inner grey arrows.
Basic Infusion • Select IV fluid. • PressRate field, program rate and press Enter. Maximum rate is1000 ml/hr • Press VTBI(Volume To Be Infused) field, program volume and press Enter. • Time will automatically be calculated; however, a change to time will automatically recalculate VTBI. DO NOT CHANGE THE TIME FIELD after initial programming. This alters the original value that was entered in VTBI. Therefore, only change the rate if needed. • PressNext A. • Review confirmation screen for accuracy and press Start Basic A. • Confirm the greenchannelLEDlight is lit, and the primary line icon is visible. Touch the screen to display split channels and the Larger Font Size (“Far View Screen”),or it will automatically default to Far View Screen in 20 seconds.
Piggyback Infusion • Do NOT stop Basic Infusion. • Tap screen to move to near view screen. • PressPiggyback button. • PressSelect Infusionfield– select drug and concentration. Note: If required, press Weight field and enter the patient’s weight. • Press VTBI field, program volume and press Enter. • Press Timefield, program time and press Enter. • Rate will automatically be calculated; however, a change to time will alter the VTBI. DO NOT CHANGE THE TIME FIELD after initial programming. This alters the original value that was entered in VTBI and medication delivery. Therefore, only change the rate if needed. • PressNext A and press OKto confirm Clinical Note. • PressStart Piggyback A. • Confirm the greenchannelLEDlight is lit, and the piggyback icon is visible.
Piggyback Infusion • “Piggyback” and “Secondary” are interchangeable terms. • Piggyback option is only available if a primary infusion has been programmed and confirmed. • The maximum rate a piggyback infusion can be programmed is 500 ml/hr. • A pop-up screen will appear as a reminder before the start of every piggyback infusion. • When a piggyback infusion is completed, the infuser automatically switches back to the primary infusion at the pre-programmed rate. • Rate is automatically calculated when VTBI and time are entered; however, a change to time will alter VTBI. DO NOT change the time field after initially programming. Only change the rate if needed.
Outside Limits If the dose or rate entered is higher or lower than the predefined parameters, an Outside Limit Message will appear. The RHCP must first ensure that it is not a key stroke error. Note: Doses/rates within the green zone are safe. Only doses/rates within the soft limits can be overridden. Hard limits cannot be overridden. • An icon will be displayed indicating the delivery is outside the predefined parameters.
Soft/Hard Limits Soft Limit Alert: • Review the medication order and IV Manuals to determine whether an override of the limit is warranted. • Consult the most responsible physician if required. Pharmacy is available as a resource. • PressEditto re-enter a value or press Overrideto accept the dose and begin infusion. • Rationale must bedocumented as per unit standards. Hard Limit Alert: • Review the medication order with the physician. Pharmacy is available as a resource. • Upon physician approval, deliver the medication using the “Other Drug” option. • Independent double check on the MAR/eMAR must beperformed before delivering the medication as “Other Drug”. • Rationale must be documented as per unit standards.
“Other Drug” Option Caution: The use of “Other Drug” option does not provide any drug dosing limits as a safety feature. Therefore, “Other Drug” option should only be used in the following 3 situations: • “Hard Limit Alert” with physician approval. • Medications that are NOT listed in both the IV manuals or the current CCA’s drug library. • Medications that are listed in the IV manuals but NOT listed in current CCA’s drug library. Every time the “Other Drug” option is used, the following steps must be done: • Review IV manuals and physician orders. • Consult the most responsible physician for approval before proceeding. • Pharmacy is available as resource. • An independent double check must be performed. • The rationale for using this option must bedocumented as per unit standards. • Pharmacy must benotified by paper/electronic reporting tool.
“Other Drug” Option • Select Other Drug. • Select[ _ _/_mL] concentration. • Press Selectand press the appropriate medication unit. • Press Total Drug Amount in Container field, program drug amount and press Enter. • PressTotal Volume in Container field, program volume and pressEnter. • Press Enter again. • Press Select, choose unit from list, program dose and press Enter. • Press VTBI field, program volume and press Enter. • Press Time field, program time and press Enter. • Rate will be calculated automatically; however, a change to time will alter VTBI. DO NOT CHANGE THE TIME FIELD after initial programming. This alters the original value that was entered in VTBI and medication delivery. Therefore, only change the rate if needed. • Press Next Aand press OK to confirm clinical note. • Press Start Piggyback A.
Bolus Infusion • Press Bolus. • In the Deliver Fromfield, select Primary Container as the bolus source. • In the When Bolus Completes field, when there is a basic infusion running, select Resume Primary Infusion or Stop Infusion upon completion of the bolus. • Press Next A.
Bolus Infusion • Enter weight if applicable. • Select Rate field, VTBI field, and Time field to enter bolus parameters. • Rate will automatically be calculated when VTBI and Time are entered; however, a change to time will alter VTBI. DO NOT CHANGE THE TIME FIELD after initial programming. This alters the original value that was entered in VTBI and medication delivery. Therefore, only change the rate if needed. • Press NextA to advance to the Confirm Bolusscreen. • Verify that the displayed values are correct. • Press Start Bolus to begin Bolus infusion and confirm the Bolus icon is visible. • Verify flow from the appropriate fluid container and confirm the green channel LED indicator is illuminated.
Titrate/Change Rate, Dose or VTBI without Stopping Infusion • From the far view screen, press either the Dose, Rate or VTBI button to titrate. • Program the new value in the appropriate field and press Enter. • Press Next A to display the confirmation screen. • Verify that the displayed values are correct. • Press Start Titration A to begin infusion. Titration Buttons
Stopping Programs • Tap the far view screen to bring up the near view screen. • Press Stopbutton to stop current infusion. Clearing Programs • Bring the near view screen up and select current infusion type (e.g. Bolus, Basic, Piggyback). • Press Stopbutton to stop current infusion. • Select the current infusion type. • For Basic and Piggyback, press Clearto delete all entries. For Bolus, press Clear Allto delete all entries. • TheClear Programpop-up is displayed. Press Continueto clear all programmed values.
End of Infusion Alarm • Alarm activates when the programmed VTBI completes. • Depending on the medication, at the end of infusion alarm, the pump will do one of the following two things: • Continue at same rate for all high alert infusionsOR • Revert to the preset rate on primary line for all other medications • For maintenance infusion, at the end of infusion alarm, the pump will default to the designated KVO rates to prevent loss of IV access. KVO Rates for Basic Infusion
End of Infusion Alarm Steps for resolving End of Infusion Alarm: • Press theSilencebutton on the top of pump. • PressVTBI and the keypad will pop up. • Program volume for new VTBI and press Enter. • PressNext A. • Confirm that the program is correct. • PressStartTitration A. • Touch screen one more time so that it reverts to “far view screen”.
Logs Icon • Press Logs icon at bottom of screen. • Press Shift Totals. • Shift totals are broken down by Channel A, Channel B, and Infuser Shift Totals (All Programs). • Press Clear A, Clear B, or Clear Both. • Press Yes to confirm. • Press Exit then Exit. Shift Total Screen
Standby Icon • Standby is a feature that enables the clinician to put the infusion in a “sleep mode”. • It allows the clinician to suspend the infusion without losing the current settings or patient information. • When the pump is in the Standby mode, the pump is powered on and the alarms are disabled. Examples for using the Standby mode: • Pre-program pump settings prior to admission • Bed bath/shower, patient transfer or repositioning • Saline lock between medication delivery • Patient leaving unit/hospital on a pass • MRI (pump cannot go into room) To Activate Standby: • From any infuser screen, locate and press Standby. • Select the channel to be placed in Standby.
Patient Transfer Upon patient transfer to a different unit, the receiving RHCP must: • reprogram the pump with the appropriate CCA. • verify physician’s IV orders as soon as possible. At the beginning of each shift, the RHCP must verify that: • the infusion against pump settings. • the appropriate drug library is being used. Two ways to reprogram infusion pumps: • clear settings from previous CCA and reprogram infusions under current CCA, or • change settings from previous CCA to multi-CCA
Patient Transfer – Multi CCA • Press CCA icon at top of screen. • Press current CCA Field (e.g. ICU) and select your desired CCA. • Press Yes when Change CCA? screen appears. • Press OK when Multiple CCAs screen appears. • Press Done. Important Note: • All previous infusions will continue to run under initial CCA until VTBI is completed OR program is cleared. Your general CCA label will say Multiple CCA. • When the infusion is completed, silence the alarm and stop the infusion. Press desired program tabs (e.g. Basic) to enter more volume. Press OK when Program is being CLEARED screen appears. Pump will automatically switch to new CCA. Channel will now operate under the new CCA drug library.
Locking the Keypad Steps to lock the keypad: • Press the Lockbutton to display the Enter Code window. • Enter the code 4 – 3 – 2 – 1. • Press Enter. • Screen is locked and the Lockbutton is now red.
Troubleshooting The Channel LED and Alarm Tab appear in red indicating High Urgency Alarm. Air-In-Line Remove air from administration set. Press Start to clear alarm. Distal Occlusion A closed clamp, clogged filter, or other occlusion prevent fluid flow between infuser and patient. Correct the problem that causes the occlusion and press Start to clear alarm. Proximal Occlusion A closed clamp or other occlusion prevents fluid flow between the fluid container and infuser. Correct the problem that causes the occlusion and press Start to clear alarm.
Troubleshooting White Screen and Touchscreen Drifting White screen and touchscreen drifting are both glitches in the software. When a white screen is displayed or drifting occurs, the IV tubing set must be removed by using the Emergency Release on the bottom of pump. Note: The pump is now inoperable and must besent to bio-med for service.
Pump Cleaning • As with all shared equipment, pumps must be cleaned between patients and when visibly soiled. • The exterior of the pump may be wiped with CaviWipesTM. DO NOT use ViroxTM wipes!!! • If the pump is still infusing, activate the Cleaning Lockbutton located on the back of the pump before cleaning. Cleaning Lock
Pump Cleaning • To activate the Cleaning Lock, press and hold the button for one second, then release it. The Cleaning Lock Active message displays. • To deactivate the Cleaning Lock, press the button for one second, then release it. • The Cleaning Lock can also be deactivated by pressing the ON/Off button or the Emergency Stop button.
Drug Library Update Periodic updates to the drug libraries will be done by Pharmacy. • If the SMART pump is infusing when the new drug library is uploaded, a yellow alarm will display. • Press the yellow tab to minimize the alarm. • You can continue with the present infusion. • The next time the pump is turned off, the LIBRARY TRANSFER IN PROGRESS window will display. • Silence the alarm when the LIBRARY TRANSFER COMPLETE window appears, or the device will automatically turn off in 30 seconds. • The next time the pump is turned on, the NEW LIBRARY ACTIVATED window will display. Press OK to continue programming.
References Institution for Safe Medication Practices Canada. (2009). Proceedings from the ISMP Summit on the Use of SMART Infusion Pumps: Guidelines for Safe Implementation and Use. Retrieved from http://www.ismp.org/tools/guidelines/smartpumps/printerVersio n.pdf North York General Hospital. (2012). Infusion Pump Policy. North York General Hospital. (2012). Medication Administration Policy II-226. Ontario Health Technology Advisory Committee. (2009). OHTAC Recommendation: Implementation and Use of Smart Medication Delivery Systems. Retrieved from http://www.health.gov.on.ca/english/providers/program/ohtac/tech/ recommend/rec_smd_20090701.pdf York Central Hospital. (2011). Hospira Symbiq Infusion System: Self-Paced Training Module.