Download
1 / 8
90 likes | 217 Vues
NUR 232: PROCEDURAL GUIDELINE 25-1: CLOSED (IN-LINE) SUCTION. PROCEDURAL STEPS. 1. Perform assessment as in Skill 25-2.

E N D
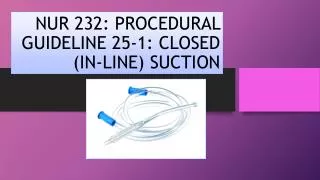
NUR 232: PROCEDURAL GUIDELINE 25-1: CLOSED (IN-LINE) SUCTION
PROCEDURAL STEPS • 1. Perform assessment as in Skill 25-2. • 2. Identify patient using two identifiers (i.e., name and birthday or name and account number) according to agency policy. Compare identifiers with information on patient’s identification bracelet. • 3. Explain the procedure to patient and the importance of coughing during the suctioning procedure. Even if patients cannot speak, they deserve to have information regarding the procedure. • 4. Help patient assume a position of comfort for both patient and nurse, usually semi- or high-Fowler’s position. Place towel across patient’s chest.
PROCEDURAL STEPS – CONT’D • 5. Perform hand hygiene, apply clean gloves and face shield, and attach suction. • A. In many agencies a respiratory therapist attaches the catheter to the mechanical ventilator circuit. If catheter is not already in place, open suction catheter package using aseptic technique and attach closed suction catheter to ventilator circuit by removing swivel adapter and placing closed suction catheter apparatus on ET or TT. Connect Y on mechanical ventilator circuit to closed suction catheter with flex tubing. • B. connect one end of connecting tubing to suction machine; connect other end to the end of a closed-system or in-line suction catheter. Turn suction device on, set vacuum regulator to appropriate negative pressure, and check pressure. Many closed-system suction catheters require slightly higher suction pressures (consult manufacturer guidelines).
PROCEDURAL STEPS – CONT’D • 6. Hyper-oxygenate patient (usually 100% oxygen) by adjusting the Fi02 setting on the ventilator or by using a temporary oxygen-enrichment program available on microprocessor ventilators. Manual ventilation is not recommended. • 7. Pick up suction catheter enclosed in plastic sleeve with dominant hand. • 8. Wait until patient inhales to insert catheter. Use a repeating maneuver of pushing catheter and sliding (or pulling) plastic sleeve back between thumb and forefinger until resistance is felt or patient coughs. Pull back 1 cm (0.5 inches) before applying suction to avoid tissue damage to carina.
PROCEDURAL STEPS – CONT’D • 9. Encourage patient to cough and apply suction by squeezing on suction control mechanism while withdrawing catheter. Apply continuous suction for no longer than 10 seconds as you remove the suction catheter. Be sure to withdraw catheter completely into plastic sheath so it does not obstruct airflow. • 10. Reassess cardiopulmonary status, including pulse oximetry and ventilator measures, to determine need for subsequent suctioning or complications. Repeat Steps 5 to 9 one more time to clear secretions. Allow adequate time (at least 1 full minute) between suction passes for ventilation and re-oxygenation.
PROCEDURAL STEPS – CONT’D • 11. When airway is clear, withdraw catheter completely into sheath. Be sure that colored indicator line on catheter is visible in the sheath. Squeeze vial or push syringe while applying suction to rinse inner lumen of catheter. Use at least 5 to 10 mL of saline to rinse the catheter until it is clear of retained secretions which can cause bacterial growth and increase the risk for infection. Lock suction mechanism if applicable and turn off suction. • 12. Hyper-oxygenate for at least 1 minute by following the same technique used to pre-oxygenate.
PROCEDURAL STEPS – CONT’D • 13. If patient requires oral or nasal suctioning, perform Skill 25-1 or 25-2 with separate standard suction catheter. • 14. Reposition patient. Remove gloves and face shield, discard into appropriate receptacle, and perform hand hygiene. • 15. Compare patient’s respiratory assessments before and after suctioning, observe airway secretions, and document findings. • Clinical Decision Point: Based on research, closed (in-line) suctioning does not decrease the risk of ventilator-associated pneumonia (VAP) when compared to opening suctioning.
END OF SKILL • Your book has not provided a video for you for this skill. • I have provided one for you that I found on You-Tube, but you must remember that you have to follow your book’s protocol. • VIDEO: • In-line closed suctioning of an oral ETT • http://www.youtube.com/watch?v=6uWoAlRTcoE