Understanding PWM Assembly Code and Instruction Execution Time in Embedded Systems Design
This lesson delves into the intricacies of Pulse Width Modulation (PWM) assembly code and instruction execution time within embedded systems. We explore common errors found in PWM code, how to evaluate execution time using the TI MSP430 User's Manual, and best practices for structured design and testing. Emphasizing modularity, we highlight the importance of implementing small, manageable tasks and thorough testing strategies. Join us as we clarify assembler directives and style guidelines, ensuring readability and effective debugging in your assembly programs.

Understanding PWM Assembly Code and Instruction Execution Time in Embedded Systems Design
E N D
Presentation Transcript
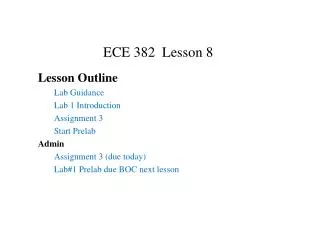
ECE 382 Lesson 7 Lesson Outline Found errors in PWM Assembly Code? Instruction Execution Time More Assembly Process Assembler Directives Structured Design and Test Lab Guidance Lab 1 Introduction Assignment 3 Admin Assignment 3 (due lesson 8)
Find the errors in this program http://ecse.bd.psu.edu/cmpen352/lecture/lecture05.html http://ecse.bd.psu.edu/cmpen352/lecture/code/badlec5.asm ; intention was to have it generate a PWM waveform on the P1.0 pin attached duty = 0x20; while(1) { cnt = 0x40; P1.0 = 1; while (cnt>duty) cnt-=1; P1.0 = 0; while (cnt>0) cnt-=1; if (P1.3 == 0) { while (P1.3 == 0); duty += 0x08; duty &= 0x3F; } }
Instruction Execution Time • Clock is roughly 1 MHz • What is the Clock Period? • So how long does this block of code take to execute? mov#0x0200, r5 mov #0xbeef, 0(r5) forever jmpforever • Single Operand • page 60 of TI MSP 430 User’s Manual • Two Operand • page 61 of TI MSP 430 User’s Manual • Jumps • All take 2 Cycles
Watchdog Timer • page 341-347 of TI MSP 430 User’s Manual • If not disarmed, How long to reset? • It counts 32768 clock cycles, then resets
Assembler Directives .cdecls C,LIST,"msp430.h" .text ;put code in the text section - maps to FLASH (ROM) StopWDTmov.w #WDTPW|WDTHOLD .data ;put code into the data section - maps to RAM .sect ".reset" ;put this at the reset vector .sect .stack ;make this the location of the stack MY_RESULTS: .space 20 ; reserves 20 bytes ----------------- To use: mov #MY_RESULTS, r5 ; pointer address into r5 mov #0xfefe, &MY_RESULT ; put fefe into 1st two bytes
Assembler Directives ; Can initialize ROM; cannot initialize RAM ;initialize sequence of bytes bytes: .byte 9,8,7,6,5,4,3,2,1 ;initialize sequence of words words: .word 0x1111,0x2222,0x3333,0x4444 ;initialize strings myStr: .string "hello, world!" ;initialize characters Chars: .char 'a','b','c','d‘ ; see in CCS
Assembler Directives ; .equ assign a label to a particular value SEVENTEEN: .equ0x11 ;align a variable with a particular multiple of bytes (useful to ensure word on even address) .align 2 ;probably won't use these often, but they're available .float ;floating point value .int;16-bit int .short ;16-bit int .long ;32-bit int
Structured Design and Test • Guiding Principle: Get one small thing working • Don't write the entire program in one go, then press go, and hope it works. When the entire program is the space you're looking for a bug, it makes debugging really hard. • Modularity • Modularity is the practice of breaking down a larger program into smaller tasks. • Makes code more reusable • Makes code more readable • Make individual taks more manageable • Focus on simpler tasks • Tough to hold a big problem in your brain
Example Design Concurrent Processes Init Process#3 Process#4 Process#2 Process#1 Init Init Init Init New = 1 image No Write Image Memory Got msg? Msg#1 Send Msg No New = 1 New image? Yes Do math image Got Ack? No Ack#1 Yes Send Ack Read Image New = 0 New data? FIFO No count count++ Data#2 Yes Write data No Do math Data#2 Process image Yes Memory Read data Yes Yes locked? count-- Locked? locked? Locked? No Done? No No Do math Lock Lock Lock Lock Yes Done? No Write D Read D Write Data Read Data unlock unlock Yes No Done? Done? Yes Yes
Testing • How do we know when we're done with a task? Testing! • You should specify the tests you'll run on the code you're going to write in advance of writing the code. It's a little more work up front, but will save you time debugging down the road. • Write tests that cover all cases - particularly edge cases.
Lab Notebook Expectations • Lab NoteboookStandards • Things people usually mess up: • Not testing • Testing after demonstration • No hardware design • Poorly written / commented code • Post-filling notebooks (or GITHub)
Assembly Code Style Guidelines • Comments • Assume the reader is a competent assembly language programmer • Comment above blocks of code to convey purpose • Only comment individual lines when purpose is unclear • Labels • Descriptive! • loop or loop1 or l1 or blah - not acceptable! • Constants • Use .equ syntax for all constants! • Don't want to see naked values
Assembly Code Style Guidelines • Instruction Choice • Use the instruction that makes your code readable! • JHS rather than JC • INCD rather than ADD #2 • Well-written code requires few comments • Spacing • Align your code to make it readable • Put whitespace between logical blocks of code
Example Code • What is good and bad about this code? • http://ece382.com/notes/L8/hw_sample.html
Lab 1 Introduction The goal of this lab is to implement a simple calculator using assembly language. • Lab 1 How This Lesson Applies • Use assembler directives: • .byte to put your test program into memory • .space to reserve space for your results • Where is this going to go? • Labels for your program / results • .equ for key constants • Modularity • Section to store results of ops • Section for each op • Testing • Specify multiple testing sequences at the beginning! • I'll test your code with a few of my own