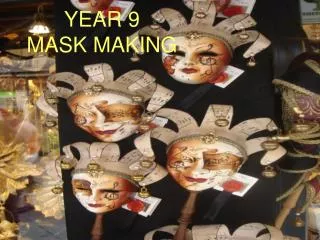
Mask Making
Mask Making. What you need to know about paper mache mask making: *You will use a form that looks like a human face. *You will need to apply at least 4 layers of paper mache to make your mask mold strong.

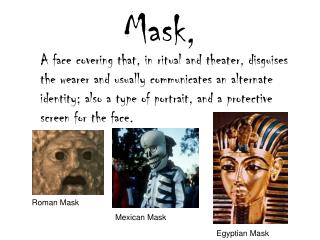
Mask Making
E N D
Presentation Transcript
Mask Making What you need to know about paper mache mask making: *You will use a form that looks like a human face. *You will need to apply at least 4 layers of paper mache to make your mask mold strong. *You will need to apply the mache carefully to minimize the torn paper texture and wrinkles. *The last layer should be white or a planned color.
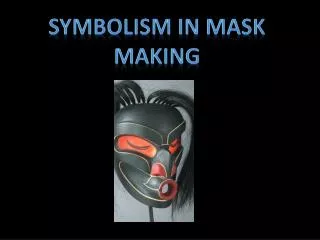
Things you can do to your mask: *Change the form of the face by adding parts like ears or a big nose. *Add color with colored papers or paint. *Add textures with various found materials. *Add details with markers, pencils, yarn, glitter, etc.
Steps in Paper Mache MASK Making Day 1 Hour Art *Write your name and class on a piece of tape using a permanent marker. Attach the tape to the underside of the mask. *Wet entire mask with paper mache paste. Apply first layer of paper using small torn paper pieces. Wet each piece as it is applied. *Paper mache at least 3 layers with paper provided . Show your best craftsmanship.
Day 2 ½ hour art *Hold mask up to light. Check for spots that may need more layers. Add more layers if needed. *Add any understructure additions . *Complete final layer of mache using white paper. *If you are done at any point, work on finalizing 2D sketch and have approved by teacher.
Day 3-Day 5 *Finish applying any paper mache needed. *If you are done at any point, work on finalizing 2D sketch and have approved by teacher. *When mask is dry, with a pencil , sketch lightly onto mask basic design for line and color placement. *Add color with paint, paper, markers, etc. *Add textures using fibers, glitter, sequins, sand, etc. *Critique or critically analyze mask and add finishing details to mask with outlining or texture. Ask at least three friends for their advice.
Requirements of your mask: *Strong durable mask. *Sketch of final design and list of supplies needed and approved by teacher. *Mask texture is planned and has desired quality. *Color and extra materials are added carefully showing your best craftsmanship. *Mask has a finished quality using outlining as needed. *Write at least 3 sentences about your mask and what cultures influenced your design.