Download

1 / 53
530 likes | 665 Vues
Cleat Covers. By Nilu Faiz Joseph Maiorana Joseph Schneider. Table of Contents. Problem Statement . Spikes/ Cleats become worn out when walking on asphalt to a field/stadium/track. Hypotheses.

E N D
Cleat Covers By Nilu Faiz Joseph Maiorana Joseph Schneider
Problem Statement • Spikes/ Cleats become worn out when walking on asphalt to a field/stadium/track.
Hypotheses • Design and manufacture a solution that will fit on the bottom of the cleats to protect the spikes from being worn out. This device will be used when the user is not using their cleats on the field or track.
Identifying the Problem • Surveys • Interviews • Patent Search
Background • Experience • Joe plays football • Joey played baseball • Knowing athletes • Conversations
Surveys • Do you use metal, rubber, or plastic spikes? • Metal • Rubber • Plastic • What do you use spikes/ cleats for? Check all that apply • Football • Baseball • Track & Field • Soccer • Golf • Work • Other
Surveys Cont’d • Do your spikes/cleats become damaged because of walking on asphalt/ sidewalks? • Yes • No • On a scale of 1-5, do you believe your performance decreases because of worn down spikes? 1 2 3 4 5 • Would you use a device that protects the spikes/cleats from becoming worn down? • Yes • No
Survey Results • 13 people agreed that spikes wear down to the point where it should be considered a problem • 8 people agreed that spikes were not worn down enough to be called a problem
Experts’ thoughts • Problem Statement is valid • Open to the idea of a solution
Interviews • Interviewed 3 people • All three interviewees agreed that their spikes become damaged • 2 of 3 interviewees also agree that having to bring multiple shoes to an event is annoying • These interviews prove problem statement to be valid
Justified Problem Statement • Athletes need to wear a different pair of shoes while walking on anything other than their playing field, otherwise their spikes will become damaged or dulled.
Solution should… • Protect spikes from becoming dull • Protect surfaces from damages • Eliminate the need to bring multiple pairs of shoes to events • Take less time than switching between shoes
Possible Solutions • Each team member came up with 3 different solutions • The team decided on the best solution
Solution A: Spike Covers • Blocks fit completely over the spikes • Keeps spikes elevated above ground • Reduces wear
Solution B: Spike Sandals • Sandal placed under cleat • Velcro belt holds in place
Solution C: Rubber Sole • A rubber sole slips on the bottom of cleat • Keeps spikes off the ground
Solution D: Spike Plugs • Rubber plugs put on spikes • Keep spikes from touching ground
Solution E: Retractable Cover • Rubber membrane on outside • Stretchy rubber material extended over sole • Covers heel, kicking portion • Rubber sleeve covers entire bottom
Final Solution: F • Spike Plug with Retractable Cover • Spike plugs easily attach to bottom of athletic spike shoe • Retractable stretchy sleeve holds together spike plugs • Allows attachment of all five plugs without effort • Retractable cover provides tight support all around shoe • Prevents shoe laces from becoming untied
Final Solution • Based on the scores on the decision matrix, we chose our solution
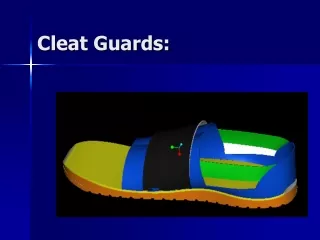
The Spike Cover • A protective covering for the front and the back of the cleat • Keeps spikes from coming in contact with the ground • Has rubber bottoms for safety • Easy to use • Easy to store
Function • Protect spikes from becoming dull • Protect spikes from coming in contact with the ground • Eliminate the need to bring multiple pairs of shoes to events
Form • The spike covers come in two parts • The spike covers must be sized to fit onto shoe • Holes can hold spikes up to ¾” long
Ergonomics • The two parts of the spike cover are shaped to the heal and to the front of the cleat.
Ease of Maintenance • Primary tools needed • Computer with Inventor • Micrometer • Prototype machine • Belt Saw
Standardization • Guerilla Glue • Flip Flops
Durability • Layer 2 was added to the product to insure durability. • It will protect the plastic from scratches • Keep the plastic from getting worn out
Cost • The cost to make the product is fairly cheap • Most of the project’s cost comes from the prototype machine • The cost to produce one spike cover (both parts) is about $25 (according to Stephen Buchs)
Refining the design • There should be two layers to the shoe • Plastic: serves as the protection of the spike • Rubber: serves as a safety precaution and increases durability of the product • There was no way of making a solution that could fit all spikes • We chose the Nike Haurachi as our model shoe
Design Development • 2 Parts to the solution • The front of the shoe • The sole of the shoe • Each part is divided into 2 layers • Top Layer: made of plastic • Bottom Layer: made of rubber
Assembly (Cont’d) • Major Tools • Prototype Machine • Belt Saw • Material • Prototype Material • Rubber • Shoe Glue
Assembly (Cont’d) • Suggested time of assembly: 1 day • Assembly procedure • Gather Materials • Use prototype machine to make layer 1 of both parts • Cut out layer 2 with belt saw • Use shoe glue to attach parts • Part A1 to A2 • Part B1 to B2
Test Procedure • Fit • Does the spike cover fall off? • Do the spikes fit within the holes? • Do the covers fit the portion of the shoe? • Safety • Is it slippery? • Is the cleat still balanced? • Weight Capacity • Appearance
Test Procedure (Cont’d) • Does the spike cover protect the spikes? • Do spikes become damaged when wearing the spike cover? • Does it eliminate the need to change shoes? • Is it faster to use the spike cover than to bring an extra pair of shoes?
Test Results • Failed the fit test • Dimensions were not correct • Spikes are different sizes • Angles were incorrect
Fixing the Problem • Redo the measurements and drawings • Realized that pressure is not the best way to make the spike cover stay on. • Over time, it will become loose. • New Solution = Magnets
Magnets • Magnets will be implanted into the second layer of the product. • They will make the fit of the product more efficient.