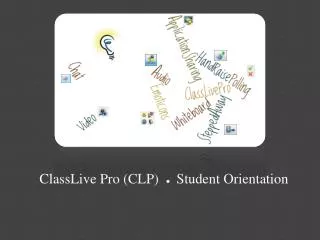
ClassLive Pro (CLP) ● Student Orientation
Discover ClassLive Pro (CLP), a premier real-time training and collaboration platform designed for online courses. This guide covers system requirements, how to join a CLP session, configure audio settings, and optimize your connection speed. Get acquainted with the four main windows of CLP—Audio, Participant, Chat, and Whiteboard—and learn about application sharing and session archives. Whether you're facilitating small group interactions or engaging in synchronous chat, this overview equips you with the essentials to thrive in your online learning environment.

ClassLive Pro (CLP) ● Student Orientation
E N D
Presentation Transcript
Brief Overview What is ClassLive Pro (CLP)? System Requirements How to Join a CLP Session Configure Your Audio Set Your Connection Speed Four Main Windows of CLP Audio Window Participant Window Chat Window Whiteboard Put Yourself on Video Application Sharing Session Archives Questions
What is CLP? ClassLive pro is a world-class, real-time, training, demonstration, and collaboration environment that is powerful, flexible, and easy to use. CLP is also known as Elluminate ClassLive Pro’s collaborative features support the development of online communities of practice and is used in online courses to: Facilitate small group interaction Promote synchronous text chat, audio, and video chat sessions Provide Application Sharing and Whiteboard sharing
System Requirements To successfully use CLP, your computer should meet or exceed the following requirements: Windows Windows XP (32 bit), Windows Vista (32 or 64 bit) or Windows 7 (32 or 64 bit) Pentium III 1 GHz processor 256 MB RAM Mac OS X Mac OS X 10.5 (32 or 64 bit) or Mac OS X 10.6 (32 or 64 bit) G4, G5 or Intel Processor 256 MB RAM
System Requirements In addition, all participants require the following: Java version 1.5 or higher For a 32 bit OS use a 32 bit JVM and for a 64 bit OS use a 64 bit JVM 20 MB free disk space 28.8 KBps Internet connection Soundcard with speakers and microphone or headset Note: Some classes require students to have a microphone and some do not. Please refer to your instructor’s specific instructions for your class
Install Java Web Start Java Web Start is required to launch CLP: On the Macintosh, it is pre-installed and automatically updated. For other operating systems/browsers, you may be prompted to download and install it. If you are using the Internet Explorer browser, you don’t need to download and install Java Web Start as it is already pre-installed. If you are using the Firefox browser, you will need to download and install Java Web Start as it is not pre-installed. The installation of Java Web Start is a one-time process that does not need to be repeated. The download can take between 5 to 40 minutes on a 28.8K modem (or less depending on the speed of your Internet connection). Please ensure that you allow sufficient time to complete the download and installation before your first session.
Check System Requirements As a safeguard, well in advance to joining your first session, ensure you have a supported Operating System and version of Java installed for CLP: Go to the following site: http://www.elluminate.com/Support/ Once on the site, click the link “First Time Users”, and then click the link “Elluminate Live!” At this point, your computer will be automatically checked to see if it can successfully run CLP. Pay attention to Step 1: Checking System Requirements. The results of the check display. It is possible your computer requires updating with the needed software. If so, you will be asked to download the required software. Please do so.
Joining a CLP Session Please join your CLP session about 5-10 minutes early. This assures everyone is present by the start of the session. To enter a CLP session, log into your course, and click the “Live” tab: On the page that display Live (Synchronous Tools), click “ClassLive”: Under the section ClassLivePro, click the link “Join Session”. At this point Java Web Start launches, and you are entered into your course CLP session. Note: You can enter CLP even when a scheduled session is not running. This can help familiarize you with some of the features.
Configure Your Audio Once in your session ensure that your audio is configured correctly by running the Audio Setup Wizard. Tools Audio Audio Setup Wizard Follow the displayed directions It is a good idea to run the Audio Setup Wizard at the start of each session.
Set Your Connection Speed It is important to set the correct connection speed when you join a CLP session. PC: Tools Preferences Mac: Elluminate Live! Preferences
Set Your Connection Speed The Preferences window opens. Scroll down until you see the option Connectionand click on it. On the right-hand side, you can change your preferences for Connection Speed and when to Prompt for speed.
Set Your Connection Speed Connection Speed Click the drop-down arrow to display the Connection Speed options. How do you decide which to select? Please take a look at the next 2 slides.
Set Your Connection Speed Your Connection Speed options: Dialup: If using a dial-up connection in your home, select the option that matches the speed of your modem. DiHardwired Network Connection: If using a hardwired network connection (e.g., in your home office) with a high-speed dedicated telephone connection, choose ISDN. If using a hardwired network connection (e.g., in your home office) with a cable, ADSL or DSL service, choose Cable/DSL. Local Area Network: If you are connected through a Local Area Network, select LAN. Continues on next slide . . .
Set Your Connection Speed Your Connection Speed options: Wireless: If using a private wireless connection with a Cable or DSL service (e.g., in your home office), you may need to experiment to determine which option works best: Cable/DSL, Wireless or ISDN. If you are alone on your wireless network, and have a relatively modern wireless router, Cable/DSL is probably be best. If however, you experience audio issues, you may have to drop your connection speed down to Wireless or ISDN. If using a shared, public wireless connection, use the Wireless option. If using an Aircard wireless connection (such as at a restaurant, airport or hotel) you will get only a small portion of the network bandwidth so it is best to use the ISDN option. Note: In all cases, if your connection keeps dropping, try selecting a lower connection speed. However, you may experience delays in receipt of the audio signal.
Set Your Connection Speed Prompt for Speed Click the drop-down arrow to display the Prompt for Speed options. If you change locations or go from a hardwired LAN to a wireless connection, you should change your connection speed.
Four Main Windows of CLP Title Bar Menu Bar Whiteboard Window Tool Bar Participant Window Chat Window Audio Window Status Bar
Four Main Windows of CLP • ClassLive Pro consists of four main windows (as depicted on the previous slide). • The Audio Window lets you participate in conversations during the session. • The Participants Window provides a list of all participants in the session and their current permissions. • The Chat Window is where you can send and receive text messages. • The Whiteboardis the main presentation window. • The next few slides will go over each of the windows.
Audio Window – How do I talk? • Click the Audio button to turn on microphone, and begin talking (click button again to release microphone). • When turned on, the audio button glows yellow. • The microphone level indicator shows the volume levels when you are speaking, and the speaker level indicator shows the volume levels when someone else is speaking. • You can adjust the levels by sliding the lever up or down.
Participant Window – Overview The participant window lists each person who is present. In the row next to each person’s name are icons. These icons represent different permissions that the moderator has granted them. If an icon is missing, that person does not have permission to use the feature. • Permission to use: • MicrophoneChatWhiteboardApplicationSharingVideo
Participant Window – Stepped Away • To the bottom-right of the Participant Window is the “Stepped Away” button: • Click on this button, and your name is italicized. This indicates to everyone that you are preoccupied at the moment, and not available. • Click the same button again to indicate you are back and available.
Participant Window –Hand Raise • To the bottom-left of the Participant Window is the “Hand Raising” button: • Click on the Hand Raising button, a number appears under the hand-raising column, in the row next to your name. This indicates that you raised your hand. If multiple participants raised their hand, the number indicates the order in which each person raised their hand. • If you change your mind, you can lower your hand by clicking the hand icon again – which now looks like this:
Participant Window – Emoticons • To the right of the hand-raising icon, are Emoticons: • Click on an emoticon and it will blink, in the row next to your name, for a few secondsbefore disappearing. • Emoticons are used to express emotions or give feedback. • The emoticons represent: • Happy • Confused • Hand Clapping (approval) • Thumbs-down (disapproval)
Participant Window – Polling • Located toward the bottom-right hand of the Participant Window is the Polling area. • Polling is when the moderator asks you questions in order to discover your views on different topics. • There are three main types of polling questions, and what display in the Polling area is dependent upon the Poll your moderator decides to take. • Yes/No (pictured) Multiple Choice Slow down/Speed up Pace • To participate in polling, click on your selection, and it will display in the row, under the Polling column, by your name:
Chat Window • The Chat Window allows you to direct your text message to: • All participants • One or Selected participants • The Moderator • If you do not have permission to use the Chat feature, you can still send a message to the Moderator(s). • To send a message: • Type your message in the Message Text Field. • From the Send To Option Menu, select who is to receive your message. • Finally, click the Send Button.
Whiteboard – Overview • The Whiteboard is where presentations are loaded by the Moderator. • Participants can use the tools to draw or write on the Whiteboard (if you have permission). • All the objects and images on the Whiteboard are dynamic and can be modified. From the Tool Bar, you can print the Whiteboard screens or save it to a file to review later. Presentation/Workspace Tools Palette
Whiteboard – Tools Palette Selection Eraser Pen Highlighter Text Editor Text Ellipse Filled Ellipse Rectangle Filled Rectangle Line Laser Pointer Import an Image Clip Art Screen Capture • To use a Whiteboard Tool, click on the tool and move your cursor to the Whiteboard. With the cursor/mouse pressed, begin to draw, highlight etc. on the Whiteboard.
Put Yourself on Video The Video feature of CLP allows you to put yourself on video for everyone in the session to see. You must have a Webcam installed on your computer. Click the (located on the Tool Bar) Choose Preview Look Good? Choose Transmit You are Live! To stop the video, click on the video button (located on the Tool Bar) Note: Choose Coarse Grays or Fine Color. This will however effect your bandwidth (speed), so choose the drop down choice that maximizes your speed.
Application Sharing • Application Sharing allows you to share an application or your entire desktop with everyone in the session. This is possible only if you have been granted permission by the Moderator. • The steps involved in using Application sharing are as follow: • Open the application(s) you wish to share (e.g. a word document). • Maximize the application on your desktop (it will be open behind your classroom browser, and not minimized) • Click on the Application Sharing button , located on the Tool Bar. • A window opens that allows you to select an application or your entire desktop. Make your selection. • Click OK. You are now sharing. • To stop sharing, click on the Application Sharing button again .
Session Archives • If your CLP session was recorded, the archive can be found on the ClassLive page of your course. • Click on the Session Date link (e.g. Friday, March 18, 2011) and the recording will open.
Questions • If you have any technical questions, please feel free to contact the 24/7 helpdesk at: • helpdesk@myonlinelogin.com • 877-252-7715 • If you have any content related questions, we suggest that you take the Student Orientation Tutorial located in the Special Courses Term.