How to Change Frequency on UCSD Class Clickers
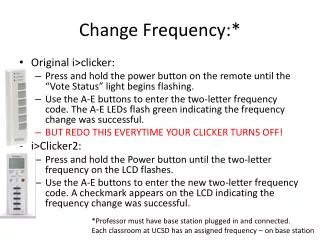
Learn how to change the frequency settings on your UCSD classroom clicker. For the original clicker, press and hold the power button until the “Vote Status” light flashes. Then, use the A-E buttons to enter the two-letter frequency code; the A-E LEDs will flash green to confirm a successful change. For Clicker2, hold the power button until the frequency on the LCD flashes, then input the new frequency code using the A-E buttons; a checkmark will appear on the LCD once updated. Remember to repeat this each time your clicker turns off!

How to Change Frequency on UCSD Class Clickers
E N D
Presentation Transcript
Change Frequency:* • Original i>clicker: • Press and hold the power button on the remote until the “Vote Status” light begins flashing. • Use the A-E buttons to enter the two-letter frequency code. The A-E LEDs flash green indicating the frequency change was successful. • BUT REDO THIS EVERYTIME YOUR CLICKER TURNS OFF! • i>Clicker2: • Press and hold the Power button until the two-letter frequency on the LCD flashes. • Use the A-E buttons to enter the new two-letter frequency code. A checkmark appears on the LCD indicating the frequency change was successful. *Professor must have base station plugged in and connected. Each classroom at UCSD has an assigned frequency – on base station