Hosted Exchange 2010
Hosted Exchange 2010. Introduction.


Hosted Exchange 2010
E N D
Presentation Transcript
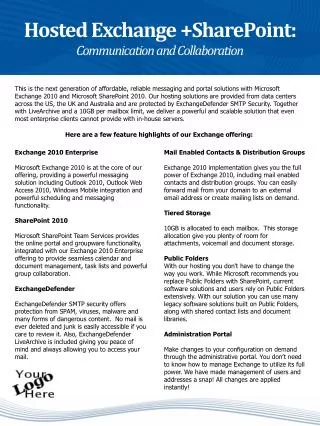
Introduction • The purpose of this Startup Guide is to familiarize you with ExchangeDefender's Exchange and SharePoint Hosting. ExchangeDefender provides enterprise grade Exchange 2010 and SharePoint hosting services that are redundant, reliable and protected by ExchangeDefender. With generous amount of storage and full flexibility of all Exchange and SharePoint features combined with the control panel that any client can use, ExchangeDefender delivers a powerful communication and collaboration platform. • Before you begin make sure you have met the following pre-requisites: • Does the client own their own domain? (Exchange hosting cannot be associated with third party email addresses such as @hotmail.com, @comcast.com, @gmail.com etc.) • Do you have the ability to manage the domain DNS settings and modify their MX record? Ordering Mailboxes 1. Please login to the ExchangeDefender Support Portal (https://support.exchangedefender.com) with your email address and a password. 2. Click on the Service Manager tab. This will bring up the Service Manager Dashboard from which you can order and manage all your Exchange and SharePoint services.
3. You can quickly subscribe to all of our services on the right in the Add Services section. Click on New Exchange 2007 mailbox to proceed. 4. Please provide the Contact and Billing information for this order. You will be asked to confirm your billing data, address and the usual contract terms of service agreements.
5. On Step 2: Service Configuration you will actually create your mailboxes. We have worked very hard to create a simple and streamlined process for creating a mailbox with as little information as possible. Just provide the users desired display name (first and last name required),login name (your choice), email address and password, and Exchange Version (2010). 6. If you are only adding one mailbox please click on Review & Finalize. If you are ordering multiple mailboxes you don't have to go through the whole order process again, just click on Add Additional Mailbox. You will be prompted for mailbox configuration information and mailboxes will be added in a queue listed on the right. When done, click on Review & Finalize.
7. Review the confirmation screen which will display the list of Exchange 2010 mailboxes about to be created. If all the information in the review screen is correct, click Finalize Order. 8. After the order is submitted the mailbox creation process will run in the background and typically complete within 60 seconds. After being redirected to the account listing you will see the pending accounts listed with a status "Processing request".
9. Within a minute you will be able to manage your mailboxes, just click on Refresh. 10. To the left of each mailbox is a blue "I" info button that displays detailed user information such as server name, domain name, login credentials and Outlook download link. To the right of each user is a management dropdown with Actions that can be performed on this mailbox. Each mailbox can be modified, have additional email aliases or alias domains added, passwords changed and the mailbox can be deleted right here. You also have an option to disable a mailbox if the client has not paid for the service or should not be allowed to login to their mailbox. Note: If you Disable a user they will not be able to send or receive mail or access their mailbox in any way.
Logging into Outlook Web Access 1. To obtain the Microsoft Exchange Outlook Web Access URL for a mailbox, click on the icon next to the desired mailbox to display the Detailed Information section. Outlook Web Access address is available here. (See above). 2.Either click on the link or navigate to the URL using Microsoft Internet Explorer (Note: Using any browser other than Microsoft Internet Explorer will only give you the Outlook Web Access Lite which has less features and less flexibility than the full version).
Setting up Outlook 2010 Exchange 2010 has a lot of useful features that only work with Outlook 2010, one of which is Auto Discover. Auto Discover allows Outlook to "self configure" itself using only the mailbox name, email address, password, and a autodiscover DNS record. Before attempting to setup Outlook, log into your clients DNS control panel and create a CNAME record with the hostname "autodiscover" and as an example if your mailbox is on DEWEY the destination of autodiscover.dewey.exchangedefender.com If you are not on DEWEY, you can substitute 'dewey' for your server, e.g. autodiscover.europe.exchangedefender.com . 1. Own Web Now Exchange 2010 Hosting includes a Microsoft Outlook 2010 license. You can download the media from the Service Manager in the mailbox details section.
Autodiscover The first thing you should do is access the domain's DNS control panel. Next, create a CNAME record and it should look something like this: (it may vary slightly, depending on your DNS provider) autodiscover.domain.com IN CNAME autodiscover.louie.exchangedefender.com. Once you have completed that step, the next recommended step before attempting to deploy Outlook 2010 is to check that the record has propagated to your end user's location. You can do this via a simple nslookup, as shown below: This is just an example, you would be using one of the following for your client on Exchange 2010: autodiscover.louie.exchangedefender.com(US)autodiscover.della.exchagnedefender.com(UK)autodiscover.matilda.exchangedefender.com(AUS)autodiscover.rockerduck.exchangedefender.com (US) When you are ready to start mail flow to our server please make sure to point your MX record to us. Due to mail servers caching old successful MX records we highly recommend having only our MX record in place to avoid inconsistent mail delivery. That record would like the following: domain.com IN MX 10 inbound30.exchangedefender.com.
After confirmation of the CNAME record propagation is complete, you can begin the set up process. Launch the Mail control Panel. 2. Click Add then name your new Profile. 3. Fill out the Auto Account Setup page with the information provided on to the Service Manager info section for the desired mailbox:
4. You will be required to authenticate and download the settings for your mailbox. Please use the primary SMTP address as the username as shown below: 5. Once you authenticate the session above and all the settings are downloaded you are ready to go! Note: If you notice any slowness for the end user make sure that the following boxes are checked: "Connect Using SSL Only", "On fast networks, connect using HTTP first, then connect using TCP/IP", "On slow networks, connect using HTTP first, then connect using TCP/IP".
Manual Configuration While we highly do not recommend Manual Configuration because there are some 2010 features that heavily rely on AutoDiscover, you can deploy our mailboxes manually as well. Once you have named your new profile, please use the following as the recommended settings for a manual deployment: 1. Select the appropriate set up method from the wizard:
2. Select Microsoft Exchange or compatible service. 3. Supply the server name as provided in the Service Manager Information section. For our 2010 environments those servers would be as stated below. You will be providing the username which will be the user's primary SMTP address at the time of ordering. cas.rockerduck.exchangedefender.comcas.louie.exchangedefender.comcas.della.exchangedefender.com cas.matilda.exchangedefender.com
4. After selecting "More Settings", click over to the Connection tab, check the "Connect to Microsoft Exchange using HTTP" box and click on "Exchange Proxy Settings". • 5. Provide the proxy server for Exchange, it will match what you provided in the Exchange server screen. You will also need to ensure that NTLM authenication is selected and the following boxes are checked: • "Connect Using SSL Only“ • "On fast networks, connect using HTTP first, then connect using TCP/IP“ • "On slow networks, connect using HTTP first, then connect using TCP/IP". • 6. Once you have clicked through "Apply" and "OK" you will arrive back at the "Server Settings" screen where you will click on "check Name" to ensure that the connection information is accurate. You will be prompted to Authenticate. You will authenticate with the email address and password you selected.
6. Once you have clicked through "Apply" and "OK" you will arrive back at the "Server Settings" screen where you will click on "check Name" to ensure that the connection information is accurate. You will be prompted to Authenticate. You will authenticate with the email address and password you selected. 7. Both entries will become underlined signifying that the mailbox and server are both successfully resolved. 8. Once you click on Next, you have completed deployment.
Migrating Mailbox Content 1. Start Outlook 2010 and select the old user profile. 2. Select File, then Import and Export. 3. Select Export to a File.
4. Select Personal Folder File for the type of file. 5. Select the mailbox for the export and select Include Subfolders. This will ensure we export all the contents of your mailbox including calendars, contacts and notes. 6. Select the export location and the duplicate options as illustrated below. Accepting the defaults is sufficient.
7.Once the export has completed (it may take a while) close Microsoft Outlook and start Microsoft Outlook with the new Hosted Exchange profile. 8. Select File, then Import and Export (Refer to Step 2 image). 9. Select Import from another program or file. 10. Select Personal Folder File (.pst) for the import file type.
11. Choose the desired import options and select Finish. Congratulations, you have successfully exported and imported your Microsoft Outlook mailbox and migrated to ExchangeDefender's Exchange 2010 hosting. You can now delete the old profile if you have created a full backup and do not believe you will ever have to access it.