Integrating Excel Worksheets and Charts into Word Documents in Microsoft Office 2007
This guide provides step-by-step instructions on how to link Excel worksheets and charts to Word documents using Microsoft Office 2007. Learn how to apply themes, update text styles, and efficiently manage document versions. Discover how to copy and paste linked objects, ensuring your documents are visually appealing and functional. The tutorial also covers important aspects such as saving files in compatible formats and ensuring document safety against viruses. Master these skills to enhance your document creation and presentation.

Integrating Excel Worksheets and Charts into Word Documents in Microsoft Office 2007
E N D
Presentation Transcript
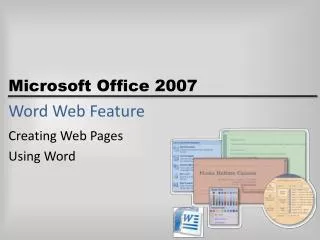
Word Integration Feature Linking an Excel Worksheet and Chart to a Word Document
Objectives • Apply a theme to a document • Update the body text style • Link an Excel worksheet to a Word document • Link an Excel chart to a Word Document • Break links • Save a document so that it is compatible with a previous version of Word • E-mail a document Microsoft Office 2007: Complete Concepts and Techniques - Windows Vista Edition
Plan Ahead • Determine how to copy the object • Be certain files from others are virus free Microsoft Office 2007: Complete Concepts and Techniques - Windows Vista Edition
Opening a Word Document and Saving It with a New File Name • Start Word and then open the file named Home Plans Memo Draft from the Data Files for Students • Click the Office Button and then click Save As on the Office Button menu to display the Save As dialog box • Type Home Plans Memo Modified in the File name text box to change the file name • Locate and select your USB flash drive in the list of available drives • Click the Save button in the Save As dialog box to save the document on the USB flash drive with the new file name, Home Plans Memo Modified • If the zoom level is not 100%, change it to 100% Microsoft Office 2007: Complete Concepts and Techniques - Windows Vista Edition
Changing the Document Theme • Display the Page Layout tab • Click the Themes button on the Page Layout tab to display the Themes gallery • Click Median in the Themes gallery to change the document theme to Median Microsoft Office 2007: Complete Concepts and Techniques - Windows Vista Edition
Changing the Document Theme Microsoft Office 2007: Complete Concepts and Techniques - Windows Vista Edition
Updating the Body Text Style • Triple-click the paragraph of text in the memo to select it. Right-click the selected text to display the Mini toolbar and shortcut menu • Click the Grow Font button on the Mini toolbar to increase the font size of the selected text to 12 point • Right-click the selected text again and then point to Styles on the shortcut menu to display the Styles menu • On the Styles menu, click Update Body Text to Match Selection, which modifies the Body Text style to match the formats of the selected text and then changes all other text formatted using the Body Text style in the document to the updated style Microsoft Office 2007: Complete Concepts and Techniques - Windows Vista Edition
Updating the Body Text Style Microsoft Office 2007: Complete Concepts and Techniques - Windows Vista Edition
Starting Excel and Opening an Excel Workbook • Click the Start button on the Windows Vista taskbar to display the Start menu • Point to All Programs on the Start menu, click Microsoft Office in the All Programs list, and then click Microsoft Office Excel 2007 in the Microsoft Office list to start Excel and display a new blank workbook in the Excel window • If the Excel window is not maximized, click the Maximize button on its title bar to maximize the window • With your USB flash drive connected to one of the computer’s USB ports, click the Office Button in the Excel window to display the Office Button menu and then click Open on the Office Button menu to display the Open dialog box • Locate and select your USB flash drive in the list of available drives • Click Home Plans Breakdown to select the file name and then click the Open button to open the selected file and display the Home Plans Breakdown workbook in the Excel window Microsoft Office 2007: Complete Concepts and Techniques - Windows Vista Edition
Linking an Excel Worksheet to a Word Document • In the Excel window, drag through cells in the range A1 through B8 to select them • In the Excel window, click the Copy button on the Home tab to copy the selected cells to the Clipboard • Click the Home Plans Memo Modified - Microsoft Word program button on the taskbar to switch to the Word window • Position the insertion point at the end of the paragraph of text and then press the ENTER key. Center the paragraph mark below the paragraph of text so that the linked worksheet will be centered on the page • Scroll so that the paragraph in the memo is near the top of the document window Microsoft Office 2007: Complete Concepts and Techniques - Windows Vista Edition
Linking an Excel Worksheet to a Word Document • In Word, click the Paste button arrow on the Home tab to display the Paste menu • Click the Paste Special command on the Paste menu to display the Paste Special dialog box • Click Paste link to select the option button • Select Microsoft Office Excel Worksheet Object in the As list • Click the OK button to insert the Excel worksheet as a linked object at the location of the insertion point Microsoft Office 2007: Complete Concepts and Techniques - Windows Vista Edition
Linking an Excel Worksheet to a Word Document Microsoft Office 2007: Complete Concepts and Techniques - Windows Vista Edition
Linking an Excel Chart to a Word Document • Click the Microsoft Excel - Home Plans Breakdown program button on the taskbar to switch to the Excel window • In the Excel window, click an edge of the chart to select the chart. Click the Copy button on the Home tab to copy the selected Excel chart to the Clipboard • Click the Home Plans Memo Modified - Microsoft Word program button on the taskbar to switch to the Word window. With the insertion point to the right of the linked worksheet, press the ENTER key • In Word, click the Paste button arrow on the Home tab to display the Paste menu and then click the Paste Special command on the Paste menu to display the Paste Special dialog box Microsoft Office 2007: Complete Concepts and Techniques - Windows Vista Edition
Linking an Excel Chart to a Word Document • Click Paste link to select the option button • Select Microsoft Office Excel Chart Object in the As list • Click the OK button to insert the Excel chart as a linked object at the location of the insertion point • Switch back to Excel. Quit Excel by clicking the Close button on the upper-right corner of the title bar Microsoft Office 2007: Complete Concepts and Techniques - Windows Vista Edition
Linking an Excel Chart to a Word Document Microsoft Office 2007: Complete Concepts and Techniques - Windows Vista Edition
Saving a Document Again • Click the Save button on the Quick Access Toolbar to save the document again with the same file name, Home Plans Memo Modified Microsoft Office 2007: Complete Concepts and Techniques - Windows Vista Edition
Editing a Linked Object • In the Word document, double-click the Excel worksheet to start the Excel program and open the source document that contains the linked worksheet • If necessary, maximize the Excel window • With the Excel worksheet displaying on the screen, click cell B5 to select it • Type 3910and then press the ENTER key to change the value in cell B5, which also automatically updates the associated bar in the chart Microsoft Office 2007: Complete Concepts and Techniques - Windows Vista Edition
Editing a Linked Object • Click the Save button on the Quick Access Toolbar to save the changes • Quit Excel • With the Word window redisplaying on the screen, if necessary, scroll to display the worksheet and chart in the document window • To update the worksheet with the edited Excel data, click the worksheet in the Word document and then press the F9 key • To update the chart with the edited Excel data, click the chart in the Word document and then press the F9 key Microsoft Office 2007: Complete Concepts and Techniques - Windows Vista Edition
Editing a Linked Object Microsoft Office 2007: Complete Concepts and Techniques - Windows Vista Edition
Saving a Document Again and Printing Again • Save the document again with the same file name, Home Plans Memo Modified • Print the memo Microsoft Office 2007: Complete Concepts and Techniques - Windows Vista Edition
Breaking Links • Click the Office Button and then point to Prepare on the Office Button menu • Click Edit Links to Files on the Prepare submenu to display the Links dialog box • If necessary, click the first source file listed in the dialog box to select it • Click the Break Link button, which displays a dialog box asking if you are sure you want to break the selected links Microsoft Office 2007: Complete Concepts and Techniques - Windows Vista Edition
Breaking Links • Click the Yes button in the dialog box to remove the source file from the list (break the link) • Click the remaining source file listed in the dialog box, if necessary. Click the Break Link button and then click the Yes button in the Microsoft Office Word dialog box to break the remaining link • Use the Save As command on the Office Button menu to save the file with the name, Home Plans Memo Modified Without Links • Double-click the worksheet object in the Word document to be sure that the link has been broken Microsoft Office 2007: Complete Concepts and Techniques - Windows Vista Edition
Breaking Links Microsoft Office 2007: Complete Concepts and Techniques - Windows Vista Edition
Saving a Word 2007 Document in a Previous Word Format • Click the Office Button and then point to Save As on the Office Button menu • Click Word 97-2003 Document on the Save As submenu to display the Save As dialog box with Word 97-2003 Document already filled in the ‘Save as type’ box • If necessary, locate and select the USB flash drive in the list of available drives • Click the Save button in the dialog box to save the file in a Word 97-2003 format Microsoft Office 2007: Complete Concepts and Techniques - Windows Vista Edition
Saving a Word 2007 Document in a Previous Word Format Microsoft Office 2007: Complete Concepts and Techniques - Windows Vista Edition
E-Mailing a Document as an Attachment • Click the Office Button and then point to Send on the Office Button menu • Click E-mail on the Send submenu, which starts your default e-mail program and attaches the active Word document to the e-mail message • Fill in the To text box with the recipient’s e-mail address • Fill in the message • Click the Send button to send the e-mail message along with the attachment to the recipient named in the To text box Microsoft Office 2007: Complete Concepts and Techniques - Windows Vista Edition
E-Mailing a Document as an Attachment Microsoft Office 2007: Complete Concepts and Techniques - Windows Vista Edition
Quitting Word • Quit Word Microsoft Office 2007: Complete Concepts and Techniques - Windows Vista Edition
Summary • Apply a theme to a document • Update the body text style • Link an Excel worksheet to a Word document • Link an Excel chart to a Word Document • Break links • Save a document so that it is compatible with a previous version of Word • E-mail a document Microsoft Office 2007: Complete Concepts and Techniques - Windows Vista Edition