Sewing Project: Creating a Mitered Corner Sample
This step-by-step sewing project instructs students on how to create a sample with mitered corners. Using an 8”x8” fabric square, students will learn to serge edges, sew folded seams, and create mitered corners while practicing essential sewing techniques. They'll utilize a combination of straight and zig-zag stitches, ensuring to backstitch for durability. With guidance and teacher check-offs provided throughout, learners will complete a polished finished product showcasing their skills. Turn in your sample for evaluation!

Sewing Project: Creating a Mitered Corner Sample
E N D
Presentation Transcript
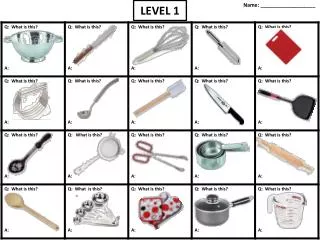
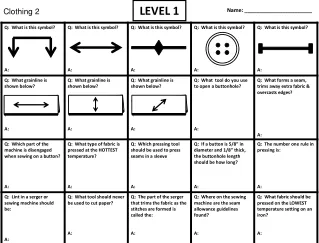
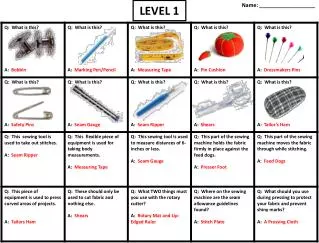
LEVEL 1 Name: ___________________
LEVEL 2 Name: ___________________
LEVEL 3 Name: ___________________
LEVEL 4 Name: ___________________
LEVEL 5 Name: ___________________
Directions:Check off each construction step off with your teacher. Using the attached 8”x8” square, serge around each side using any color of thread. Try not to cut off any material as you serge. Press flat. Fold one edge in 1 1/4 inches. Press in place. Using the left edge of your presser foot, sew a 1/4 inch seam down the top edge of the fold to secure the folded edge. Remember to backstitch at both ends. (CHECK OFF). Place the sample so that the folded edge you’ve just sewn is facing up and on the right. You should see the serging on the edge you’ve just sewn. Take the upper left corner and fold it in diagonally at a right angle at 1 1/4 inches. Press the fold in place. With the corner pressed and flat in place, fold in the left edge of the square and fold down the top edge of the square to create a mitered corner in the upper left hand corner of your sample. Press the two folds in place. (CHECK OFF). Using a 1/2 inch seam allowance, sew down the pressed top and side edges, pivoting at the mitered corner. Remember to backstitch at each end. (CHECK OFF). Fold the bottom edge of the sample in toward the center at 1/2 inch and press in place. Fold that same edge again 1 inch and press in place. Sew along the top edge of the fold at 1/8 inch to secure the fold in place. (CHECK OFF). Place the sample on the table in front of you. All of the folded edges of the sample should be on the same side. With a marking pen or pencil of any color, draw a 2”x2” square in the center of your sample. Try to place it as much in the center of your sample as possible. Sew a straight stitch on this marking, remembering to backstitch at the beginning and end, and pivoting at the corners. (CHECK OFF). Using the left edge of your presser foot as a guideline , sew another box around the first box 1/4 inch away, but this time using a zig-zag stitch (size five). Remember to backstitch at the beginning and the end and also to pivot at the corners. Trim all threads and do a final press of your sample and staple it to this paper with the mitered corner in the upper left hand side. Turn it in to your teacher to be checked. Staple Your Sample HERE LEVEL 6 Name: ___________________