Sensors and actuators
1.17k likes | 2.74k Vues
Sensors and actuators. Sensors Resistive sensors Voltage-controlling sensors Actuators Analog actuators Pulse width modulation Making sounds. Sensors. Sensors. Allow the microcontroller to receive information about the environment How bright is it? How loud is it?

Sensors and actuators
E N D
Presentation Transcript
Sensors and actuators Sensors Resistive sensors Voltage-controlling sensors Actuators Analog actuators Pulse width modulation Making sounds
Sensors • Allow the microcontroller to receive information about the environment • How bright is it? • How loud is it? • How far is an object? • Is the button being pressed? • Perform operations based on the state of the environment • Turn on a light if it is dark out • Voice-controlled operation
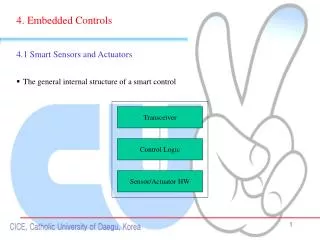
Sensing the environment • Microcontrollers sense voltage • digitalRead(pin) returns state of a digital pin • analogRead(pin) returns the analog voltage on a pin • Sensor logic must convert an environmental effect into voltage
Reading a pushbutton • Make a pin HIGH when the button is pressed, and LOW when it is not pressed Correct Incorrect
Resistive sensors • Many sensors change resistance • Photoresistors, thermistors, flex sensors, etc. • Connect sensor in a voltage divider • As resistance changes, voltage changes
Photoresistor • As brightness increases, resistance decreases • Resistance = 10K ohms, Voltage = 2.5 volts • Resistance = 5K ohms, Voltage = 3.33 volts
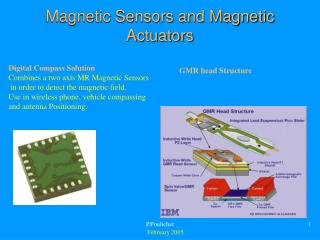
Voltage-controlling sensors • Some sensors control voltage directly Accelerometer: Reports acceleration in 3 axes Gyro: Reports angular velocity in 3 axes Passive infrared sensor: detects motion
Actuators • Devices that cause something to happen in the physical world • Outputs of the devices • Visual: LED, LCD, monitor • Audio: buzzer, speaker • Motion: motors, valve, pump • Tactile: heating, cooling
On-off actuation • The only control is power • Even complicated actuators can be controlled via power • LED, buzzer, monitor • Does not use the full potential of the actuator • On-off control may be all that is necessary • Lights in a classroom
Current limits • Watch out for current limits • LED can only handle 20mA • Be sure to use an appropriate resistor • Arduino can only supply 40mA • Cannot drive a motor that requires 10A • May need to use alternate power supply • Arduino can control access to power without providing power directly
Analog voltage control • Many actuators need an analog voltage for complete control • DC motor speed controlled by voltage • LED brightness controlled by voltage • Heating element temperature controlled by voltage • Arduino cannot generate analog outputs
Digital to analog converter (DAC) • DAC will convert digital number to an analog voltage • Most microprocessors do not have a DAC • Can buy one and attach it, but may be costly
Pulse width modulation • Duty cycle is the percent of time the pulse is HIGH • Increasing duty-cycle increases perceived voltage
analogWrite() • Generates a square wave on a pin, 490Hz • First argument is the pin number • Second argument is the pulse width • 0 is 0% duty cycle • 255 is 100% duty cycle • Pin number must be a PWM pin • Marked on the Arduino with the “~” symbol • Example: analogWrite(3,128); will output 2.5V approximately on pin3
Fade example int brightness=0, fadeAmount=1, led=3; void setup() { pinMode(led, OUTPUT); } void loop() { analogWrite(led, brightness); brightness = brightness + fadeAmount; if (brightness<=0 || brightness>=255) fadeAmount = -fadeAmount; delay(30); }
tone() • tone() can generate a square wave with an arbitrary frequency • analogWrite() has a fixed frequency • Duty cycle is fixed at 50% • Can be used to drive a speaker or buzzer • Two or three arguments • Pin number • Frequency, in Hz • Duration in milliseconds (optional)
Square waves vs. sine waves • Square waves sound bad • Contains many high-frequency components • Square wave is the best we can do with simple digital outputs
Buzzer • Two inputs: signal and ground • Produces a click when a rising edge is applied • Driving with a square wave produces a pitch
Music system void setup() { } void loop() { tone(8, 988, 1000); delay(1000); tone(8,1047,1000); delay(1000); } • Plays two tones, 1 second each • Delay is needed; only one tone at a time
Windscreen wiper • Get your Arduino ready with a touch sensor, a potentiometer, a servo motor, and a breadboard. • You are making a simplified windscreen wiper. • When your Arduino is powered up, your servo motor should head to the rest position (to 0 degree with an appropriate speed) • Your touch sensor is the switch. • While you put your finger on the touch sensor, the servo motor should swing between 0 degree to 90 degrees. • If you put your finger off, the servo motor should head to the rest position. • Your potentiometer is a speed controller. • Rotating the potentiometer should change the wiper’s swing speed.