Adobe Photoshop
Adobe Photoshop. Multimedia 4 th Level. T.Ahlam Algharasi. Adobe Photoshop. Adobe Photoshop is a seriously powerful photo and image edit ( treating and manipulation, compositing, converting to different formats, printing, etc.). Creating a New Document. Creating a New Document

Adobe Photoshop
E N D
Presentation Transcript
Adobe Photoshop Multimedia 4th Level • T.AhlamAlgharasi
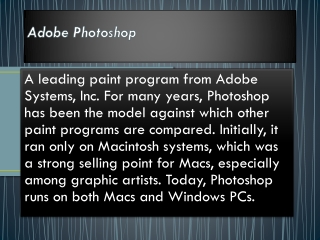
Adobe Photoshop • Adobe Photoshop is a seriously powerful photo and image edit ( treating and manipulation, compositing, converting to different formats, printing, etc.)
Creating a New Document • Creating a New Document • To create a new document in Photoshop, select File > New from the Menu Bar. • A dialog box will appear such as the one shown below:
Creating a New Document • A. Document Name – Set the document name here (optional). • B. Presets – Choose a document size from a list of presets. • C. Document Dimensions – Set the width and height of the document here. • D. Document Units – Set the units of the dimensions of the document. Pixels should be your typical choice for any work you’re displaying on the web or on a monitor.
Creating a New Document • E. Resolution – Set the Resolution of the document. Resolution typically means the number of dots (or pixels) per inch. • In printing, you typically want a high value here (300 or higher), which will also increase the documents size. However, for web based work, or on-screen work, 72 is the default resolution. • F. Color Mode – Set the color mode of the document. Unless you are doing special printing, you typically will be working with RGB Color (Red/Green/Blue). • G. Background Contents – Set up the background for your
The Work Area • A. Menu Bar – An organized menu area categorized by the type of task being handled. • B. Options Bar – Contains options for the currently selected tool. • C. Tool Bar – Contains a wide selection of available tools in Photoshop, as well as the Foreground Color, Background Color, and other features. • D. Document Window – The Containing Window of a document being worked on inside of Photoshop.
The Work Area • E. Active Image Area – The Document Window contains the Active Image Area (Shown in White above). This is the area an artist works in. • F. Navigator – A small version of the current documents active image area. Used for navigating large images, or when zoomed in. • G. Color Palette – A palette used to select foreground and background colors for painting / drawing with.
The Work Area • H. History – Constantly updating record of previous changes made inside of a document. Can be used to reverse steps taken (Undo). • I. Layers - Layers in Photoshop allow you to work on a single canvas, letting some things appear above or below others.
Layers • layers are used to work on individual parts of an image while not affecting other parts. You might say that layers are like transparency papers stacked on top of one another which can be repositioned and separately drawn on without disturbing each other.
Layers • Create new layer in Photoshop • To create empty layer, click on the create a new layer button.
Layers • Rename Photoshop Layer • you can double-click on the layer label, the label will then turn into text box for you to enter new name. • or by right click on the layer and then select layer properties…, enter a new name into the Name field.
Layers • Creating new layer from existing image • First, select the lasso tool to select a part of an image. • Right click the selected area and select Layer via Copy or Layer via Cut. Both command will create a new layer with the selected image area in it.
Layers • Group layers in Photoshop . • Create a group from the icon Create a new set then move the layers into the folder.
Layers • Merge Layers in Photoshop • When you want to combine layer back into one piece, you can do so by merging the layer. • There are 3 way to merge layer: • Merge Layer will merge all the selected layer into one layer. • Merge Down will merge the selected layer to its lower layer. • Merge Visible will merge all the visible layer into one layer. • Duplicate layer in Photoshop • Right click on the layer > Duplicate layer. • Select Layer > Duplicate Layer
Layers • Lock all: If the box is checked the layer is totally protected from any editing. • Lock Position: You can make any changes except for moving the image. • Lock Image pixels: You cannot draw on this layer if checked. • Lock transparent: You can paint on this layer but not where it is transparent
Layers • Layer opacity: Adjusts how transparent each layer is. 0 is completely transparent, 100 is completely opaque. • Blending mode: Changes the way the layers interact with each other.
Selection Tools • selection tools • are used to facilitate the process of making selections of shapes, colors, and objects inside of Photoshop, and positioning them in the working image area. With tools like the magnetic lasso and magic wand.
Marquee Tools • Marquee Tools • are used to make rectangular, elliptical, horizontal and vertical line selections. To create a selection with a marquee tool, simple hold down your mouse button over the active image area, and drag out your shape.
Marquee Tools • Note : • When making selections with the Rectangular Marquee Tool or Elliptical Marquee Tool, it’s possible to make perfect square and circular selections by holding shift when drawing our your selection.
Lasso Tools • The Lasso Selection Tools • allow you to make selections of irregular shapes. Using the ordinary lasso tool, simply click and drag a freehand selection with your mouse. • You can toggle between freehand and straight line mode by pressing the Alt key while you are drawing the selection.
Options Bar • New selection . • Add to selection. • Subtract from selection. • Intersect with selection. • To soften the selection borders so that it blends into the area outside the selection. • To smooth the edges of your selection. 1 2 3 4 5 6
Polygonal Lasso tool • The Polygonal Lasso tool • is used to draw straight line selections. • You can make the polygonal lasso tool work just like the regular lasso tool by holding down the Alt key to draw freehand selection. • One difference with the Polygonal lasso tool is that you can use the Shift key to constrain the selection lines to 45° increments. • you can press the delete key at any time to remove the last segment. To remove multiple segments, press delete repeatedly.
Demo • Select the star from this image And put it in a new image with a black background?
Magnetic Lasso tool • TheMagnetic Lasso tool • works similarly to the other lasso tools, but it has special powers that can detect areas of contrast and it will snap to the edges of the object you're trying to select. Because of these special powers, the magnetic lasso has more options than the other lasso tools. • It works best when selecting areas that contrast well with their surroundings.
Magnetic Lasso tool • Edge Contrast • is the amount of contrast needed for the tool to find an edge. Low contrast edge = low number; high contrast edge = high number. • Frequency • is the number of points the tool lays down along the selection line. • Use low numbers for smooth edges and high numbers for a very irregular edge.
Magnetic Lasso tool • To switch the icon to a circle press Caps key • The circle represents the width of the area that Photoshop looks for edges. Only the area inside the circle is looked at. • Press the left bracket key ( [ ) to make the circle smaller, or the right bracket key ( ] ) to make it larger as you're working. • Width • is the number of pixels the tool "looks at" in the vicinity you move it. • For an image that has very clear high contrast edges, high numbers are OK (40 is the highest). For an image with more subtle, low contrast edges, enter a lower number.
Magnetic Lasso tool • Fixing Mistakes • If an anchor point gets added in the wrong spot, press the Backspace key on your keyboard to remove the last anchor point that was added. • Switching Between Lasso Tools • To temporarily switch to the Polygonal Lasso Tool, hold down your Alt key and click on the edge of the object.
Magic Wand Tool • The Magic Wand Tool • is designed to select pixels based on their color similarities. • Tolerance box: • A low number will let you select colors very similar to the pixel you click; a high number will let you select a broader range of colors.
Magic Wand Tool • Contiguous • to select only areas which are joined together. • Use All Layers • the selection will be made on all layer, not just the one you are working on.
Move Tool • The Move Tool • is used for moving selected areas of an image, layers, shapes, and other objects. • You can used it to move a selected part of an image. • Note: • You can activate the move tool when another tool is selected by holding down the Ctrl
Crop Tool • The Crop Tool • is used to resize the canvas and active image area. • If the Crop tool isn’t working as expected, click the Clear button to reset some settings . • Rotate as you Crop
Demo • Make a Crop for any Image?
Selecting and Deselecting • "All" allows you to select everything on a layer. • "Deselect" removes the selection. • "Reselect" will reselect the last selection you made. • "Inverse” will select everything that outside of your selection and deselect everything that was originally selected.
Canvas Size • Canvas Size allows you to change the overall size of the document canvas without altering the contents of the document.
Rotate Canvas • Rotate Canvas • To rotate an image you can apply the following commands: • 180° - it rotates the image by 180 degrees. • 90° CW - it rotates the image by 90 degrees clockwise. • 90° CCW - it rotates the image by 90 degrees anticlockwise. • Flip Horizontal- i.e. interchanges the left and the right parts of the image; • Flip Vertical i.e. it turns the image upside down.
Rotate Canvas • Rotate Canvas • Arbitrary - this command rotates the image by an arbitrary angle. For this purpose: • Step 1. select the command from the menu; • Step 2. enter the value of the rotation angle in degrees; • Step 3. specify the direction of the rotation - clockwise or anticlockwise;