Download
1 / 3
30 likes | 53 Vues
Find out how much it costs to get a tradesman to do a job for you.

E N D
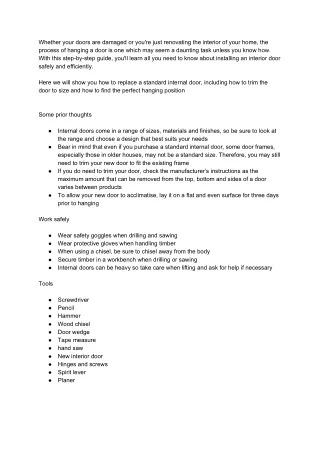
Whether your doors are damaged or you're just renovating the interior of your home, the process of hanging a door is one which may seem a daunting task unless you know how. With this step-by-step guide, you'll learn all you need to know about installing an interior door safely and efficiently. Here we will show you how to replace a standard internal door, including how to trim the door to size and how to find the perfect hanging position Some prior thoughts ● Internal doors come in a range of sizes, materials and finishes, so be sure to look at the range and choose a design that best suits your needs ● Bear in mind that even if you purchase a standard internal door, some door frames, especially those in older houses, may not be a standard size. Therefore, you may still need to trim your new door to fit the existing frame ● If you do need to trim your door, check the manufacturer’s instructions as the maximum amount that can be removed from the top, bottom and sides of a door varies between products ● To allow your new door to acclimatise, lay it on a flat and even surface for three days prior to hanging Work safely ● Wear safety goggles when drilling and sawing ● Wear protective gloves when handling timber ● When using a chisel, be sure to chisel away from the body ● Secure timber in a workbench when drilling or sawing ● Internal doors can be heavy so take care when lifting and ask for help if necessary Tools ● Screwdriver ● Pencil ● Hammer ● Wood chisel ● Door wedge ● Tape measure ● hand saw ● New interior door ● Hinges and screws ● Spirit lever ● Planer
Okay, let’s hang that door… Step 1: Removing your old door ● Take your screwdriver and unscrew your old door from its frame. ● Take care to ensure that you don't damage the hinge rebates on the frame; you'll need to keep these intact so that your new door can be hung securely. ● Place your old door neatly out of harm's way. Step 2: Measuring the doorframe and your new door ● Take your tape measure and measure the doorframe from the bottom to the head of the frame. Make sure you measure both sides; it may be that your frame is not perfectly rectangular. ● Now, measure both sides of your new door. If you find that it is longer than the frame, you'll need to trim it to size. Step 3: Trimming your door to fit If your measurements indicate that trimming is necessary, place your door on a work surface and: ● Take your fine-tooth saw or planer and begin trimming the door to size. Make sure you do this from the bottom of the door. ● When using a planer on interior oak doors or those with clearly-defined growth rings, make sure that you plane in the direction of these. ● Also, try to plane towards the centre of the surface to reduce the risk of splintering at the edges. Step 4: Ensuring your new door fits ● Place your new door into the frame. ● Ensure there is a 2mm gap between the door and doorframe on all four sides. If not, you'll need to return the door to your work area and make adjustments with your planer. ● If you do need to plane the sides, always plane the side with the hinges - these will be out of the way, so any imperfections will be hidden. ● Only plane from both sides if large adjustments need to be made. Step 5: Fitting the hinges to your door Once you're sure that your new door fits nicely into the frame with a 2mm gap on all sides: ● Take your pencil and mark the points on the side of your new door where it lines up with the top and bottom of each hinge rebate. ● Return the door to your work area, and mark the thickness of your hinges on to the side of the door, between the marks you made earlier. ● Then, place the hinges into position and draw around them with your pencil to indicate where they will sit on the edge. ● Take your hammer and chisel and cut an outline into the wood, with the depth corresponding to the thickness of the hinge marked earlier. ● Now, use your hammer and chisel to remove the material where the hinge will sit, creating a hinge rebate.
● Place the hinges neatly into position and screw them into your door. Step 6: Fitting your door to the frame ● Place your new door into the frame, and use wedges to hold it in position. ● Now, take your screwdriver and screw the hinges into the hinge rebates of the frame. It's always easier to attach the top hinge first. ● The screw heads need to sit nice and squarely into the hinge, since this will allow the door to open and close much more smoothly. ● Once you have fitted most of the screws, have a try at opening and closing your door. If it swings smoothly and easily, attach the remaining screws. You have successfully hung a shiny new interior door. Now, how to get rid of the old one. If you would like to view a video tutorial of the above and more details on how to hang a door do visit the Moderniserblog.