Download

1 / 9
90 likes | 207 Vues
Learn how to create a litter bin using Autodesk Inventor 2008. Follow step-by-step instructions to sketch, loft, shell, and add finishing touches. Practice lofting and shelling to make your own unique designs.

E N D
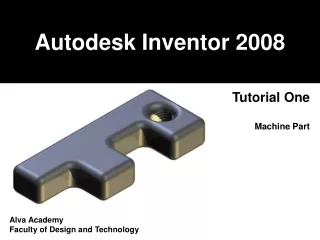
Autodesk Inventor 2008 Tutorial Three Litter Bin Alva Academy Faculty of Design and Technology
Draw a rectangle (any size you want). This will form the bottom of our litter bin. • Complete the sketch. • We are now going to create a new work plane which will be offset from the • original. • Let’s make the original workplane visible. • From the MODEL HISTORY window (bottom left) select ORIGIN. • From the expanded menu, right click on XY PLANE and select VISIBILITY. • This has now switched on the workplane. You can switch it off in the same • way.
Choose the WORKPLANE option from the 3D Features Panel. Move the curser over the XY PLANE that you have just made visible. Drag the mouse upwards and hold down the left mouse button. Drag to the desired height or type in an offset. This is the distance between the workplanes.
Instead of sketching on a surface, we are now going to sketch onto a workplane. • Select SKETCH. • LOOK AT the workplane. • Draw a circle onto the workplane. This will form the top of the litter bin. • Complete the sketch.
We are now going to create a transition between the rectangle and the circle. • This is called LOFTING. • Select LOFT from the Part Features Panel. • Select the rectangle and then the circle. • Click OK. • We don’t need the workplanes anymore, so switch them off.
A solid bin is not much use. Let’s make it hollow. This is called SHELLING. • Select SHELL from the 3D Part Features Panel. • Remove the top surface (the circle). The offset is the wall thickness. • Click OK. • Rotate the bin and have a good look inside it!
Let’s smooth off those bottom edges! • Try applying a fillet to the bottom of the bin. Don’t be surprised if it doesn’t work! • Didn’t get the result that you expected? • You cannot fillet a shelled part as the fillet interrupts the hollow interior of • the model. A fillet should always be applied first! • You now have a choice. Undo your last operation and add the fillet BEFORE • shelling, or follow the instructions on the next page to fix the bin.
Find the FILLET history from the Model Panel and delete it. Right click on SHELL and select SUPPRESS FEATURES. Now add the fillet to the bottom of the bin. Try different sizes until you get a result that you like. When you have finished adding the fillets, right click SHELL and select the UNSUPRESS FEATURES option. You now have a shelled litter bin with fillets. hint: you can also change the order of model history features by dragging the operations up and down. This also allows you to see how the model was generated stage by stage!
Add the finishing touches to the bin and apply a suitable material. Save your work! Now that you have learnt how to loft and shell, try making your own, unique litter bin. Try adding TEXT as a SKETCH. Here’s a more advanced bin, which was generated with a series of offset workplanes and rectangles. The text was cut into the front of the bin.