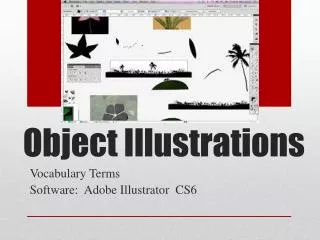
Mastering Illustration Refinement: Aligning, Grouping, and Editing Objects in Presentations
This comprehensive lesson focuses on refining original illustrations in your presentations. Learn how to work with multiple objects, including selecting, aligning, distributing, and flipping them. Discover the power of layers as you bring objects forward or backward, and master grouping, ungrouping, and regrouping to organize your designs effectively. Additionally, explore image editing techniques like recoloring clip art and adjusting fill colors, ensuring your visuals are cohesive and engaging. Perfect for enhancing design skills in any presentation software.

Mastering Illustration Refinement: Aligning, Grouping, and Editing Objects in Presentations
E N D
Presentation Transcript
Lesson 9 Refining Original Illustrations
Objectives Work with multiple objects Align, distribute, and flip objects Work with layers of objects Group, ungroup, and regroup objects Edit images
Lesson 9 Refining Original Illustrations 1 Working with Multiple Objects
Select Multiple Objects Using the Shift Key To select multiple objects one at a time: First click an object to select it Add objects to the selection by pressing <Shift> as you click another object.
Select Multiple Objects by Drawing a Selection Rectangle Start at a blank area of a slide Click the left mouse button and hold as you drag your pointer diagonally to create a rectangle surrounding the objects that you want to select. Only objects completelyenclosed in the selection rectangle are selected.
Remove an Item from a Group of Selected Objects One way is to deselect all the objects by clicking a blank part of the slide. Another way is to press <Shift> and click a selected item to deselect it, leaving the remaining items in the group selected.
Create a Diagram with Shapes and Connector Lines A connector line is a straight, curved, or angled line with special endpoints that can lock onto an object’s connection sites. When you rearrange objects joined with connector lines, the lines stay attached and adjust to the new position of the shapes they connect. Connector lines can be used in combination with shapes to create a diagram.
Lesson 9 Refining Original Illustrations 2 Aligning, Distributing, and Flipping Objects
Align Objects Horizontally and Vertically Use the Arrange button on the Home tab, in the Drawing group. Alignment options include: Align Left, Align Center, Align Right (horizontal) Align Top, Align Middle, Align Bottom (vertical) Distribute Horizontally and Distribute Vertically Align to Slide and Align Selected Objects
Distribute Objects Horizontally and Vertically To distribute objects horizontally: Position the first shape where you want it on the left and the last shape on the right. Be sure all shapes in between are selected, also. The Distribute Horizontally button will divide the blank space evenly between them. To distribute objects vertically: Position the first shape where you want it on the top and the last shape on the bottom. Be sure all shapes in between are selected, also. The Distribute Vertically button will divide the blank space evenly between them.
Flip and Rotate Objects To rotate a selected object: From the Home tab, in the Drawing group, click the Arrange button and choose Rotate. To flip a selected object: From the Home tab, in the Drawing group, click the Arrange button and choose Flip.
Lesson 9 Refining Original Illustrations 3 Working with Layers of Objects
Bring Objects Forward or Backward Click the Arrange button, then choose the Bring Forward or Send Backward commands. If the object is not visible, you can press Tab several times until the desired object is selected and then you can move it.
Bring Objects to the Front or Send to Back Click the Arrange button, then choose the Bring to Front or Send to Back commands to move the object to the front of all other objects or behind all other objects.
Use the Selection and Visibility Pane to Change Stacking Order From the Home tab, in the Editing group, click the Select button and choose Selection Pane. The Selection and Visibility pane opens on the right side of your screen. Rearrange the objects by moving the object name up or down in a list.
Lesson 9 Refining Original Illustrations 4 Grouping, Ungrouping, and Regrouping Objects
Group Objects To create a group of objects, first select the objects and then from the Home tab, in the Drawing group, click the Arrange button and choose Group.
Ungroup and Regroup Objects When the objects are ungrouped, they once again become individual objects. After working on individual objects of an ungrouped object, you can regroup the objects by selecting any one of the group’s original objects and choosing Regroup. The Regroup command finds all the objects of the original group that remain on the slide and groups them again.
Format Part of a Grouped Object Select the group then click an object within the group. The group remains selected, but the object also displays selection handles, indicating that you can change its shape fill, outline, and orientation without affecting the other objects in the group.
Lesson 9 Refining Original Illustrations 5 Editing Images
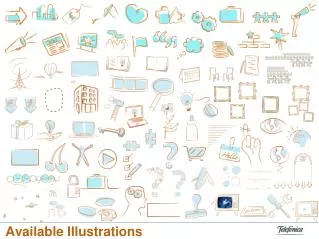
Recolor Clip Art The recolor feature may be applied to clip art images or pictures to blend them with the theme colors. Different Color Modes (grayscale, sepia, washout, black and white) are available as well as dark and light variations of theme colors. From the Picture Tools Format tab, in the Adjust group, click the Recolor button then choose the color mode you prefer.
Ungroup and Change Fill Color for Parts of a Clip Art Image Right-click the picture and choose Group from the short-cut menu, and Ungroup. A dialog box asks whether you want to convert this image to a Microsoft Office drawing object. Click Yes to agree to the conversion. Right-click the image and choose Group from the short-cut menu and Ungroup. You will see many sets of selection handles.
Ungroup and Change Fill Color for Parts of a Clip Art Image, Cont. Press Esc (or click any blank area of the slide) to deselect all of the pieces of the clip art. Select pieces individually to recolor, move, or delete them.
Delete Parts of an Image Delete pieces of an ungrouped image, you must select them and then press <Delete>.
Create Soft Edges From the Picture tools Format tab, in the Picture Styles group, select the Picture Styles button to view the Style Gallery Choose Soft Edge Rectangle
Compress Pictures Use the Compress Pictures button from the Picture Tools Format tab, in the Adjust group. A reduction in image quality will usually not be noticeable for on-screen viewing, but it will make a difference in printed output. You will have the option to delete cropped areas of pictures.
Refining Original Illustrations Lesson 9 Summary
Lesson 9 Summary—1 Select multiple objects when you want to perform the same operation on all of them. Select multiple objects one at a time by holding down Shift while clicking each object. Select multiple objects all at once by drawing a selection rectangle around them. Add items to a selection by using the <Shift> + click method. Remove an item from a group of selected items by <Shift> + clicking it.
Lesson 9 Summary—2 Selected objects can be aligned horizontally or vertically to the whole slide or to other selected objects. Objects can be aligned by the top, bottom, middle, right side, left side, or center. Objects can be aligned relative to the edges of a slide when the Align to Slide option is selected. Selected objects can be evenly spaced by using the Distribute Horizontally or Distribute Vertically options. Objects can also be evenly distributed across the width or height of a slide when the Align to Slide option is turned on.
Lesson 9 Summary—3 Flipping an object creates a mirror image of it. The Rotate Left and Rotate Right options rotate objects in 90-degree increments. When objects overlap, use the Order options or the Selection and Visibility pane to control which object appears on the top. The most recently drawn object will be on top until you change its order.
Lesson 9 Summary—4 Grouping two or more objects combines them so they behave as if they were one object. After grouping objects, an individual object within the group can be selected without ungrouping all the objects. To delete, resize, or rotate an individual object within a group, first ungroup the objects. After you are finished working on individual items in a group, regroup them.
Lesson 9 Summary—5 Vector-based pictures (for example, pictures with the .wmf file extension) can be converted into a group of PowerPoint objects by using the Ungroup command. Once ungrouped, the individual objects can be formatted and manipulated like any PowerPoint object. To reduce the file size of a presentation containing pictures, use the Compress Pictures command to reduce the resolution, remove cropped areas, and compress the pictures.