Download
1 / 154
1.54k likes | 1.55k Vues
https://www.intoresin.com/ :- Epoxy resin is a chemically created versatile substance having diverse applications in various fields. #IntoResinFreeGuide<br>

E N D
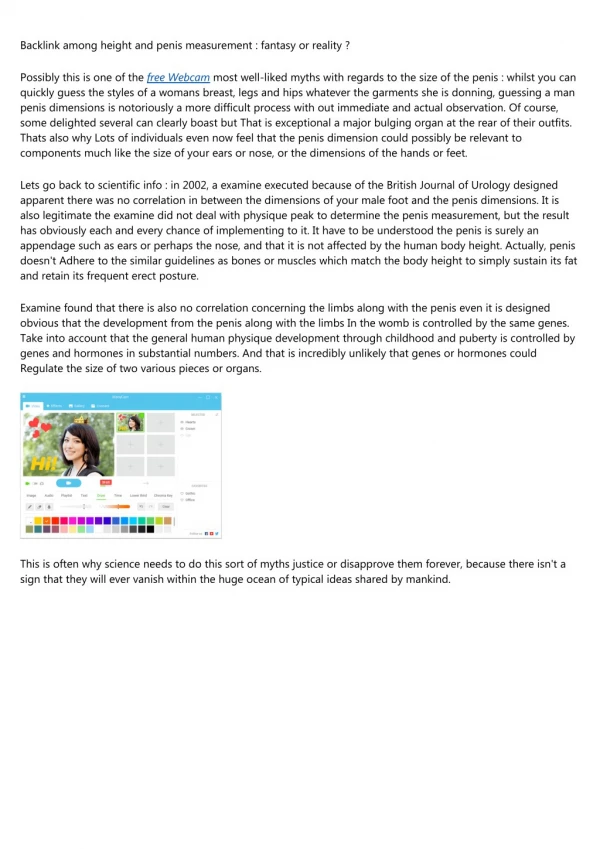
For Resin Beginners What is Epoxy Resin - The Ultimate Guide Epoxy resin is a chemically created versatile substance having diverse applications in various fields. Epoxy in its liquid form was primarily used as structural and engineering adhesive in aircrafts, automobiles, ships/boats, bicycles, snowboards and skis. It was also used as a bonding agent in products made of wood, glass, stone, metal and plastic. With the passage of time, the use of epoxy evolved from mere adhesive to a substance that can be used in a variety of art and craft projects. How come? Let's dive into the world of epoxy. IN TO RESIN What is Epoxy Resin Made up of? Epoxy resin is a combination of resin and hardening (curing) agent. It is thermosetting which means it hardens when exposed to heat or radiation. After hardening, epoxy resin becomes shiny and glossy. Once the epoxy is cured (hardened) it cannot be uncured. Epoxy resin is made up of bisphenol (a combination of acetone and phenol) and epichlorohydrin (derived from allyl chloride which is a chlorinated sub-chemical of propylene). Phenol was previously extracted from coal tar but nowadays it comes from petroleum.
Uses/Applications of Epoxy Resin in Art and Craft Modern art and craft projects are incomplete without the word epoxy. The use of epoxy resin has increased manifolds in the past few years. There was a time when people were not familiar with epoxy resin because its use was limited to construction industry. However, with the passage of time, it came out as a very versatile substance that can be used in a variety of ways not only in maintenance and repair works but decorative and creative jobs as well. Epoxy resin can be used creatively in various DIY art and craft projects. Here are some of many uses of epoxy resins: IN TO RESIN Jewelry Making Epoxy resin can be used in creating amazing jewelry pieces including necklaces, bracelets, rings etc. With incorporation of dry and artificial flowers, glitter and gold flakes, one-of-a-kind jewelry pieces can be created.
Whether it is an old center table or a boring work desk, epoxy resin can be used to transform these ordinary looking tables into jaw-dropping scenic masterpieces. IN TO RESIN Furniture Decorative trays, plates, resin geode and petri dishes Epoxy resin is a great substance to create DIY decorative trays, petri dishes and plates. Resin geodes can be created by incorporating glitter, crystals and decorative stones. Resin Art Epoxy can be used to create enchanting wall art pieces. Abstract resin wall canvas is very popular among artists and art enthusiasts. There are several techniques to create resin paintings; dirty pour, air swipe and swipe can be used to create fascinating effects.
Stone Carpets and Shower Trays IN TO RESIN Being water-resistant, epoxy resin is used for fixing indoor and outdoor stone carpets and creating floors for shower trays. It not only looks beautiful but completely seals the area and makes it water-proof. What things to keep in mind while buying epoxy resin? Epoxy resin is widely available online and in art and craft stores. There are so many options of resin available that a beginner may get confused on where to start and what to buy? Here are a few things that you should keep in mind while buying epoxy resin for your DIY projects. Select the Right Epoxy We have mentioned in this article 4 types of epoxies and their differences. Epoxy resin should be bought keeping in mind the type of project because not every epoxy resin works for every project. Some projects need a thin coating layer whereas others require filling-in deep spaces so the type of epoxy should be selected accordingly. Quality of the Epoxy Resin Epoxy resin is available in different price ranges. Usually low price products are of inferior quality and you might end up with a project that either does not cure completely or turns yellow over time. It is better to buy good quality resin even if it is coming at a higher price. You can check the reviews before buying resin for your DIY project. Health Hazards
Some epoxy resins may have solvents that when evaporated during curing can cause serious health issues. Before buying epoxy resin, you must check if it is safe or not. The packaging contains the information about probable hazards and should never be ignored. Epoxy Resin Supplies If you are planning for a DIY resin art project, there are some basic supplies that can get you started. The supplies may vary depending upon the type and complexity of the project however there are some supplies that you must have for a basic resin art project. Clear epoxy resin Hardener (curing agent) Measuring cups Mixing cups IN TO RESIN Popsicle sticks Gloves Respirator/Mask Silicone molds Color pigments/inks Embellishments (glitter, crystals, artificial/dry flowers, decorative stones, beads) Heat gun 4 Types of Epoxy Resin - Uncovering the Differences Resin art is very fascinating and after watching a few videos, everyone wants to create an amazing art piece all by themselves. If you are a beginner, you need to know about types of epoxy resin and understand the differences to avoid any disaster. Different types of resins have varying consistency (whether the resin is runny or thick), pot-time (time during which the viscosity of the resin doubles), curing time (time taken by the resin to get hard) and hardness (how hard the surface of the resin is). Here are the 4 main types and how they differ from each other on 6 attributes; depth, cure time, air release, UV resistance, hardness and application. Let’s uncover the differences.
IN TO RESIN Epoxy Resin for Surface Coating Surface coating or laminating resin is highly viscous and its consistency is more or less like honey. Depth If you are selecting epoxy resin for surface coating, you should keep in mind that you can pour it up to 3/8” deep. Cure Time Epoxy resin for surface coating hardens in 24 hours. So if you are using it in any of your projects, you need 24 hours for it to harden however it depends on surrounding temperature as well. Air Release Since all the attributes are interlinked, surface coating epoxy has great air release quality to untrap the bubbles. UV Resistance Surface coating resins have good UV resistance and will not lose gloss or color easily if exposed to UV light.
Hardness Surface coating epoxy resins cure to a very hard and strong finish to resist scratches. Application Surface coating epoxy resins are perfect for small castings, floor sealing, protecting pipelines, sealing and finishing countertops, and any product that needs protection from environmental damages. UV Resistant Epoxy Resin Depth UV resistant epoxy resin also can be poured up to the depth of 3/8”. Cure Time Depending on surrounding temperature, it sets 90% in more or less 24 hours. The speed also depends on the type of project and temperature of the surrounding area. IN TO RESIN Air Release Bubbles releases quickly in UV resistant epoxy resins as well and the surface will look clear and bubble-free. UV Resistance As the name suggests, UV resistant resins have the best UV resistance. They protect the products from yellowing caused by exposure to UV light for the longest time. Hardness UV resistant epoxy resin cures to a hard finish and the end product is durable. Application UV resistant resins are perfect for small castings, art coating, creating enameled look on jewelry, and sealing collages or photos. Quick Curing Epoxy Resin Depth Quick curing epoxy resin can only be poured up to 1/8” otherwise it will generate a lot of heat. Cure Time It takes only 4-6 hours to cure that is why it is called quick curing epoxy resin. Air Release
Quicker bubble release in quick epoxy resin. The resin surface will have less bubbles as air releases fast. UV Resistance Most quick curing epoxy resins are UV resistant though not as good as the UV resistant epoxy. Hardness Quick curing epoxy resin cures to a hard finish. Application Quick curing epoxy resin is mostly used where thin coat of resin is required. Since it is very thin, it is used to seal cracks in electronics, wooden products, and repair antiques. IN TO RESIN Deep Pour Epoxy Deep Pour Epoxy is low viscosity resin. This resin is thin and flowable and that is why it cures very slowly. Depth As the name suggests, deep pour can be poured where depth is around 2”. Cure Time The more the depth, the longer it takes to cure so deep pour takes 24-72 hours to 90% cured. Air Release To look crystal clear, deep pour resin needs to release more bubbles than others since it is 2 inches thick. Normally it will be formulated to have the best air release ability among all kinds of epoxy. To avoid air bubbles from the beginning, you can put a single coat of resin on the surface and then pour the deep pour resin. UV Resistance Deep pour epoxy also has good resistance to UV lights and protect the products from sunlight damages. Hardness Since deep pours are created for relatively bigger projects, their final finish is very hard and durable. Application Deep pour is perfect for bigger and more complex projects like river/ocean tables. It is also used for deep casting and molding of sculptures.
Advantages/Disadvantages of Epoxy Resin Epoxy resin has diverse uses. Where on one hand it is used to create magnificent one-of-a-kind jewelry pieces, it is used to seal and repair broken pipes on the other hand. Epoxy resin has its own sets of advantages and disadvantages. IN TO RESIN Advantages of Epoxy Resin It is ideal for coating and laminating because of its great adhesiveness and relatively longer pot-life. It is impact resistant and does not shatter so it is best for load-bearing forms It is water resistant Products made out of epoxy resin are durable Acts as a good insulator Disadvantages of Epoxy Resin The liquid raw material can cause skin allergies and eye infections. Once the epoxy is cured it becomes difficult to remove it from surfaces. Epoxy resin is not completely resistant to highly concentrated acids. Some products may turn yellow over time when exposed to UV light and sometimes even if they are not exposed to UV light.
Epoxy Resin Calculator Resin products have inspired many of us. They beauty, the finish and the unique creative incorporation of various substances with resin to create an utterly amazing product is still trending and is not going anywhere any sooner. For a resin product to look perfect, the calculations must be accurate. You can use a digital scale for precise measurements. However you can use this Resin Calculator to calculate how much resin would be required for your project (The amount is for a single coat of resin). IN TO RESIN Put in the length, width and thickness of the project and you will get the proper amount of resin required for the rectangle or square project. If you’re working on epoxy cylinder project, just put in diameter and height. Total amount that you get after calculation should be divided in two equal parts; 50% resin and 50% hardener. You can use a measuring cup to get the required amount of resin and hardener and mix it well to get started. Conclusion Epoxy resin is a great substance to work with. Sky is the limit for the products that you can make with epoxy resin. However, before getting started you should get acquainted with the materials to avoid wastage, damage and health issues.
What Is Resin Art - All You Need To Know About It Resin is the latest buzzword in the field of art and craft. You may have seen videos of amazing resin art in your social media feeds. So, what is resin? Get to know about types of resin, epoxy resin supplies, application of resin in art and craft; in short, everything about resin in this article. IN TO RESIN History of Resin and How did it all begin? Before getting into details of resin art, let’s understand the basics. What is Resin? Resin is a naturally occurring substance found mainly in plants and bugs. It has remained in use since long. In ancient Greece and Egypt, it was considered a valuable substance and was used in religious rituals. Shellac, balsam, and amber are examples of resin obtained from nature. Plants secrete and use this substance as protection in case of injuries and safety against insects. Before the arrival of synthetic resin, natural plastics like gutta-percha, lac, and cemented asbestos were used for commercial molding.
Synthetic resin was introduced by Leo H. Baekeland in 1909. It was called “bakelite” and is considered the first completely synthetic resin. This resin could be molded and used in various distinctive ways. Synthetic resin is a viscous substance which is converted into rigid polymers by curing (hardening by cross-linking polymer chains). IN TO RESIN What is Resin Art made up of? Resin art is created using synthetically created resin called epoxy resin. Epoxy resin was invented in 1930s by two scientists Dr. Pierre Castan and Dr. Sylvan Greenlee. The word “Epoxy” is a combination of two Greek prefixes “epi” and “oxy. Epi means “upon” and oxy means sharp or acidic. Epoxy resin is created by mixing resin and the hardening agent in equal quantities. It is popular for two things; chemical resistance and adhesive qualities. As the time passed and the properties of epoxy resin became more evident, its use in art and craft increased.
Properties of Resin Resin is known for its four main properties. Water Resistance Resin offers resistance against water and is used for sealing, and bonding . It is also used to protect delicate artwork from weather-related wear and tear. It can protect any surface, from concrete to wood and masonry to metals and plastic. Versatile Resin is a versatile substance used to create products of distinct types, sizes, and shapes. Where one kind of resin is used to make garbage bins, another type is used to make jewelry. IN TO RESIN Low Maintenance Resin products do not require much maintenance. Any dust or stains can be easily wiped off, and in extreme cases, a pressure wash will turn the product look as good as new. Ecofriendly Certain types of resins are made from recycled material, making it an environment friendly substance. Why Resin Art Become So Popular? Resin art isn’t new. It became popular in the wake of corona virus when resin artists started making videos of their resin art creations. There are hundreds of videos of resin art, including DIY projects for beginners to complex projects made by experts and every project is a masterpiece in itself. How to Choose Resin for Your Resin Projects? Choosing resin for any project depends upon various factors including: Pot time Time taken for the viscosity of the solution to double. For example, if the initial viscosity of resin is 5000 cps and it doubles to 10000 cps in 15 minutes then the pot time is 15 minutes. Working life Time you can take to use resin (coating, casting etc.) before it starts to get hard.
Cure time Time resin takes to harden/set completely. Clarity Whether it is a jewelry item, an item to be preserved, or an art piece, you want it to be crystal clear (unless the project demands a specific color or tint in the resin). A clear or color-free resin might be expensive, but it will give an accurate result. Epoxy resin is a clear resin, and polyurethane is opaque white. Application You require a different kind of resin depending on its application. For filling molds or objects with solid sides, you need casting resin. For objects without sides, you need a thinker and sturdier resin that sits perfectly on the artwork without running down the sides. IN TO RESIN Which Type of Resin Should I Choose? Uncovering the Differences Here is a brief description of the types of resin used in art and craft and decorative purposes. UV Resin UV resin is polymerized and cured by energy radiated from UV irradiation devices. It is used for bonding and sealing. In art and craft, it is used to seal collages and create an enameled look on jewelry. It can be used without mixing a hardening agent and takes a few minutes to cure under special UV lamp. Polyurethane Resin It is mainly used for coating and sealing purposes. It is used in furniture, floor and plastic coating, and product finishing. Its pot time is a few minutes and can take from minutes to hours to cure. Some polyurethane resins have a very quick cure time. Their down side is their moisture sensitivity. They don’t cure well in humid weather and may require special color additives for the same reason. Epoxy Resin It is the most widely used and popular type of resin. It is heat resistant and has excellent adhesive properties. Its pot time is a few minutes and can take from hours to days to get hard. The down side of working with epoxy is that it cannot be buffed and will need an extra layer of resin if you are looking for a smooth and shiny look.
Polyester Resin or Fiberglass Resin This flexible, low-cost, and heat-resistant resin is used in the construction industry, decorations, and furniture. Its pot time is few minutes and can take few minutes to hours to cure. The benefit of using polyester resin is that it cures to a very hard finish and gives a smooth shiny look when sanded and buffed. However it turns yellow after some time. IN TO RESIN
For working with resin as a beginner, one should always use epoxy as first choice. Epoxy is easy to work with, it does not require wearing a respirator mask, it does not get affected by humidity, and it has the most extended shelf life. Applications of Resin in Art and Craft Resin became popular because of its application in art and craft. Besides industry experts, no one knew about the applications of resins before it hit YouTube and TikTok. There are innumerable uses of resin in art and craft. Mentioned below are some relatively easier projects you can make using resin. Jewelry Resin is used to make magnificent jewelry pieces. Be it pins, pendants, rings, and charms, the options are endless. It does not require much experience and supplies to create a resin necklace or earrings for you, your friends and family. You can even start your small business of resin jewelry. IN TO RESIN Coated items Vintage furniture like old tables or bar stools can be transformed with pennies, broken china, marbles, or bottle caps submerged in resin. Some people have turned this pastime hobby into a full-fledged business. Preserve items Whimsical items like butterflies, dried flowers, feathers, leaves, pine cones, bugs, etc., can be preserved by adding resin to them. When the resin hardens, the item inside will be preserved and converted into paperweights, jewelry items, and even furniture. Paintings Resin is used as part of paint to enhance the colors, look, and finish of painting and used for the coating to make it waterproof. A marbleized abstract painting can be made by mixing epoxy resin with paints. You can also incorporate resin with fluid pouring to create a lacing effect in paintings. Supplies Needed for Resin Art To create resin art, you need some basic supplies that remain more or less the same in any resin art project. However, for more complex projects, you may require specialized supplies.
IN TO RESIN Epoxy/Casting Resin Resin is the main component of any resin art project. If you use resin for coating applications it is called epoxy resin and when you use resin for filling in the molds it is called casting resin. However, any resin in 1:1 proportion of resin and hardener can be used. Disposable Mixing Cups For any resin art project, you need your measurements to be accurate. For this, you need mixing cups with measurement lines to ensure you add the right amount of resin and hardener. You may need more cups depending on the number of colors used in the project. Wood Sticks You can buy resin stir sticks or regular Popsicle sticks to stir the mixture (get a separate stick for every cup to avoid color mixing). Disposable Gloves and Safety Glasses To protect your hands and eyes from resin and colors/paint splashes, you need disposable gloves and safety glasses. Is Resin Dangerous? Safety Measures while working with resin Resin is a chemical compound. Although working with epoxy resin is relatively safer as it is considered non-toxic, if mishandled, it can cause serious injuries.
When is Epoxy Resin Dangerous? Epoxy resin can be dangerous in its certain forms. Epoxy resin has three forms: cured, uncured and dust. When epoxy is cured (hardened) it is the safest. Uncured epoxy is the liquid form of epoxy. When it is mixed with the hardening agent, an exothermic reaction occurs and one should take necessary precautionary measures during this process. When a surface is smoothened, dust particles fly in the air and one should wear a respirator and glasses during this stage. The significant risks involve oral exposure (ingestion by mouth), dermal exposure (through the skin), and inhalation of vapors or dust. Safety Measures while working with Epoxy Resin Following safety measures should be considered while working with resin: IN TO RESIN Stay extremely clean Ensure good ventilation at the workplace (wear a respirator in case of inadequate ventilation). Opening a window or turning on the fan can help in the rotation of air and reduced chances of vapor inhalation Use tools designed especially for working with resin Always wear safety glasses, gloves, and shoes Wash hands thoroughly with water (never use vinegar, acetone, alcohol, or varsol as they tend to absorb in the skin) and use skin creams to avoid dryness and cracking Do not wear rings, watches, and bracelets while working with resin Avoid eating and smoking in the work area Don’t leave the cans without lids and always place them on plastic films Use sawdust, paper, and cloth as an absorbent in case of spills Use a resin that is approved/recommended for art and craft Don’t forget to read the safety instructions mentioned on the packages.
How Resin Art Works And Can I Make My Own? IN TO RESIN Resin art is an emerging art form. Every piece created using resin is one-of-a-kind. No one can completely duplicate resin art. The best part is that you don’t need to be a professional jewelry maker or an artist to use resin. However, you need to have the ability to follow instructions. There are several online resources, including written and video tutorials, books, and online courses to learn the art. Select a tutorial, buy the supplies from your local market or online stores and get going. You can check out our tutorial How to Make Resin Art, from which you can have a basic understanding of making resin art works. You can also search some simple projects like Resin Art for Beginners | How to make resin keychain or How to make resin necklaces on YouTube. Old and broken jewelry pieces, key chains, and other decorative items can be transformed through resin art. Once you get better at using resin, you can start bigger projects like transforming a furniture piece or making wall art. Conclusion Resin is a versatile material to work with. With basic knowledge and general know-how, you can create impressive resin art. The sky is the limit for applications of resin in the field of art and craft.
Resin Basics - How to Mix Colors There are many ways to mix colors and turn clear epoxy resin into wonderful jewel tones and a full palette of other gorgeous colors. The most tried and true methods are with colored inks and dyes, paste colorants, and powdered pigments. The following is a short primer on coloring resin. For more detail and a tutorial, go to: https://www.instructables.com/Resin-Basics-How-to-Mix-Resin-Colors/ Adding Color 1) Always choose colors according to the name on the label, or by a sample of the color. You can’t always tell a color by what it looks like in the container because the dyes are so concentrated. 2) Shake color bottles very well and often. Most dyes are a suspension of color particles, so you need to make sure the dyes are well mixed to ensure consistent color results. 3) Always start with the smallest amount of pigment and add more in tiny increments. It’s much easier and more economical to add dye than to have to lighten a color by adding more resin. When you’re familiar with a particular product, you can add color a little more freely. IN TO RESIN Colors Mixing After adding pigment, mix well, but gently so as not to incorporate a lot of extra bubbles. When the pigment is fully incorporated, check the color. Use the intensity of the newly mixed color to determine how much more colorant to add. If you get a big change in color, proceed by adding only one drop at a time. If you only get a faint color, you can try a few drops at a time.
Increasing Color Intensity Continue to add a drop or two at a time and then mix until you reach the depth of the colors you want. This method will give you a lot of control and allow you to achieve different intensities of color without waste. Mixing More Colors There are two main techniques for mixing up your own resin colors. You can add multiple dyes straight from bottles and mix into one portion of clear resin. Or you can mix colors separately and then mix those colors together in another clean cup. IN TO RESIN After Coloring Once your color is mixed, you can continue to work with the resin until it begins to set. The amount of working time will vary depending on the kind of resin, the temperature, humidity, etc. You can pour your colored resin into molds or bezels and make diy jewelry, toys, home decor, and much more!
How to Color Resin - Instructions by IntoResin Are you wondering what is one thing that you can add to bring a new life to your home? Don’t want to revamp the entire place since you know that some changes can satisfy you? Ever thought what makes your home look so beautiful? Well, don’t bother to confuse your mind when the answer is right in front of you- resin. Yes, not only does it look good but can also be made into any shape, size or design based on what type of change you are looking for. Resin is known to be one of the best and versatile items, especially when it comes to transforming it into functional yet amazing pieces for the home. The best thing about resin is that it is useful in many ways- be it in a living room, bedroom or dining room. Now, once you have decided to add resin to your home, the next step would be color it in your desired combinations. Yes, it’s clear and transparent; you are required to use some colorants that are made for this purpose. However, it’s not as easy to color resin as it sounds like. There are a number of minor details and requirements that, if not taken care of, would lead to dissatisfaction. So, it’s better to do some research on how to color resin than to regret after all the efforts. IN TO RESIN Right Colors/Resin Pigment When it comes to exploring the colors or pigments for coloring resin, the important thing is to make sure that the choice is perfect for the situation or purpose resin will be used for afterwards. Remember that not every media or coloring option would work well for all purposes. You will have to figure out why do you need to color resin so as to make sure that you don’t have to face any trouble once everything is in order. Considering their use, media options are divided into two major categories. Let’s dig deeper into each category and see where they can be used for. Liquid or Paste Like Consistency These types of colors are ideal for dyeing because of their high quality and productive nature. They are capable of making resin just the way you want. So, what are you waiting for? Get one of the following now: ResinTint: Designed with the aim to make it compatible with ArtResin, this resin colorant requires resin to work as a binder. Wondering what does it mean? Well, ResinTint is not designed to be added on its own; rather, it requires resin to mix into it to meet the requirements. Unlike alcohol ink and acrylic paint, ResinTint isn’t capable of bringing out the desired results until it is mixed into resin. It is just like ood coloring, where the material requires a binding substance. What makes ResinTint preferable
despite of other options is its non-flammable and non-toxic nature that doesn’t affect the glossiness, non-toxicity and non-flammability of ArtResin- another plus to go for ResinTint! Alcohol Ink: Since ink is a water based substance, it offers better pigmentation than other media options. You have to use a few drops of alcohol ink on resin and your desired color will be in front of you. However, just make sure that you use it for indoor purpose because its light fastness is unsuitable for outside use. Alcohol leaves the pigment in its place without disrupting the composition of resin. Based on their nature, Alcohol Inks are divided into two types: . Water-based inks that have solvents like acrylic inks in which, water leaves resin to face unfavorable chemical reactions that impose negative effects in one way the other. . The best thing about alcohol-based inks is that their transparency is controllable. All you need to do is to add a few drops to resin and wait until you get a gorgeous yet transparent color. However, if you want a saturated and vibrant look, add more drops of alcohol ink. IN TO RESIN Airbrush Paint: In case of using the combination of epoxy resin, airbrush paint turns out to be the perfect option. Just be careful about the high quality products as the color concentration tends to be a bit high. Though, if your purpose still requires airbrush paint, then one of the recommendations is to go for Aerosol by Schmincke. Acrylic Paint: This type of media option consists of binders, water, color pigments and other additives to maintain its durability. However, acrylic paint is not recommended for most of the purposes because of the water and additives that may lead to some serious consequences. Even, the end result would streaks or a dull surface. Powdery Additives and Color Pigments From normal and matte colors to metallic and shimmery shades, color pigments are available in myriads of options. The best thing about these pigments is their light resistance that doesn’t let colors to fade so easily. Glowing Pigments: Although color pigments are perfect, luminous pigments can be added to them for additional wow-effect. These pigments are divided into two types- first type of pigments are charged with UV light and glow in the dark while second type simply glows under the black light. There are many daytime colors like fluorescent pigment tint that is combined with the natural glow powder to give a nice splash of color. Also, mixing photo-luminescent pigment with transparent or clear mediums like resin, rubber, epoxy paint, silicone, powder coating, cement, plastic ink, glue, glass, praint road paint or clay can also bring a huge difference in the appearance. The glowing pigment will settle down, thereby leaving an amazing clear top with the desired feel. Just remember- the higher the amount of glow powder added to the mixture, the brighter will be the outcome. Glitter Powder: For exciting and amazing effects, glitter powder tends to be the perfect option. From classic metallic to holographic glitter, you name it and it will be
possible. Although it wouldn’t be possible to color casting resin but still, there will be added eye catching effects for others. Mica Powder: Mica is a form of a natural stone that has shiny flakes. When grounded, it coverts into mica powder having a fine glittery and sparkly look. So, if you want the resin to be shiny and shimmery with pearl-like effect, then mica powder for resin is the best thing you can go for. The best of all, it is available in multiple colors but brings in more sparkle to the finish product as compared to the color shades. Process of Coloring Resin The steps are simple yet a bit tricky as you will have to be really careful about the ratio and quantity of each substance being added into the mixture. Collect all the materials and other items needed to make resin. Make sure that you give enough time to each and every detail to avoid issues in the future. IN TO RESIN Make sure to cover the surroundings to keep it safe from the damages. Always wear protective gear- nitrile gloves, a breathing mask and protective goggles- to ensure your safety. Read the manufacturer’s instructions on the packet and identify the right ratio between resin and hardener. Add a colorant and start mixing resin. Always remember to start with a small amount of pigments to see which shade or intensity of colors you want. Avoid adding a high amount of color as it mayalter the mixing ratio. If you want to have the translucent color effect in resin, then go for a high quality of powdery additives, particularly mica powder. It is one of the best options to get that translucent look. Important Tips to Color Resin Resin is not an easy material to deal with. Similarly, you will have to the right color or media options to come up with the perfect resin color. To avoid making any mistake or facing dissatisfaction at the end of the process, here are some tips to take into consideration: The first and foremost thing is to pay attention on the mixing ratio. Make sure that you mix the right amount of resin and hardener or else, you might have to face some unforeseen problems. Likewise, addition of colors also bring some changes into its composition. So, always follow the measurements as stated by the manufacturer or find some standard ones. Use paints that have low water content and are highly concentrated or pigmented Start with a small amount of paint and resin to make sure that the resultant is according to your expectations.
Coloring resin doesn’t mean that it will be prone to UV protection. The yellowish shade of epoxy resins is less noticeable without UB protection as compared to transparent resin but, the color would fade over time and yellowish shade turn into a new color. Make uncolored resin in the beginning to get an idea about the handling techniques. Once you know how to deal with it, it would be much easier to give any color you want. Frequently Asked Questions (FAQs) Is it possible to color epoxy resin with a color? Yes, it’s possible- just make sure to use a highly-pigmented two-component paint like a car paint. Normally, it’s recommended to color resin while casting but, there are some applications where it requires paint- for instance, aquariums or terrariums. IN TO RESIN Is Epoxy Resin Efficient for heat resistance? Casting resin is famous to resist heat with temperature anywhere between 700C and 1000C. However, if it is colored, its heat resistance ability would be decreased. So, whenever resin is colored, especially for epoxy tables, it’s recommended to apply an additional layer of clear epoxy resin for added beauty. What’s the process of resin dyeing? Primarily, it’s the same as that of other types of resin- mix two substances followed by the addition of color media or epoxy dye. Mix slowly until everything gets in harmony and there will be no air bubbles in the resultant. What is the right amount of color to be added to resin? Irrespective of the type of colorant chosen, always make sure not to exceed from 6% according to the total volume of resin. Any amount higher than 6% may disturb the chemical composition and balance of resin. What is the process to tint resin for transparent colors? When tinted before casting, resin still remains a bit transparent. So, if this isn’t the goal, then it’s better to go for airbrush ink, printer inks or color pastes.
Can epoxy resin adhesive be colored? Yes, it’s possible but, would take longer time than normal resin. Adhesive takes more time to dry after coloring. Can resin be painted? Although there are different methods for painting, the answer remains the same- resin cannot be painted! Let’s discuss each method in detail: Oil Paint:Oil paint has never been compatible with casting resin. Since it contains lipids that do not combine with resin, it creates lumps thereby making it difficult to use it for coloring resin. IN TO RESIN Watercolors:Watercolors are rarely recommended and even used on resin. Their low pigmentation doesn’t color resin enough due to which, you would have to use a high amount of watercolors to get the desired shade. Their hard consistency is another reason why they cannot be mixed with resin. Nail Polish:Yes, nail polish cannot to be a good way to color epoxy resin. However, dripping it on wet resin can help to color resin and create effects. Even, painting with nail polish can give amazing looks to resin charms. Latex Paint:This option is not recommended as a resin dye. People, who have used it, are well aware that it makes resin stringy and inappropriate for giving any shape. Are coloring methods for resin different for UV resin? There is good news that all methods for epoxy resin can be used for UV resin as well. They are- Alcohol inks, pigments, epoxy resin color pastes and airbrush colors. Now that you are aware of different media options, methods and tips and tricks to color resin, it would be the right time to get an item for your home. All you need to do is to find out the right spot for resin followed by the right color and shade that would complement the entire space. Once you have these details, the next step will be to follow this guide and see how things would proceed for you.
Where to Buy Resin - What Should Be Considered IN TO RESIN Nowadays is the time when people appreciate everything made with someone’s hands. Handcrafting became popular last years and today you can find sites (such as Pinterest) which offer you ideas in different projects. In such way you can express your individuality creating unique product. Epoxy Resin Projects are very popular among artists. Epoxy resin consists of two parts (resin and hardener) which must be mixed very careful to avoid bubbles and reach crystal clear effect. The spheres which it covers are very various (jewelry, projects with wood, paintings, floor coating, modeling etc.) that’s why you won’t make mistake choosing that product. Why Is Resin So Expensive Most artists while working with epoxy resin face the question: why is resin so expensive? Can we find any alternatives? Almost everywhere in different social pages, online stores and blogs you can find epoxy resin products. After watching tutorials, people all over the world try to make the same thing or to create their own one. But when they go to the local store or purchase online the problem appears – why epoxy resin is so expensive?
The average price for epoxy resin made in the USA is approximately 110-150 $ for 2 Gallon Kit and 500 $ for 4 Gallon Kit. So epoxy resin costs approximately 0.9- 1 $ per ounce. Sometimes Amazon offers coupons applying which you can save an extra 20%. But if you make some big project like epoxy resin flooring or river wood table it is not so easy to spend a thousand of dollars. You can find cheaper variants at some Chinese online stores (7-9 $ per kg) but minimum order starts from 20 kg. The reason why epoxy resin is so expensive isn’t because of popularity and common use nowadays. Epoxy resin is the unique material good for big and small projects with great properties which help your product look stunning: clear and smooth surface, non-yellowing effect, water-resistant and ideal for casting in the shape you would like. We can highlight several reasons why epoxy resin is worth to be so expensive: popularity and wide use; IN TO RESIN expensive materials; the country of origin; the amount of epoxy resin. Of course, the high demand of the product influence on the price at the market but it is important to know that the materials for epoxy resin are not cheap. The process of making the product demands well-trained specialists and well-equipped workplace. As I’ve mentioned before the price depends on the country of origin of the product and on the amount of the product you need. We can say that the price of epoxy resin is truly worth paying for it. You will not find any alternative to such a great product with excellent features. What Should Be Considered The only sticking point is what facts should I consider while purchasing resin? Consider the following before you purchase resin. The first step is to know what exact epoxy resin you need for your project. There are manytypes of resin with special characteristics for your product. You can learn about types of epoxy resin and qualities in our article BEST EPOXY RESIN FOR YOUR PROJECT. Don’t allow to be mislead that any epoxy resin is suitable for all projects! The second step is to accept that epoxy resin isn’t a cheap product. There can be some inexpensive variants but usually such products are toxic, harmful for your safety, not crystal clear and can yellow after some time. Spare no expense on buying high-quality epoxy resin! The third step is to be aware of the amount of epoxy resin that you need for project. Of course, when you purchase the kit you can save some money but for “first meeting” with epoxy we advice you to buy a little bit. TIPS Don’t purchase a large volume of epoxy resin for a start!
Where to Buy Epoxy Resin Online Stores and Suppliers There are two ways how to do purchase – in specialist stores or online. As any aspect, these two ways have got advantages and disadvantages. Shopping online became the integral part of everyday life. Undoubtedly this is the most convenient way to purchase resin from anywhere. While choosing what you want you can compare prices, different types and brands including reviews of real customers about your product. You have possibility to view the whole range of products which they sell and decide exactly what you need. Internet purchasing opens you not only local market but items from all over the world which can be easily delivered straight to your door. This is the best variant for people who don’t like crowds and pressure from the seller. Buying epoxy resin online you find detailed instruction how to mix and pour your product, even there can be step-by-step tutorial about some projects. IN TO RESIN " I like purchasing online because while ordering big amount of resin I get some discounts. Besides that there great customer support service which are always ready to help me with my questions." Oleksandr, artist, KorchiStore. Complaints about buying resin online: difficult to log in bad customer service: sometimes it is really difficult to reach representative of the product on the website, usually they can send you e-mail explaining some details returned product problem delivery problem: it occurs that tracking information shows that it was delivered but still you haven’t got it If you made decision to purchase online, you can easily find any resin product at the following sites: amazon, ebay, etsy, aliexpress and etc. Without any doubts Amazon is the platform with wide range of epoxy resin of different brands and categories comparatively to other sites. Here you can find the detailed description of resin, video tutorials of how to use the product, ratings by feature and customer reviews. The price is also lower and varies according to the option you choose. The only problem is that the product you want are often currently unavailable. Ebay and Etsy offer less variants with poor instructions and higher price. But these sites have rich selection of accessories for epoxy resin projects. There are alsp some smaller family owned online stores which make a speciality of their epoxy resin products. Usually such sites are very interested in new customers that’s why they have good customer service and gifts but the price can be higher and the product not well-known among artist.
Finally, if you decide to purchase online don’t forget about one pothole – delivery charge. The good point is that they show the shipping price separately from the item cost. The shipping fees depend on the type of the product you choose. Most of the time when you buy resin within the country you get free shipping from some sellers. International shipping cost more especially taking into account the size of some resin kits. You should remember that resin is non-returnable product. There are some deals at different sites which occur from time to time but you have to check every time. If you exactly know the resin which you need almost all sellers offer different size of resin and it is more profitable to purchase bigger size to save your money. As we mentioned before, if you are a beginner and want to try this handcraft better start with small amount of good quality. Local Store Purchasing at the local store has its benefits in any case. You feel more confident when you can touch the product, read its labels and instructions, listen to advices of the seller. The problem with delivering is resolved – you don’t have to wait and get your product in place. But what to do if you have no stores locally? IN TO RESIN The best way to know about some issues is to hear real feedbacks from real customers. We’ve watched reviews about buying resin at local and online stores and are ready to show you some results. Complaints about buying resin at the local store: distance problem: sometimes local stores are far away from your house what is inconvenient; poor choice at the store. Wecannot tell you exactly what type of purchasing is better – online or at the local store. It depends on where you live, amount of resin you need and your personal wishes. You just need to follow our tips, find suitable for you type of resin and way how to get it!
12 Hacks to Get Bubbles Out of Resin Every artist enjoys the feel of creating a bubble free resin craft that turns out flawless and reflects the vision of our thoughts. But finding bubbles in your resin during resin curing completely ruins the look of your project. It is a very common issue that when you mix resin with the hardener, it develops some bubbles and appears cloudy. What Causes Bubbles In Resin? Bubbles are one of the biggest issues when you hear resin craft. There are many reasons why these bubbles pop up. Here are the most common causes of these bubbles to develop in your resin: Reactions Sometimes these bubbles popped due to the reaction between resin, photo paper, and the adhesive used to mount the paper on the substrate. This reaction results in the formation of micro-sized bubbles in your resin. IN TO RESIN Off-Gassing Organic materials like wood, porous substances, leaves, some low-quality paper emit the containing air or moisture depending on the climate and temperature or the environment. These materials will continue to release air even after being covered with resin. This process is called off-gassing, and it results in the formation of bubbles in the resin. In some cases, these bubbles may even develop after several hours you have poured and torched the resin. Cold Temperatures The ideal temperature for your workspace and your resin crafting is 75-80 F or 24-30 C, which is slightly warmer than your room temperature. Epoxy resin is crystal clear, beautiful, and has a consistency similar to honey. But if the resin is cold, its consistency can be thick and clumpy which may make it difficult to work with. It will also appear cloudy or milky due to thousands of micro-bubbles. You won’t be able to eliminate these bubbles even by using a torch. How To Remove Bubbles From Resin? The most frustrating thing for an artist is working tirelessly on your craft and getting results that are less than satisfying. Finding bubbles in your resin craft ruins the look of your project.
It is very important to get those bubbles out of resin before it cures. Here are some fast and effective ways to remove those bubbles and make your project perfect again. 1. Monitoring the temperature of resin, surface, and surroundings Resins need an ideal room temperature of 70-75 Fahrenheit for curing. Of course, it isn’t convenient for everyone to have heaters running all the time to have the temperature maintained at the perfect rating for resin; so instead, opt for heating a small part of your house like a closet or bathroom perhaps. A portable heater can be more than enough for this purpose. A “Hot Box” is another good suggestion for smaller resin craft; especially if you are looking for casting resin in molds or bezels. 2. Selecting the proper resin IN TO RESIN It is very important to select the right kind of resin for the kind of work you are doing. For instance, using a thinner resin is ideal if you want to cast it in molds or bezels as it has low viscosity, hence, it has lower chances of developing bubbles. Nonetheless, if there are still some bubbles present in your mixture, there’s no need to worry. As your resin and hardener mixture is thinner, the bubbles will escape easily. Thicker resin tends to develop bubbles as it is generally for doming projects due to the casting having high viscosity. 3. Mixing resin and hardener carefully Exercise caution when mixing resin with the hardener as you aren’t just beating eggs. Mix it attentively and with care when you are mixing at the bottom or along the sides of the container. Often when dealing with a large volume of resins, develop bubbles is rather unavoidable. Some of the bubbles might come up to the surface of the resin while you pour or cast it. 4. Using a hot air gun or utility lighter This is the fastest and the most effective method, so make sure to start with this tip. You have to be really careful with this method because the flame is near the resin. Make sure to do it quickly and don’t keep the flame on the surface of the resin for too long. Only 1-3 seconds of heat exposure is required at a time. I recommend you to repeat it 1-3 times, also wait for several minutes in-between to allow the resin to cool. If you overheat the resin using the flame too much, it may not allow your resin to harden completely for months. Usually, when you overheat or over-use the flame, the cured product has a grainy, sticky texture on the surface instead of a smooth, slick surface.
5. Let bubbles escape naturally When the resin and hardener mixture is thinner, it usually has a thinner viscosity. They are less likely to develop bubbles but if some bubbles develop in the resin surface, give some time to escape naturally. The reason why they escape naturally is that the resin and hardener mixture is thinner, and the bubbles tend to release easier from the surface of the resin. But, it is only for thinner resin mixture, not for thicker resins. Thicker resins are generally used for doming projects, sculpture designing, and furniture. They hold bubbles, especially with thick casting. Doing resins are better suited for thin layers of pours. 6. Manually target stubborn bubbles Manually, you can get rid of bubbles using a toothpick or a pin. This method is usually used for a smaller art piece. Blowing on bubbles can cause them to pop on the surface. This process is slow and only works on small pieces like jewelry, rings, earrings, molds, or small river boards. Everyone has a hairdryer in their bathroom. Light heat from the hairdryer helps to remove air bubbles, but it is not intense like a hot air gun to fight against bubbles effectively. Dust a mica powder or liquid resin dye to decrease the surface tension of a mold. A small amount of colored baby powder may also work to stop bubbles from popping on the surface of the resin. IN TO RESIN 7. Pouring the tesin the right way Start by slowly pouring in the resin right in the middle of the cast while you hold the spout a few (two to four) inches away from the surface. This ensures an even distribution of the resin. If the mold you are using has an irregular shape, move the pouring cup evenly over the mold in a smooth circular motion. Be sure to avoid pouring resin over itself and keep taking different directions as you keep pouring the resin. If you make clockwise or anti-clockwise directions as you pour, this will prevent the formation of air bubbles. Nonetheless, once you have poured a layer, use a heat gun to remove the bubbles. Once done, repeat the entire process and pour one layer on top of the other to prevent the formation of bubbles. Once done, let it rest to dry which may take anywhere from 2-3 hours. 8. Using a pressure plot Pressure plotting is one of the best ways of removing bubbles from resin in case of large castings or when using clear resin like polyurethanes. You use a pot and place your mold/casting inside of it while pressure is created to reduce the size of the trapped bubbles. To ensure that the resin turns out bubble-free, the pressure needs to remain on the casting for the entire duration of the process.
9. Heating the resin in water Cold resin equals a lot of trapped bubbles, so that’s something we don’t want. Instead, if your resin is significantly heated, it will have lower bubbles in it. of course, you can't directly heat the resin; instead, placing the resin in hot water will do the trick for you. You can either have the basket of resin placed in a bigger basket or tub filled with hot water or if you are unable to make arrangements for that, you can put the resin in a plastic bag and have it placed in the water. By having your resin heated in warm water and pouring it in thin layers, you can eliminate over 90% of air bubbles trapped. A 20-minute warm water bath will do wonders for you. 10. Use powder to eliminate surface tension IN TO RESIN Especially when pouring resin in the intricate molds, if you dust the surface with a little amount of baby powder, you can eliminate surface tension that will prevent new air bubbles from forming while molding the resin. Additionally, de-molding a few times can also eliminate the bubbles in molds with curves and depth. And before you fill the mold completely with resin, having resin poured around all the sides of the mold will prevent any air bubbles from forming in the sides and getting to the middle. 11. Sand-out and repour In case your piece has already dried and still has a few bubbles that are either on the surface or just below it, you can use sandpaper and trim down the surface. This is particularly possible in the case of flat pieces. It can also be used for pieces that, although are not flat, can still be trimmed with sandpaper. Once done, clean the surface neatly and repour a thin layer of warm resin. 12. Mix from bottom up Whether mixing manually or with an electric mixer (using a drill) or a paddle, if you mix slowly and from the bottom towards the surface, it will naturally push all the bubbles towards the surface. This includes micro as well as big bubbles that often get trapped in case you are using something deep (like a bucket) to mix the resin. What Not To Stress Over? Although it is very frustrating for an artist when they try to create a bubble-free craft and it ends up with some micro-sized bubbles. It is a very common thing when it comes to resin crafting and you don’t need to stress over or worry about it.
Now there are many ways to get rid of those micro-sized bubbles that make your project look cloudy, sticky, or filled with bubbles. There are also many manual methods to remove bubbles from the surface of your resin. A minor size bubble is normal and won’t take away your peace because it won’t be noticeable normally. You need to understand that there are a lot of variables to play. It could be humidity, room temperature, or the brand of resin. You usually don’t have to worry about doing smaller undertakings and using a bezel or mold for casting. In bezels, bubbles usually get sometimes stuck in the corners. Blowing the bubbles on the surface and using flame don’t help in popping corner bubbles. You need to move them to the center of the mold physically. Then you can try to pop the bubbles with a toothpick or a pin. Toothpicks are very user-friendly. You can easily swirl the bubble onto the toothpick and quickly wiping it off on a paper towel. Resin is a type of epoxy glue that usually develops bubbles when they are poured and left to dry. But it is extremely important to pop those bubbles before letting the mixture dry completely. Getting bubbles out of the resin is an easy and safe process. IN TO RESIN How to Get Bubbles Out of Cured Resin? In case your resin has cured and there are still bubbles trapped inside, no need to fret as we still have you covered. Although there is no direct method of taking bubbles out of cured resin, you can still eliminate them by… eliminating them. . Start by locating where you have bubbles trapped in your resin. If you have tried the methods mentioned previously to get rid of bubbles from resin in its uncured form, it is most likely the few that still remain are just below the surface. . Use a sandpaper and sand down the surface until you have eliminated the layer with bubbles trapped in it. . Once you have done that, clean the surface thoroughly and eliminate the residue with a damp cloth. Be sure that there is no residue left before you put in a fresh coat of resin as it will again take you back to square one. . Finally, put a fresh, warm, and thin coat of epoxy resin to make up for the lost surface area. Be sure to have the resin that you are going to pour prepared according to the instructions previously discussed to ensure there are no bubbles that remain. Once it cures, your piece will look perfect with no air bubbles in it whatsoever! Working with resin can be very tricky. You have to be very careful to avoid unnecessary mess and to do it right. It is a type of epoxy glue that is used to protect art, seal jewelry, and fill molds in furniture and sculptures. Some epoxy resin brands are better and easy to handle but, many brands need to be poured in thin layers to avoid fewer ugly bubbles. Follow the instructions and tips given above to get a flawless piece of art without any bubbles. It is a long list of rules to follow but trust me, and the results would be worth it.
The Ultimate Guide to UV Resin for Beginners Most commonly used for jewelry making, metallic bezels, and small molds, UV resin takes craft projects to a whole new level. But what exactly is UV resin, how does it work, and which resin kit is the best option for the project? In this ultimate guide, we'll take a deep dive into these questions and more to help get you equipped with the fundamentals when using UV resin. What is UV Resin When we talk about types of resin, UV resin is the easiest to work with. UV resin falls under the synthetic resin category. It is also called 1-part resin as it does not need to be mixed with anything else. It remains liquid until it is exposed to sunlight or UV light. IN TO RESIN Characteristics of UV resin UV resin is excellent for DIY projects. They have several characteristics that distinguish them from other types of resin. Fast Curing. UV resin has fast curing (hardening) speed.This is the reason it is known as quick curing resin. Because of it’s quick curing, projects can be completed quickly and in less time making it perfect for small DIY projects. Longest Pot Time. Pot times the time during which the resin will maintain its liquid state. Since UV resin does not require a hardening (curing) agent, the pot life of UV resin is much longer than other kinds of resins. It will harden only when it is placed under direct sunlight or UV light. Cures At Low Temperatures. UV resin does not require high temperatures to cure. Depth. UV resin can only be used in projects where the required layer thickness is not more than 3mm to 4mm. In the case of a thick layer, you need to make extra layers of resin. Shelf Life. The shelf life of UV resin is very short, only six months. If the resin didn’t work well, you must check for its expiry date. The comparison between UV resin and epoxy resin When shopping for the best resin for the project, you may consider epoxy resin as another option. Many compare UV resin alongside epoxy resin due to some similarities. However, there are noteworthy differences between UV resin and epoxy resin. From durability and quality to curing time and application, it's essential to understand the differences between
the two types of resin to determine which fits the project's needs best. Here are a few significant differences between the two: Curing Time. Epoxy resin can require several hours or even days to cure fully, whereas UV resin cures in just a matter of minutes. Durability And Quality. Epoxy takes the win for durability and quality, but not without the extra work. Epoxy should be maintained regularly to last. UV resin can harden within minutes, making the process much faster and efficient, but it is still prone to wear and tear from heat and scratches. Curing Process. Unlike epoxy, UV resin is a one-step process with no measuring or mixing required. On the other hand, epoxy is a two-step process that combines resin and hardener to achieve a glossy, transparent finish. Application. UV resin is cured under a UV light layer by layer,so it is not feasible for big projects,while epoxy resin can be applied on more complex projects. IN TO RESIN Price. UV resin is more costly than epoxy resin. Applications Of UV Resin There are various application capabilities that UV resin has to offer. While the resin is a popular tool for jewelry making, it can also be utilized for craft decor and more. UV resin has become the ultimate DIY tool for crafters. Resin Jewelry Making UV Resin is ideal for jewelry making, whether it be earrings, pendant necklaces, bracelets, and much more. Due to its fast-curing application, crafters can produce twice as many pieces of jewelry. Not to mention, the resin does not give off any odor and results in a fully cured and transparent surface.
Craft Decorations A variety of silicone molds can be used with UV resin to produce custom pieces, including, but not limited to, unique craft decors such as coasters, ornaments, paper holders, and keychains. IN TO RESIN Wood Pieces Another form of material that can be used with UV resin is wood. While the application process can be a little more challenging, the result is much more rewarding. With wood resin projects, the application is similar to other materials, but it comes down to the shape of the wood and if it needs to be resized to fit the project's needs.
Other Uses UV resin can be used for sealing small surfaces of collages,making cast figurines,and finishing layers of projects by mixing it with colorants and glitters.Also,it can be used as epoxy resin adhesive due to its short curing time. How To Choose UV Resin UV resin should be selected keeping in mind the following factors: Type of Project. Resin should always be selected, keeping in mind the project. Not every resin works for every project. If you are making a jewelry piece, you require a resin that cures fast and gives a glossy finish to your project. So UV resin makes a perfect resin because it ticks all the boxes. IN TO RESIN Air Bubbles. For any project, you need a resin that forms lesser air bubbles as the bubbles on the surface of the project ruin the look. Select a UV resin that makes little to no air bubbles, so the project looks flawless. Curing Time. UV resin should be selected based on its curing time. Most UV resins cure under UV light in 1-2 minutes. A good quality UV resin shouldn’t take more than that to cure. Transparency. Since UV resin is primarily used in decorative projects and as final layers, it should be transparent and clear. If it doesn’t give a clear look, it surely isn’t a good quality UV resin. However, colored UV resins are also available. So, if the project requires colored UV resin, you can always use colored resin. Price. Most often, low-quality products are priced low. Do not opt for cheap UV resin, as it can ruin your project. Always buy high-grade UV resin, no matter how costly it may be. How To Select UV Resin Kits It's important to choose a suitable UV resin kit as there are several different kits available. Some may include a UV lamp or even a UV flashlight. Others will have specific types of casting molds, whether it be silicone, metal, or wood.
How to choose a UV lamp IN TO RESIN Depending on the complexity of the project, a simple UV resin kit will do the job. These kits include a standard UV lamp, silicone molds, mixing utensils, and even some color pigment options. Additional materials that may or may not come included are glitter or mica flakes. When it comes to choosing the perfect UV lamp, strive for a minimum of 4 watts. While some kits include a flashlight, a lamp is still the best and most innovative way to go, but some flashlights can be just as efficient. How to choose color pigments
Most color pigments are powder-based and can be used to create a colorful UV resin concoction. Not to mention, eye shadow palettes can also be used as color pigments for a truly unique resin effect. For the best results, choose colors that are concentrated or highly pigmented. For liquid color pigments, avoid any that contain water as it can cause a negative effect when mixing. For a comprehensive set of searching the suitable color pigment, you can check our previous post that provide more useful information. How To Use UV Resin If you are using UV resin for the first time, these guidelines will help you start and finish the project. Supplies needed to work with UV resin: IN TO RESIN Make a list of all the required materials and buy them from local market or any online store, whether it is a decorative item or a piece of jewelry, you need the following supplies as a starter. UV resin (buy excellent quality resin for a perfectly finished project) UV lamp or UV torch Silicon mold Color pigments or liquid ink in desired colors Measuring/mixing cups Popsicle sticks or stirrers Respirator or face mask Gloves Embellishments (glitter, dried flowers) Step by step instruction: Working with resin can get messy, so cover your workplace with cardboard, foil, or plastic sheet. Place all the materials within your reach, so you don’t have to move around when you need something. If the project requires a colored resin, pour the resin in a measuring/mixing cup and add colors. Mix the color with a stirrer. If transparent or clear resin is required, you can pour the resin directly in to the mold.
Since UV resin is applied where a thin layer nearly 3-4mm is required, pour the resin in a mold measuring up to 3mm for perfect setting and curing. If multiple layers of resin are required, you should let the first layer harden and then pour more layers. You can check by inserting a toothpick to see if the layer has hardened or not. You can add embellishments like glitter, dried flowers, or luminous pigments to enhance the product’s beauty. UV resin hardens under UV light,so hold the lamp or torch close to the surface of the resin for a few seconds to a couple of minutes. IN TO RESIN Be very careful while working with UV resin as heat is produced due to a chemical reaction when curing. Cautions When Working With UV Resin When working with UV resin, there are a few tips and tricks to keep in mind to produce the highest quality resin piece, such as temperature, storage, and even the environment. Here are some caution tips when working with UV resin: Cleaning. Be sure to use Acetone to clean off any leftover resin from the tools used. Environmental. Applying UV resin should be done in a well-ventilated space. While it might not have much of an odor, it is still a chemical being used. Storage. Try to avoid direct sunlight as it can cause the resin to flake and dull down. Equipment. A UV-supported light should be used to cure the resin. Tweezers are also helpful for placing small, delicate pieces together. Temperature. Keep the resin in a dry and cool place between 32 and 77 Fahrenheit.
Avoid Blistering. Embedding various elements in the project can also cause blistering. It can be avoided by laying the elements flat and pressing them down on each layer of uncured resin. Air Bubbles. Air bubbles produce when pouring the resin and mixing colors. The mixing process should be performed at a slow,steady, and gentle pace to alleviate the bubbles. Before curing, If any air bubbles form, use the sharp end of the mixing stick to pop the bubbles. Safety. Always wear the proper safety gear when using any type of resin, such as safety goggles, a respirator, and disposable gloves. Resin tends to soak through clothing easily, which can irritate the skin and potentially stain the clothes. Consider wearing protective clothing that can be dedicated to resin use. Finish. The appearance of a UV resin finish does not always have to be a one-way street. There are options to create stunning pieces that are gloss, matte, or even iridescent, depending on the type of UV resin used. IN TO RESIN Patience is key. When working with any kind of resin, it is best to be patient throughout the process to achieve the best results. Taking the time to pour each layer and cure them one at a time will save the stress of air bubbles forming and having a poor quality product in the end.
FAQ We understand there might be some questions about the use of UV resin, so we've gathered some of the most commonly asked questions to help set you up for success. How to tell if UV resin is fully cured? To test if the resin has cured, use a toothpick to check the condition of the surface. If the surface is not completely hard, it still needs time to cure. How long does it take for UV resin to fully cure? On average, it can take about 15-25 minutes for the UV resin piece to be fully cured. Epoxy resin can take a few hours up to several days. Some high-powered UV lamps can cure items within 3 to 5 minutes, depending on the wattage. For fast curing time, strive for at least 4 watts. IN TO RESIN What does it mean when the UV resin is not shiny? It depends on the mold being used to produce the resin design. Silicone molds can be matte, which will result in the resin curing as a dull and matte finish. If the mold is shiny, the resin will be as well. How to maintain UV resin for long-lasting durability? To preserve the condition of resin products, use a dry, soft fabric to polish the piece. You can also run light-pressured warm water to rinse off dirt and dust. Why is the resin still tacky after curing? It is entirely normal for most UV resin finishes to be slightly tacky after a few minutes of curing. It's good to let the piece rest alone in a dark, cool place to complete the curing process. It helps to cure thin, individual layers at a time to reduce the tackiness. Conclusion As someone new to the world of resin, exploring UV resin for projects is a great way to get the feel of what resin is all about. UV resin is especially ideal for small time-sensitive projects and can still produce high-quality results. It is essential to do thorough research on the types of UV resin on the market today as each resin can offer different possibilities. This ultimate guide to UV resin for beginners helps set you up for success on your next resin project!
Getting Started With Resin Casting The versatile art of resin casting is alluring for several reasons. One does not need to have outstanding artistic abilities to create a stunning product. The process requires patience and time, but it has proven to be incredibly therapeutic for most. It is perfect for people who want to indulge in a meticulous creation and have a charming keepsake to show for their efforts. After seeing popular videos of people resin casting online, it can be tempting to rush to start your first project. However, you need to keep several things in mind before this to ensure the best results, as well as your safety. We hope this article can help you in your exciting journey ahead so you can make beautiful masterpieces to share with friends and family. What is Resin Casting? Resin Casting? IN TO RESIN Resin casting is a process in which liquid synthetic resin is mixed with a curing agent, typically at or near room temperature. This mixture is poured into the desired mold and, due to the curing agent, it hardens into a solid, as the liquid resin acts as a monomer and polymerizes into the polymer. Once this reaction is complete, the hardened casting is removed from the mold. The size and shape of the mold vary because this technique is used at a hobby level and a small-scale manufacturing level. What Kind Of Projects Can Be Made By
Like all crafting techniques, there is no limit to the possibilities of what can be made through resin casting. Resin art can be found in history when it was used to make ornaments and jewelry. In modern times, jewelry and decorative ornaments, such as pendants, earrings, and combs, are popular end products for resin casting and have a high demand too. It can also be used to make small household items such as trays, coasters, or ashtrays. Other trinkets may include keychains or bookmarks. You can customize your resin mixture to add a charming personal touch to your items. Some ways to do this are by preserving dry flowers in resin or adding colored glitter and dyes. Some people add in beads, tiny shells, or other tiny jewels. However, that requires a higher level of expertise. In addition to being a popular hobby, it can also be used for commercial products. Resin products, especially when it comes to wearables and ornaments, are incredibly popular and in-demand, making them an excellent choice for a start-up project. A lot of small-scale manufacturers also use it to create figurines and collectibles. There are multiple types of resin that help you achieve the end product you want. Epoxy resin is widely used in creating art. IN TO RESIN Due to their popularity and demand, multiple small businesses have sprung up making customizable resin items, which you can learn to do as well. Resin Casting can be mastered by anyone and they can subsequently profit from it. How to Cast Resin? Needed Products To start, you will be needing: Desired casting resin or epoxy for jewelry. Safety equipment. Hardener Desired molds. Thick plastic sheets to cover your surface. Heat gun or blow torch. Measuring scales. Utensils for mixing like cups and spatulas or stirrers. Dyes, glitter, flowers, stones, or whatever you wish to personalize your resin with. Something to cover your resin with while it cures First, you must decide the kind of resin you want to use. Epoxy resin is recommended as it is less viscous than other kinds of resin, thus making it more forgiving for amateurs. Thicker
resins are generally used for polishing surfaces, not casting. After selecting your desired resin, it is vital to keep some safety measures in mind before you begin. To make the most out of the process in a safe and protected environment, professional resin artists suggest: 1.Wearing nitrile gloves to protect your hands from toxic resin as you work. 2.Having a well-ventilated working space to ensure that you do not inhale any toxic. fumes. 3.Keeping on a respirator mask if you are working with large amounts for a larger project 4.Having on goggles while pouring the resin, so it doesn’t accidentally get into your eyes Next, you need to focus on your workspace. You can do everything at home since resin casting doesn’t require any fancy apparatus or tools. You should start by covering your surface with a thick plastic sheet to avoid contamination by anything toxic. The surface you are working on must be completely leveled so that your resin sets evenly in the molds. IN TO RESIN Resin Casting Process After everything is set up, you can finally begin the process. The casting process is very methodical, which is part of its charm. There’s a set quantification and procedure to everything that can be very calming. The process goes as follows: Measurement Measuring the quantities of the resin and hardener is extremely crucial for obtaining the perfect consistency for your product. Each product has a different mixing ratio between epoxy resin and hardener, which helps it set properly. Unless you have a firm grasp of resin casting, we recommend you follow the package instructions for the best results.
Mixing Stir the mixture for at least three minutes to ensure complete incorporation. Add the embellishments of your choice at this step. Store correctly to make sure the mixture works and the consistency is right. IN TO RESIN Pouring After the mixture is ready, pour it into your mold. Make sure to have goggles on and pour as slowly as you can. The slow pouring helps ensure none of it splashes and helps in setting it properly. Ensure the resin covers every corner of the mold and is filled evenly so that the final result looks like you envisioned. Waiting The resin will take around seventy-two hours to harden fully.The mixture needs to be covered while it rests. This is to ensure that no dust or other particles get inside, otherwise, it becomes part of the mold.
Cleaning Up While working with resin, you are dealing with a lot of chemicals, which is why so many protective measures are needed. After you are done working, you need to thoroughly clean your workspace and all the surfaces used in addition to disinfecting for good measure. Furthermore, it is advised that you don’t wash the utensils and molds you used in a kitchen sink, but in a different place, preferably under running water without a basin. However, a washbasin does the trick too. Tips to Improve Your Casting Your resin product is now done. To ensure your product a masterpiece, we have some great tips for you too: Mixing and Instructions Follow the product instructions as far as you can, especially if you’re a beginner. Usually, those instructions are case-specific and lead to the best results. This is especially true for mixing. IN TO RESIN Try to be as precise as possible with the mixing ratio. If your project requires a different ratio than the one stated on the project, you can use online epoxy resin calculators. You should mix these components by volume rather than weight as the density of the resin and hardener differs. Use good quality measuring tools. Taking Care of Temperature and Humidity Epoxy resin is fairly temperature-sensitive, so temperature regulation is essential. It is advised to keep the temperature and humidity of your resin mixture constant. You can put your resin package in a warm water bath to bring its temperature, down to 20 degrees, before you use it. If the temperature is below 20 degrees, the curing process slows down. When it is above 20 degrees, the curing speeds up so projects that require a longer setting time can be done accordingly. Humidity affects the hardener adversely, so make sure that the humidity remains below 70%. A primer can be used on your work surface so that humidity does not interfere with your hardener and resin mixture’s curing. Bubbles Preventing bubbles while your resin sets is a problem many resin artists face. Unsightly bubbles in your creation can ruin the overall look of the end product. Fortunately, they can be prevented. After pouring the resin mixture, lightly heat the sides of the mold to help the bubbles that may have formed rise to the surface and pop. This
problem is more frequent in deeper molds, so make sure to pour into them as smoothly as possible. Another tip comes from professional resin artist, Kate Ede, from The Resin Reserve, who suggests the use of a blowtorch for smaller molds or a heat gun for larger molds. Some bubbles can also be eliminated during mixing. Mixing gently with a spatula and leaving the mixture to rest for a while between stirring helps. After pouring the resin mixture, lightly heat the sides of the mold to allow the bubbles that may have formed to pop. Miscellaneous Tips Patience is key. In the initial stages, you are sure to get excited and try to speed up the process. Keep reminding yourself that good things taketime. Otherwise, you will fall victim to novice mistakes. Some of them include not mixing well enough and taking things out of their molds too early. IN TO RESIN Some dyes may not be compatible with your brand of resin so make sure to check beforehand. Tips and Tricks for Personalizing the Resin Elements and How to Keep Them in the Middle It is important to make sure to use compatible dyes, glitters, gold flakes, etc. When preserving a dried flower, create the piece in two layers. The flower may float to the top if you fill the mold in one go, so pour some resin around the flower or an item that can float to the surface and let it harden a bit. Then pour the rest of the resin to complete your piece. That way, it keeps in the middle, as well as maintains its shape. Keeping Its Shape Sealing things, like photographs, in resin is a pretty popular trend. However, the problem may sometimes occur in that they lose their shape in the process by becoming crumpled or disfigured. For that, make sure to seal them with vinyl resin glue and let them dry. Then pour over the rest of the resin.