Download
1 / 9
100 likes | 116 Vues
Are you having trouble assembling your professional fingerboard? Then, read our article and learn all the steps on how to assemble fingerboard at once. Complete assembly instructions on how to Attach the fingerboard truck, Attach screws on truck etc. Visit:- https://xflippro.com/blogs/news/how-to-assemble-fingerboard

E N D
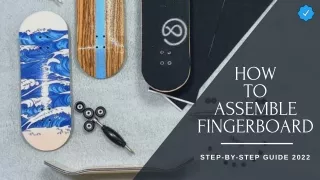
HOW TO ASSEMBLE FINGERBOARD STEP-BY-STEP GUIDE 2022
As an advanced product brand, XFLIPPRO is a modern fingerboard brand with various design styles. In order to better integrate art and fingerboard, XFLIPPRO has collaborated with multiple designers, committed to not only satisfying the performance of skateboards but also creating an art collection. On our website, we customize the manual fingerboard according to the customer's unique design and needs. At the same time, we also have limited designer fingerboard sets on the website for sale, with a high collection value. • ABOUT XFLIPPRO
ASSEMBLE FINGERBOARD STEPS Use a nail file or fine sandpaper to remove excess foam tape Attach the fingerboard truck Attach the screws in the fingerboard truck Remove the backing from the foam tape Place the wheel on the axle
STEP 1: • Attach the fingerboard truck to the deck with the 8 screws provided. • It is a good idea to place the screws in the truck before attaching them to the deck. • Remove the screws and attach the truck to the deck. The truck is not pre-threaded. This is normal for all fingerboard trucks.
STEP 2: • Make sure the screws go through the fingerboard truck. • If the screws are not tight, the truck will fall off. • If you have difficulty in a truck, it's better to put the screws in the truck before connecting them to the deck. • Remove the screws and attach the truck to the deck. The truck is not pre-threaded. This is normal for all fingerboard trucks.
STEP 3: • Place the wheel on the axle. The wide side of the wheel faces outward. • Place the nut in the tool and tighten the wheel to the axle. Ensure that the nut is tight but does not prevent the wheel from turning.
STEP 4: • Remove the backing from the foam tape, as shown. • Add board rails to protect your graphic, swap out your o-ring style bushings with bubble bushings, or add stickers to your deck!
STEP 5: • Use a nail file or fine sandpaper to remove excess foam tape. • Have fun riding. And tag us in any cool photos or videos you take, we're @xflippro on most social media!
Phone Number • 852 4607 3388 • Email Address • info@xflippro.com • Website • https://xflippro.com • Contact Us Check out our Collection at - • https://xflippro.com/blogs/news/how-to-assemble-fingerboard