Download
1 / 63
650 likes | 901 Vues
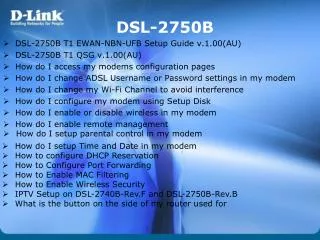
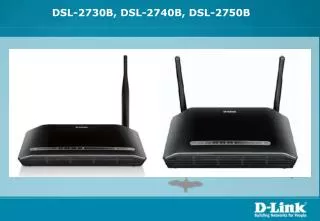
DSL-2730B, DSL-2740B, DSL-2750B. Agenda. DHCP Reservation Port Forwarding Guide MAC Filtering Web Filtering How to Enable Security on Wireless Network How to Upgrade the Firmware IPTV setup on DSL-2740B/DSL-2750B. DHCP Reservation.

E N D
Agenda DHCP Reservation Port Forwarding Guide MAC Filtering Web Filtering How to Enable Security on Wireless Network How to Upgrade the Firmware IPTV setup on DSL-2740B/DSL-2750B
DHCP Reservation This document will detail how to configure DHCP Reservation on the following models DSL-2730B Revision T1 Firmware AU_2.00 DSL-2740B Revision F1 Firmware AU_2.00 DSL-2750B Revision B1 Firmware AU_2.00 NOTE: DHCP Reservation is commonly used when a user utilizes their PC on other networks and not only their home network. Reserving an IP for a specific MAC Address will assist the user to obtain the same IP address from the router rather than configuring a manual IP address on their network adapter.
1. Log in to the modem with the computer connected to the modem via Ethernet. - URL: http://192.168.1.1 (default) - Username: admin - Password: admin (default)
3. Select the ADD button under the DHCP Reservation List section.
4. If you would like to reserve an IP for the PC you are currently using, click COPY YOUR PC’S MAC ADDRESS.
5. Enter an IP Address you would like to reserve for the PC e.g. 192.168.1.200
7. To renew the IP Address on the computer, click on the START menu and type cmdin ‘Start Search’. 8. Right click the cmdicon that appears in the search results above and select Run as administrator. - Type ipconfig /release and press Enter - Type ipconfig /renew and press Enter Example Command Prompt window.
Port Forwarding Guide This document will detail how to configure Port Forwarding on the following models DSL-2730B Revision T1 Firmware AU_2.00 DSL-2740B Revision F1 Firmware AU_2.00 DSL-2750B Revision B1 Firmware AU_2.00 NOTE: It is recommended that your PC is configured with a Static IP when using Port Forwarding.
1. Log in to the modem with the computer connected to the modem via Ethernet. - URL: http://192.168.1.1 (default) - Username: admin - Password: admin (default)
3. Select PORT FORWARDING in the left menu. 4. Click ADD to create a new port forwarding rule. In this guide, a rule for Remote Desktop is created.
5. The DSL-2730B allows you to select a preset rule or create a manual rule. - Select a Service: these are presets included in the unit’s configuration. - Server Name: this option allows you to create a manual port forward rule if no preset for your service exists e.g. Remote Desktop
6. Select the Server Name option to create your own rule. 7. Enter a name for the Server Name e.g. RDP-MyPC used in this example (RDP = Remote Desktop).
8. If you would like the rule to always be active, leave the Schedule as ALWAYS. You may also create a schedule by clicking ‘View Available Schedules’ 9. Enter the IP Address of the system running the Remote Desktop service. The system in this configuration was set with a Static IP – 192.168.1.3 - External Port Start: 3389 - External Port End: 3389 - Protocol: TCP - Internet Port Start: 3389 NOTE: If you have multiple PC’s you wish to enable a service such as Remote Desktop on, you will need to create a different External Port Start and End for each PC e.g. - PC 1: 3389 (standard) - PC2: 3390 - PC3: 3391 10. Click APPLY to save and activate the rule created.
MAC Filtering This document will detail how to configure MAC Filtering on the following models DSL-2730B Revision T1 Firmware AU_2.00 DSL-2740B Revision F1 Firmware AU_2.00 DSL-2750B Revision B1 Firmware AU_2.00 1. Log in to the modem with the computer connected to the modem via Ethernet. - URL: http://192.168.1.1 (default) - Username: admin - Password: admin (default)
3. Select PARENTAL CONTROL in the left menu, followed by the Block Mac Address button.
5. Enter a name (User Name) for the rule e.g. Kids-PC - Select Current PC’s MAC Address if you wish to create the rule for the PC you are currently working from. - Select Other MAC Address to create the rule for another computer on the network such as e.g. the Kids PC. - Enter the MAC Address in the correct format for the Kids PC (xx:xx:xx:xx:xx) - Select Manual Schedule to create a new schedule to block the computer from accessing the internet at specific times or select the pre-configured Schedule Rule (Always) if you wish to block the PC constantly.
6. Once all information is set, click on APPLY to save the changes.
Web Filtering This document will detail how to configure Web Filtering on the following models DSL-2730B Revision T1 Firmware AU_2.00 DSL-2740B Revision F1 Firmware AU_2.00 DSL-2750B Revision B1 Firmware AU_2.00 NOTE: The Web Filter feature cannot be configured to block websites to specific computers. All computers on the network will be affected by the filter.
1. Log in to the modem with the computer connected to the modem via Ethernet. - URL: http://192.168.1.1 (default) - Username: admin - Password: admin (default)
3. Select PARENTAL CONTROL in the left menu, followed by the Block Website button.
5. Enter the URL of the website you wish to block access too e.g. http://www.youtube.com - Select Schedule if you wish to set the filter to ‘always’ block the site or select a pre-configured schedule. - Select Manual Schedule to create a new schedule in which the site will be blocked. 6. Once all information is set, click on APPLY to save the changes and verify whether the sites are being blocked.
How to Enable Security on Wireless Network This document will detail how to enable Wireless and Wireless Security settings on the following models DSL-2730B Revision T1 Firmware AU_2.00 DSL-2740B Revision F1 Firmware AU_2.00 DSL-2750B Revision B1 Firmware AU_2.00 To setup wireless on your router and secure your wireless network, please follow these steps: 1. Open your Web browser and enter the IP address of the router (192.168.1.1). Select Username (admin) and password (the default is admin). Click on the [Login] button
2. Click on the ADVANCED > Wireless Settings > Wireless Basics.
3. Make sure the Enable Wireless option is selected. Your Wireless Network Name is displayed under the Wireless Network Name (SSID) field. You can change to anything you want. You can select a number of different Wireless Channel to avoid any possible wireless interferences. Click on Apply button when finished.
4. Click on the ADVANCED > Wireless Settings > Security Settings.
5. Select Disabled in [Enable WPS] section at the top of the screen.
6. Under Security Mode select the type of security you want to have on your wireless network. We recommend WPA-Personal. Under WPA Mode select 'WPA Only'. Under WPA Passphrase specify a passphrase/key. This will be your Wireless Security Password. You can just make it up. The key should be at least 8 characters long. WPA Group Rekey Interval - 0 WPA/WAPI Encryption – TKIP+AES 7. Click on Apply/Save button to save the settings.
When connecting your computers to the wireless network, make sure you use the same security settings on your wireless adapter e.g. WPA-PSK with the same passphrase/key. Note that it is case sensitive. Please refer to your wireless adapter's guide on how to connect to a secure network. Note: WPA-PSK is more secure then WEP. However if any of your wireless clients do not support WPA-PSK (WPA Personal), you will have to select the Shared option (WEP). Under Security Mode select Shared. Set Encryption Strength – choose 128 bit or 64 bit. Current Network Key – 1. Under Network Key 1 enter the key you want to use. 128 bit encryption requires 26 character HEX key (HEX characters include numbers from 0 to 9 and letters from A to F). Click on Apply/Save button to save settings.
Example below is from a Windows 7 laptop connecting to a wireless network. 1. Click on the ‘bar graph’ in the task tray, followed by selecting your network from the list and click Connect. 2. You will be prompted for the network key. - Enter the key you created in step 6 of this guide.
How to Upgrade the Firmware This document will detail how to update the firmware on the following models DSL-2730B Revision T1 Firmware AU_2.00 DSL-2740B Revision F1 Firmware AU_2.00 DSL-2750B Revision B1 Firmware AU_2.00 Ensuring the firmware remains up to date can assist with functionality / improved performances as well as adding additional features.
1. Open an Internet Browser and in the address bar type in http://192.168.1.1 then press Enter.
2. Please proceed to login with the required credentials, Default Password is admin then click Login. NOTE: The default username is admin and the password is admin.
3. Click on MAINTENANCE > Firmware Upgrade > Browse button as per below:
4. Select the firmware file which you downloaded. If it is a *.zip extension you will need to unzip it first. Once selected then you may click the Update Firmware button. NOTE: An example of a firmware filename is "DSL-2730B-T1-FW-AU_2.00", as newer firmware is made available characters in the filename will change accordingly.
5. The DSL-2730B will now begin to upload the firmware file. Please wait for the process to complete. 6. Once completed, click on the OK button:
7. You will be requested to login again. Notice at the top right side, the firmware will display the firmware file which you uploaded.
8. Now click on MAINTENANCE > System > Restore Default Settings button.
9. At the prompt, Click the OK button: 10. The DSL-2730B will now reboot with the factory default settings applied. Please wait for this process to complete.
11. At the below prompt, click the OK button: 12. The DSL-2730B firmware update process has been completed. IMPORTANT: You will need to login again, please manually configure the DSL-2730B. Do not use a saved configuration file as different firmware versions can have different characteristics.
IPTV setup on DSL-2740B/DSL-2750B This document will detail how to setup IPTV on the DSL-2740B H/W: F1 and DSL-2750B H/W: B1 models. IPTV is a multimedia service (television/video/audio....) delivered to you over IP based networks. This guide will assume you already have an active connection to the Internet. If you don't have Internet connectivity please run the included Setup CD-ROM or manually via the Web Configuration to first establish a connection to the Internet.
1. Login to the Web Configuration of your DSL-2740B/DSL-2750B. By default the IP address is http://192.168.1.1. An example has been provided below using an Internet Browser: 2. Login with your admin username and password when prompted. This is not your Internet Service Provider Username and Password.
3. Click on SETUP > Internet Setup > ATM. Click on the 'Add' button: