DSP BOARD
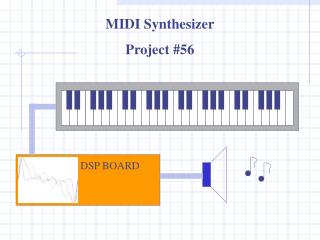
MIDI Synthesizer Project #56. DSP BOARD. General Outline. Background Information. - Wavetable Synthesis Theory. - The MIDI Standard. Hardware Implementation. - MIDI to Serial Interface. Software Implementation. - Serial Interface Loop . - Oscillator Bank . What is Wave-Table Synthesis?.

DSP BOARD
E N D
Presentation Transcript
MIDI Synthesizer Project #56 DSP BOARD
General Outline Background Information - Wavetable Synthesis Theory - The MIDI Standard Hardware Implementation - MIDI to Serial Interface Software Implementation - Serial Interface Loop - Oscillator Bank
What is Wave-Table Synthesis? • An efficient technique for the generation of a particular waveform • One cycle of the waveform is stored in a table prior to synthesis • To generate samples during synthesis, table lookup is performed for the desired number of samples
Multiple Wave-Tables • Based on a sum of fixed waveforms with time-varying weights • Allows for generation of time-varying timbres • Adequate representations of instruments can be achieved using only a few basis spectra
General Digital Oscillators • The fundamental sound generator in all kinds of synthesizers • Takes amplitude and frequency as inputs, and performs table lookup on the waveform tables • Wavetable oscillators use desired frequency to determine sample increment for table: increment = frequency * table length / sample rate • Multiple wave-table synthesis consists of several oscillators added together
Table Lookup Procedure • The sample increment is used to ‘resample’ the waveform in order to generate different frequencies • The table index is determined by the sample increment and the previous index (L is the table length): index = modL(previous index + increment)
Table Lookup Procedure (cont.) • Sample output is determined by the amplitude and the value of the wavetable at the current index: output = amplitude * wavetable[index] • The amplitude that is used is determined by the duration of the desired sound and the length of the amplitude envelope table: amp_incr = (table length)/(duration * sample rate)
How do we deal with non-integer increments for our tables? • Three common options: truncation, rounding, and linear interpolation • Truncation: ignoring the fractional part leads to the largest approximation errors, but takes the least computation time • Rounding: slightly better approximation error, slightly more computation time • Linear interpolation: best approximation error of the three, but uses much more computation time
Approximation Error • Approximation error for all three methods decreases with increased table length • Difference between results yielded by truncation and rounding affects only the phase of the resulting waveform, which is not detectable by human ears, so the audible error will be the same for both methods • Our wavetables are of sufficient length to use the faster truncation method, but the shorter amplitude envelopes need to use the linear interpolation method to be accurate enough
What is MIDI? • Musical Instrument Digital Interface • Standardized system of communication between musical and control devices • Specification: 31.25kbaud, serial, 8 data bits, 1 start bit, 1 stop bit, no parity, 5mA current loop
MIDI Messages • Generally, in the form of a status byte followed by one or more data bytes • Not all devices implement all of the specified parameters; for example, cheaper keyboards often don’t have key pressure sensors, and hence don’t send the key pressure data • The specification has a lot of details unnecessary for this project; all we handle are NOTE ON and NOTE OFF messages
Table 1. MIDI Messages Message 1st Byte (*) 2nd Byte 3rd Byte NOTE ON 1001 CCCC 0NNN NNNN 0VVV VVVV NOTE OFF 1001 CCCC 0NNN NNNN 0000 0000 (*) – First byte may be omitted in the case of a rapid succession of NOTE OFF or NOTE OFF messages Channel Range (0-15) Note Number Range (0-127) Attack Velocity Range (0-127)
MIDI Waveform 0 0 0 0 0 1 0 0 1 1 0 0 0 1 1 1 1 0 0 1 0 1 0 1 0 1 0 1 0 1
MIDI to Serial Interface • Need a way to get the MIDI messages from the keyboard to the DSP
Interface Circuit 5V 9V IN4148 6N138 MC1488 2 3 3 8 220 33 14 To DSP 2 5 4 1 2 6 3 1 220 5 7 MIDI IN 1N4148 - Diode -9V 6N138 – QT Optocoupler MC1488 – Motorola Line Driver
Derivation of Power for Interface Circuit -9V 9V +9V MC7805 9V +5V
DB-9 Serial Port Connector 1 2 3 4 5 6 7 8 9 Note: These pin descriptions are from the point of view of the MIDI instrument side of the interface; i.e., our hardware must supply the signals for the outward direction, and can ignore the signals that come in from the DSP.
Serial Loop Flow Diagram Check Serial Port For Byte Has Something been received? NO Branch Back To Main Oscillator Bank YES Read Byte Into Hold Location Does Mat_count = 0? Does Mat_count = 1? NO Does Mat_count = 2? NO NO YES YES YES Does the Byte = 090h? Byte = Note Number (nn), store 2 in Mat_count, Branch to Main Loop Byte = Velocity, Branch to Main Loop Branch to Main Loop NO YES Possible NOTE ON, but check for FEh, store 1 in Mat_count, Branch to Main Loop Compare nn against all oscillators to check for NOTE OFF. If Found, Send Rcvd_off to Main Loop. If Not Found, Check for Full Condition. If Not Full, Put Note Into First Available Oscillator, Branch to Main Loop
Oscillator Flow Diagram Check note number. Is it 0 (no note to play?) NO Have we received the ‘NOTE OFF’ message? Get wavetable increment from table YES NO YES Use ‘fast’ increment Have we reached the ‘hold’ point yet? Set output sample for this oscillator to 0. YES NO Use ‘slow’ increment Use increment of zero Reset registers, set output sample to 0 Is the note done playing? YES NO Update wavetable and amplitude indices Move to next oscillator Calculate output sample Perform lookup on wave and amp. tables
MIDI Keyboard Output 5 Pin DIN Connector For Keyboard Output 2 5 4 3 1
MIDI to Serial Interface 1 2 3 4 5 SERIAL OUT MIDI IN 6 7 8 9 9 Pin Serial Port Connector
Interconnect to DSP Board DSP BOARD Running Synthesizer Code SERIAL OUT MIDI IN
Problems and Challenges • UART clock rate • C-compiler • MIDI issues • Hardware
UART Clock Rate Problem • To convert serial data correctly, the UART (Universal Asynchronous Receiver-Transmitter) needs to generate a clock at 16x the data rate • To do this, it divides its external clock by a divisor programmed by the user • The divisor must be an integer
UART Clock Problem, cont. • The clock built into the EVM UART runs at 3.6864MHz • We need to generate a clock at 16 * 31.25KHz = 500000Hz • Divisor: 3.6864MHz/500KHz = 7.3728 • Forced to round down to 7 => 5.3257% error! Generally, UARTs can survive up to around 5% error, so there is a possibility for problems. However, analysis of the problem determined that, most likely, the data would be fine, but a frame error would be generated
C-Compiler Issues • Since the decoding of serial messages meant a lot of ‘administration’ work in our software, we believed it would be easier to do in C • Code Composer Studio has a very good C development environment and compiler, so we began working in C
C-Compiler, cont. • We were able to have good success early, but once we began to create more complicated programs, we had more and more problems • Unfortunately, programming in C is not nearly as efficient as Assembly, and we believe that our efforts failed because we didn’t have enough clock cycles between samples to make all of our calculations • Because of this, we went back to programming in Assembly
MIDI Issues • When we first integrated the hardware and software, we noticed that when we lifted a key, it wouldn’t go off, but rather begin playing on another oscillator as well • Looking at the MIDI waveforms on the scope showed that the keyboards were sending NOTE ON messages with zero velocity instead of NOTE OFF messages; it turns out that this is a valid method in MIDI
MIDI Issues, cont. • We noticed a lot of note errors; i.e., notes wouldn’t always play when you hit them, and wouldn’t always stop when you let go • We initially believed that this was due to our clock rate problem • After reading through the MIDI specification again, we found the source of the problem; the use of “running status bytes” • If the next message is the same type as the previous one, it doesn’t send the status byte again
Hardware Issues • Our initial design had a larger resistance value on the output of the optoisolator, and it caused some serious problems • The output of the line drivers had great transitions from –9V to +9V, but the transitions from +9V to –9V were very slow and dirty • Lowering the resistance to 220ohms cleaned up the transitions
MATLAB Interface • Using the MATLAB interface allowed us to perform simulations for every aspect of our project • Most importantly, it helped simulate the serial interface, including both message and clock rate issues
Simulating the Clock Rate Problem • While we couldn’t run the computer’s serial port at the MIDI rate through MATLAB (it only accepts standard rates), we were able to simulate rate differentials similar to ours • If we set the transmitter to a slow enough rate, we could tell the receiver to expect a different rate which was off by several percent • For example, we were able to set the computer to send at 2400Kbaud, and the DSP to receive at2531.868Kbaud, a difference of almost 5.5%. This was the highest difference we could attain without seeing many errors
MATLAB Interface, cont. • The MATLAB interface also allowed us to simulate the message handling done by the serial port • Finally, the MATLAB interface allowed us to test the performance of the synth itself, and to do so even before the hardware interface was built
Other Tests • Another part of the project which could not be determined during the design stage was the handling of the amplitude envelopes for each type of sound • The ‘slow’ and ‘fast’ increments, as well as the ‘hold’ points, needed to be determined by trial and error, and separately for each instrument
Recommendations • EVM board unnecessary; if this project was to be a real product development, a DSP board should be designed from scratch, using only processors, UART/serial port with correct clock, 1 D/A, etc. Could use external ROMs for all of the different waveforms; don’t need the external RAM • Even the processors should be designed specifically for these procedures (ASIC) • MIDI-to-parallel conversion should be done right on the PCB, without the DB-9/RS-232 connector