Introduction to Visual Basic .NET
Introduction to Visual Basic .NET. A version of the Hello World program in Visual Basic .NET. Objective. Our main objective is to become familiar with the VB .NET Integrated Development Environment (IDE or environment for short)

Introduction to Visual Basic .NET
E N D
Presentation Transcript
Introduction to Visual Basic .NET A version of the Hello World program in Visual Basic .NET
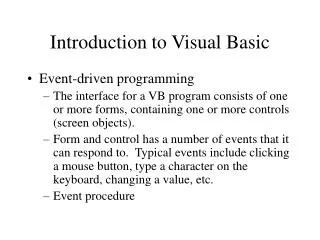
Objective • Our main objective is to become familiar with the VB .NET Integrated Development Environment (IDE or environment for short) • To accomplish this task, let us design an interface and write the associated program that has the user enter his or her name, then click a button and view a message welcoming him or her.
Start/Programs/Microsoft Visual Studio .NET/Microsoft Visual Studio .NET
After a splash screen, one sees the Start Page. Click the New Project button
New Project Dialog Box: Choose Visual Basic as the Project Type
New Project Dialog Box: Choose Windows Application as the Template
New Project Dialog Box: Click Browse to choose a location for your project
Project Location Dialog Box: Use the Look in: drop-down box to select a folder
Project Location Dialog Box: Use the Create New Folder button (if you want)
New Folder Dialog Box: Enter the name of the new folder, then click OK
Windows Explorer Folder we made Folder Visual Studio made
What is a form? • A simple answer is that it’s a window – a surface upon which we will build a graphical user interface (GUI). • A more complex answer is that there are a number of things called forms • A Form base class – all of the generic code for a window provided by Visual Studio • A specific, programmer-designed class Form1 – the programmer adds specific features for the particular project • A form object – an instantiation of the above
“Form1” in four places • “Form1” appears in four places • It is the name of the class we are making • Form1.vb is the name of the file containing the code for the class • “Form1” is the default value of the text property, which corresponds to what is written at the top of the window • It is the start-up object
Change the name of the class: click on the form then find the (Name) property in the Properties Window Properties Window (Name) property
Next change the name of the startup object • If you change the name of the class, you must change the name of the startup object. • The startup object is a property of the project that tells it where to start. • The only other option we would have for the startup object at this time is Sub Main
Right click on the project (one level down) found in the Solution Explorer and choose Properties
On the HelloWorld Property Pages, use the drop-down list to choose FrmHello as the Startup object and click OK
Return to the Properties Window, find the Text property and change it
One can list the properties by category or alphabetically Click here to alphabetize
Categorizing the properties Click here to categorize
Right click on the file in the Solution Explorer and choose Rename
It’s traditional (though in VB not strictly necessary) to give the file and the class the same name
Change the BackColor property of FrmHello • Click in the box to the right of BackColor in the Properties Window • A drop-down arrow will appear • Use the tab to select the palette from which you can choose the color
Customize the form with some controls • A control is an object (typically visible) that one places on a form to facilitate interaction with a user. It may be • A label to display a message • A textbox for the user to enter text • A button for a user to click • Etc. • The standard controls are in the toolbox.
Place the mouse over the hammer and wrench icon on the left.
Click on the label button on the toolbox, it will appear depressed. Move the cursor over to the form it will appear as a crosshairs and a letter A
Place the crosshairs where you want the upper left-hand corner of the label, drag across to where you want the lower right-hand corner and release. Upper left: begin drag here Lower right: end drag here
Click on the plus sign to the left of the label’s Font property. Make sure Label1 appears in the drop-down box of the Properties Window
This shows all of the individual properties related to the label’s font.
Use the drop-down list to select the alignment of the text, choose MiddleCenter (vertical/horizontal)by clicking on the square
Hungarian notation • The naming of the form as FrmHello and the label as lblWelcome follow a naming convention known as Hungarian notation. • Hungarian notation consists of a standard (three-letter) prefix that identifies the type of object followed by a name that starts with a capital letter and has some meaning within the project.
Hungarian notation (this reference is for version 6.0, but most of the prefixes are still useful)
Add a second label, lblName, that prompts the user to enter his or her name
Add a textbox, click on the Textbox button on the toolbox, use the crosshairs icon to drag the textbox into the desired location