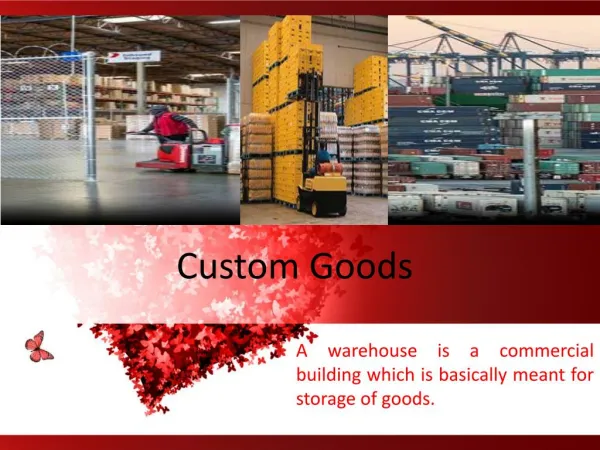
Warehouse Overview
Please read ALL instructions on every screen. Warehouse Overview. This presentation is intended to show the operation of the eCotton Warehouse program. While some aspects apply to all customers, others will need to understand that their operations are unique.

Warehouse Overview
E N D
Presentation Transcript
Please read ALL instructions on every screen. Warehouse Overview This presentation is intended to show the operation of the eCotton Warehouse program. While some aspects apply to all customers, others will need to understand that their operations are unique. For unique or specific requirements, please contact eCotton. Remember, on every eCotton program screen pressing F1 displays HELP for that subject. Click here to continue.
Overview Use these fast access icons. Each is also defined within a menu bar options. For example: Import bales from Gin is also found in Remote Inbound Import Bales from Gin. Create Outbound File Read an Inbound File Run a Custom Report Backup Bale Review Accural Report Import Bales From Gin Enter Bales Export EWR Transactions To Provider Import Shipping Orders Shipping Order Scheduling Shipping Order Picking List Shipping Order Entry Click here to continue.
Overview Close Minimize Title Bar Icon Bar Menu Bar Continue
Overview Additional Options - Screen Design All eCotton program screens have an additional options button. It is located in the bottom-right corner of each screen. The additional options provide extra functions for the current screen. When entering data on the entry screens, all the input areas may not be used. Those un-needed input areas can be ‘turned off’ using screen design. Click the additional options arrow and click on Screen Design. Continue
Overview Screen Design Note that the arrow pointer changes to a hand pointer. Move the pointer over any input area and click the left mouse button. When the mouse button is clicked, the input area becomes ‘grayed out’ and access is denied. Continue until all un-necessary input areas are selected. Click the additional options arrow again to save the screen design. Continue
Overview Entries Warehouse Reports Shipping Order Audit Utilities CCC Remote Entity Help Click on any Menu Option for details End Orientation
Overview Entity The Entity is the database that contains all the warehouse process data. You can have an Entity from previous seasons (years) or one Entity per warehouse ID. The Entity contains all the system parameter information, Customers, Shippers, Truckers, Tariffs, etc, It also contains information about the Gins that you do business with. The Entity’s System Parameters are essential because this data provides all the required settings for processing. If the system parameter data is missing or inaccurate, processing of data and calculations will be in error. Pressing F1 displays HELP. Return to Main Menu Continue.
Overview Entity - Entity Selection Choose which Entity you desire by clicking the entity name once to highlight, then click Select. Make entity copies for: Prior to performing major data functions: Rebuild Year to Date totals, changing a large amount of information, before you begin a new season, etc. Continue.
Overview Entity - Entity Selection The Entity name is displayed on the title bar. If it is desired to have a specific entity opened each time the program loads, click on the Default button with the entity highlighted. To Add or copy an Entity, click the + Addbutton. Continue.
Overview Entity - Entity Selection - Copy Entity To make a new entity and copy the data from an existing entity. Click on the drop-down arrow to select from a list of existing entities or use Master. Then Type the name of the new (Entity to copy to:) and click on the OK button. If you want this new entity to be the one that is used each time you open Warehouse, select Make Default. Continue.
Overview Entity - Printer Setup Use this screen for multiple printer setup if using different printers for different tasks. Continue.
Overview Entity - System Parameters Attention: If your eCotton system is installed on a network with multiple users, you must have all users exit the program prior to making changes to the system parameters. If you are the sole user of the program, changes can be made as needed. Continue.
Overview Entity - System Parameters - Company Used on printing of invoices and other reports. Edit the footer information to the desired text. Used as your Email return Address. Continue.
Overview Entity - System Parameters - Settings The settings determine the Warehouse storage charges calculated when a shipping order is processed Enter a date range that is not too restrictive. The bale and tare weight must be in a range that conforms to imported bales from a GIN. Tariffs are created using Entries Enter Tariffs from the Menu Bar. Continue.
Overview Entity - System Parameters - Settings Click on the ? To display a list of user-defined tariffs. Select the appropriate tariff by clicking on it to highlight, then click on the Select button below. Continue.
Overview Entity - System Parameters - Preferences If the number of bales on a shipping order exceed this amount, the order becomes a work order. If you have a two tag system, the bale number can be reassigned to the warehouse bale number by choosing Yes. Or, the system can be set up to prompt for reassignment. Continue.
Overview Entity - System Parameters - Locations Click here to setup the bale location scheme. Continue.
Overview Entity - System Parameters - Bale Codes Set up user defined miscellaneous flags. Continue.
Overview Entity - System Parameters - Interface In Utilities from the menu bar, there is an option to perform a backup. Indicate the drive location here where the backup file will be placed. If you subscribe to IsMyLoadReady, click inside this check box and enter the upload security code. When the annual accounting interface license fee is paid, update the license by clicking on this button. Continue.
Overview Entity - System Parameters - Blocks Non-negotiable electronic block receipts can be accommodated. Continue.
Overview Entity - System Parameters - EWR Controls how Electronic Receipts are handled. Continue.
Overview Entity - System Parameters - Recon & Cert Details Note Continue.
Overview Entity - System Parameters - CCC Loan/LDP Enter parameters in this screen if you put cotton into loan or pop cotton for a producer. This same screen displays if you click on the parameters button when creating a loan or LDP. Return to Main Menu
Overview Entries Return to Main Menu Continue.
Overview Entries - Customers Customers can be Merchants, Gins, Producers, or anyone who deposits bales into your warehouse and MUST be entered prior to adding bales to your warehouse. Refer to Inbound process from the Remote Read Inbound File…option to understand how the inbound layout affects the data being imported. Continue.
Overview Entries - Customers When selected, the customer data is displayed. Or enter the new customer information. This section keeps a running total of the customer’s data. Continue.
Overview Entries - Shippers When selected, the shipper data is displayed. Or enter the new shipper information. This section keeps a running total of the shipper’s data. Continue.
Overview Entries - Truckers Continue.
Overview Entries – Gin Parameters Set up a Gin ID for each gin you receive cotton from. Continue.
Overview Entries Continue.
Overview Entries - Tariffs Tariffs are warehouse charges for receiving, shipping (load out), re-weighing, storage and other tasks that are required by the warehouse customers. When the tariff is set up, a specific start date and charge amount is required to accurately calculate the tariff. Tariffs 1 – 5 are reservedand are automatically calculated and defined as: 001 - Receiving 002 - Compression 003 - Load Out (Shipping) 004 - User defined 005 - User defined All other tariffs are user defined as needed. Standard Storage is a required tariff and should be assigned a tariff number higher than 005. Continue.
Overview Entries - Tariffs When selected, the tariff data is displayed. Or enter the new tariff information. Enter date the tariff charge starts and the tariff rate. Return to Main Menu
Overview Warehouse Return to Main Menu Continue.
Overview Warehouse – Enter Bales Bales can be manually entered or edited. Enter Bales fast access Icon. Continue.
Overview Warehouse – Enter Bales Enter or edit bale date. When all required data is entered, click the Save button. Continue.
Overview Warehouse – Edit/Post Imported Bales… If bales are retagged or reweighed, they are imported into edit/post. Continue.
Overview Warehouse – Edit/Post Imported Bales… The imported data contains the Gin ID, Gin bale number, Gin weight and other information. This screen allows for editing of the data, if necessary, to allow posting to the master bale file. Continue.
Overview Warehouse – Edit/Post Imported Bales… The bale is now ready to be posted to the master bale file. Tag the bale for posting by clicking in the check box. Or, click the Tag All button. Click on the Close button. A confirmation screen displays. If Yes is selected, all tagged bales are posted to the master bale file. Continue.
Overview Warehouse – Edit/Post Imported Bales - Copy Use the edit/post copy function to perform automated tasks such as reassigning WH Bale numbers. Continue.
Overview Warehouse – Enter Bale Locations… Typically, bale locations are imported using a scanner file. Bale locations can be manually entered. Continue.
Overview Warehouse – Sample Boxes… Typically, sample locations are imported using a scanner file. Sample locations can be manually entered. Continue.
Overview Warehouse – Service Invoice… Create an invoice for services prior to shipping the cotton. Return to Main Menu
Overview Shipping Order Shipping Orders are from your EWR provider or manually entered. Return to Main Menu Continue.
Overview Shipping Order– Import Shipping Orders Import Shipping Orders fast access Icon. Click on Import Shipping Orders…. Continue.
Overview Shipping Order– Import Shipping Orders Import brings in your Shipping Orders from your provider software. This screen allows for editing of the shipping order data. Click the Post button to post the shipping orders into the warehouse system. Continue.
Overview Shipping Order Continue.
Overview Shipping Order Click the Ship button to ship the order. Continue.
Overview Shipping Order Ensure dates are accurate, then click Save. Continue.
Overview Shipping Order The shipping order invoice is generated and a listing of the bales on the order. Continue.
Overview Shipping Order – Picking List - Add Orders Enter a start and end scheduled date or click on + to enter a shipping order. Picking List fast access icon. Identifies which bales are to be pulled and staged for shipping. Continue.