U R S
U R S. TACTICAL / TERRAIN FLIGHT MISSION PLANNING. REF: BWS Flight Training Guide Dated Jun 2011 Tactical/Terrain Flight Mission Planning Guide Dated Jun 2012. TACTICAL/ TERRAIN FLIGHT MISSION PLANNING. PURPOSE.


U R S
E N D
Presentation Transcript
TACTICAL / TERRAIN FLIGHT MISSION PLANNING REF: BWS Flight Training Guide Dated Jun 2011 Tactical/Terrain Flight Mission Planning Guide Dated Jun 2012
TACTICAL/ TERRAIN FLIGHT MISSION PLANNING PURPOSE The purpose of this Tactical/Terrain Flight Mission Planning guide is to enhance the quality of training in the BWS, BCS, and FMT courses by standardizing mission planning methods. It will be used in conjunction with FM 3-04.203, 1/212th AVN REGT Flight Procedures and Rules SOP, and the BWS FTG, and the TC 1-228 (Task 2012) to establish planning criteria standards to which the 1/212th Aviation students will be evaluated. APPLICABILITY This Tactical/Terrain Flight Mission Planning Guide is applicable to all personnel under the supervision of the 1/212th Avn Regt who are accomplishing tactical flight operations in the OH-58 A/C.
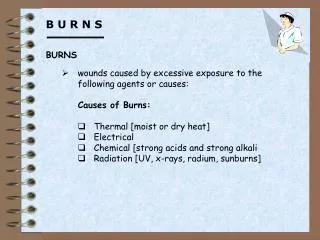
TACTICAL/ TERRAIN FLIGHT MISSION PLANNING TACTICAL FLIGHT Tactical Flight is a tactic that that uses Terrain,Vegetation,andManmade objectsto mask aircraft from Visual, Optical, Thermal, and Electronic detection systems. Tactical flight is defined as flight at 200 feet or less above the highest obstacle IAW the 1-212th SOP.
TACTICAL/ TERRAIN FLIGHT MISSION PLANNING CONDITIONS:Before a tactical flight in an OH-58 A/C helicopter and given a Mission Briefing, Navigational maps, or a navigational computer and other materials as required. STANDARDS: • Mission • Correctly analyze the mission • using the factors of METT-TC. • Enemy Situation • Troops • Terrain and Weather • Time • Civil Considerations • SAFETY
TACTICAL/ TERRAIN FLIGHT MISSION PLANNING STANDARDS: Perform a map or photo reconnaissance, using available map media, air mission planning system video map terminal, or photos.
TACTICAL/ TERRAIN FLIGHT MISSION PLANNING STANDARDS: Select the appropriate terrain flight modes. LOW LEVEL CONTOUR N. O. E.
TACTICAL/ TERRAIN FLIGHT MISSION PLANNING STANDARDS: Select the appropriate primary and alternate routes and enter all of them on a map, route sketch, or into the air mission planning system (AMPS).
TACTICAL/ TERRAIN FLIGHT MISSION PLANNING STANDARDS: Determine the distance ± 1 KM, groundspeed ± 5 knots, and estimated time enroute ± 1 minute for each LEG of flight. Determine the fuel required ± 25 Lbs (3.7 Gal) including VFR reserve IAW AR 95-1. 1ST LEG 5TH LEG 4TH LEG 2ND LEG 3RD LEG
TACTICAL/ TERRAIN FLIGHT MISSION PLANNING STANDARDS: Obtain and evaluate the weather briefing.
TACTICAL/ TERRAIN FLIGHT MISSION PLANNING STANDARDS: Perform Risk Assessment per the unit SOP 3 2 Assess Hazards Develop Controls & Make Decisions 4 1 Identify Hazards Implement Controls 5 Supervise & Evaluate
TACTICAL/ TERRAIN FLIGHT MISSION PLANNING STANDARDS: Conduct a thorough crew member briefing per unit SOP and FTG Task 1000. AMMUNITION INTELLIGENCE FLIGHT CREWS FIRE SUPPORT MAINTENANCE REFUEL
TACTICAL/ TERRAIN FLIGHT MISSION PLANNING TACTICAL / TERRAIN FLIGHT MODES
TACTICAL / TERRAIN FLIGHT MODES LOW-LEVEL FLIGHT: • Constant airspeed and indicated altitude • Travelingtechnique of movement • Enemy contact is NOT LIKELY. • Altitude - Day - 50 feet AHO • NVG - 80-200 feet AHO • Airspeed – Not to exceed VNE
TACTICAL / TERRAIN FLIGHT MODES CONTOUR FLIGHT: • Flight at low altitude generally conforming to, and in proximity to, the contours of the earth. • Varying airspeeds and altitude • Traveling or Traveling Overwatch techniques of movement • Enemy contact is POSSIBLE. • Altitudes – Day – Low altitudes conforming to the • surface of the earth. • NVG – 25 - 80 feet AHO • Airspeed – Day – Not to exceed VNE • NVG - Not exceed 70 KIAS SOP: Contour flight will be conducted at a minimum of 50 feet AHO.
TACTICAL / TERRAIN FLIGHT MODES N.O.E. FLIGHT: • Flight as close to the earth’s surface as vegetation, obstacles, visibility, or ambient light will permit. • Altitude and airspeed will vary according to the factors of METT-TCS. • Enemy contact is EXPECTED. • Altitude - Shall not exceed 25 feet AHO • Airspeed - Shall not exceed 40 KIAS
ACP 2 8 8 DESTINATION CP CP MAGNETIC HEADING 360 DISTANCE 12 KM EST TIME ENROUTE 4 + 50 ALTITUDE 650 DEFINITIONS and SYMBOLS Air Control Points Start/Release Points Check Points ACP 2 15+34 17+00 RP 1 Navigation Information Block Navigation Barrier Contingency Route 1+50 3.4 KM Hdg 265°
ACP 4 15+34 17+00 RP 1 DEFINITIONS and SYMBOLS AIR CONTROL POINT (ACP): An easily identifiable point on the terrain or an electronic navigational aid used to provide necessary control during air movement. • Generally designated where the flight route or air corridor makes a definite change in direction or at any other point deemed necessary for timing or control of the operation. • Indicated by a circle for an ACP or a square for an SP/RP. The exact landmark is identified by a dot in the center of the circle or square. • To the left side of the symbol Indentify the ACP (SP/RP) with a name or number. • To the right side of the symbol indicate the ETA.
AIR CONTROL POINT (ACP) 4+25 RP 1 2+34 ACP 2 ACP 1 1+10 SP 1 0+00
8 8 CP CP DEFINITIONS and SYMBOLS CHECK POINT (CP): • A geographic location on land or water above which the position of an aircraft in flight may be determined by observation or electronic means. • Indicated by an inverted “DOGHOUSE” with the associated number outside of the doghouse.
CHECK POINTS (CP) 2 CP CP 1 4+25 RP 1 2+34 ACP 2 ACP 1 1+10 SP 1 0+00
2 CP CP 1 ACP/CP SELECTION CRITERIA 4+25 RP 1 NOTE: The primary considerations in selecting an ACP/CP, especially at night, are ease of identification from the altitude selected and proximity to your location on the route of flight. An ACP/CP must be distinctive in it’s surroundings. ACPs must be planned directlyon the route and identified during the flight . CPs should be within 500 meters of the routebeing flown 2+34 ACP 2 ACP 1 1+10 SP 1 0+00
ACP/CP SELECTION CRITERIA • Either natural or manmade. • Avoid routes near built up areas. • Always confirm by adjacent features, natural and manmade. • The first ACP should be 3 – 8 KM from the departure/takeoff point. • The final ACP, known as the RP, should be approximately 3 – 8 KM from the OBJ/RT. • Intermediate ACPs/CPs Must be selected 5 – 20 KM apart. Any of the ACPs that conclude the SXS outbound corridors may be utilized as a start point (SP).
2 CP CP 1 4+25 TIME TICK MARKS RP 1 4 • Marks drawn to divide the course at desired [time] intervals. 3 2+34 • Two minute intervals can be used. ACP 2 2 • One minute intervals may be more precise and allow for earlier error detection. ACP 1 1+10 1 SP 1 0+00
DEFINITIONS and SYMBOLS BARRIERS: A prominent feature which, when seen, indicates to the crew when a checkpoint has been over-flown. Major highways and ridgelines are good examples. Barriers may also be parallel to the course to channelize your movement toward the objective. BARRIER SELECTION: • Use easily identifiable features. • Use two types when available – • Perpendicular to the course • Parallel to the course
CONTINGENCY: A backup plan to be used when the objective is not identified. A contingency plan begins at an easily identifiable point, preferably within 3-8 KMs of the objective, from which navigation to the objective can be restarted. It will be marked with time, distance, and heading to the objective and will be recorded on the navigation card and/or the map. CONTINGENCY PLANNING: • Minimum of one contingency for each objective. • Use identifiable features. • Compute time, distance, and heading to the RT or • objective from the contingency.
ADMINISTRATIVE PLANNING CONSIDERATIONS • Minimize the use of manmade features. • Avoid open areas and large bodies of water. • Avoid built up areas (1000m lateral distance). • Do not plan a route that will parallel wires within 100m. • Avoid all towers and their supporting structures by at least 500m. • Avoid planning a route within 1000m of an NOE box or route unless you plan to enter or traverse over it at the required altitude. • Course heading changes should not exceed 60º. • Compute and plot time tick marks along the route, from start point to release point, as necessary.
USEFUL PLANNING TIPS • Avoid planning across the corners of the map. • Avoid paralleling the edge of the map. • Avoid heading changes or other ACPs immediately following a map sheet change. • Minimize the number of heading changes. • Include important information directly on the map. • Do not plan to stop and restart the clock at each ACP. • Plan from the OBJ to the Take Off / Departure Point. ( Reverse Planning )
LOW LEVEL FLIGHT PLANNING NOTE: The following steps utilize the Reverse Flight planning technique. It is not a requirement but it is highly recommended that you use this technique. • Identify the objective area. • Determine the best available RP within 3-8 KM of the objective with barriers aligned to the expected landing direction or best approach heading. (The RP performs much like the IAF in an IFR approach. It is the last best fix aligning you with your objective.) • Within 3-8 Km from your origin, select an easily recognizable terrain feature as your SP. • Draw a line between the SP and the RP. • Select a minimum number of ACPs to avoid any built up areas, towers, noise avoidance areas, and tactical considerations. • Reconnoiter the proposed route for the highest terrain feature within 500 meters of the route and compute the required minimum altitude. • Select CPs along the route as aids to navigation.
x 3.28 419.84 feet ALTITUDE SELECTION • Reconnoiter a lateral distance of 500m (1000m NVG) on each side of the course line for each route segment and identify the highest terrain elevation for that segment. Example 128 meters • Multiply by 3.28 to convert from meters to feet. • Round up to the next 50 foot increment. 450 feet • Add 100 feet for vegetation. 550 feet • Add 50 feet Day (80 to 200 feet NVG) for obstacle clearance. +50 feet 600 FEET MSL
AIRSPEED SELECTION • Plan an airspeed commensurate with the terrain. • Do not exceed the applicable airspeed limits. • It is wholly acceptable and operationally sound to decrease airspeed in order to safely utilize the selected terrain flight altitude(ensure time tick marks reflect the selected airspeed).
RP SP CONTOUR FLIGHT PLANNING • TC 1-228: Contour flight • Maintain a safe obstacle clearance altitude while generally conforming to the contours of the earth. • Maintain airspeed appropriate for the terrain, enemy situation, weather, visibility, and ambient light. • Maintain aircraft in trim.
3 CP CP CP 2 1 CONTOUR FLIGHT LEG RP However, during contour flight headings, altitudes and airspeeds are all constantly changing so it stands to reason that Checkpoints for navigational aids would be used instead of ACPs. Naturally if the terrain feature is a reporting point or another point where some type of control is required then ACPs would be the appropriate symbol. Contour flight is defined as varying the altitude and airspeed in order to fully utilize the terrain in a tactical manner, minimizing the likelihood of being detected by the enemy. ACPs are normally used in terrain flight planning to denote a control measure of some sort. (i.e. a change of altitude or heading.) SP
4+57 4 3 3 CP CP CP 2 2 1 1 CONTOUR FLIGHT LEG RP Time tick marks can still be added by estimating the average appropriate airspeed based on the terrain, weather, ambient light, and enemy situation SP
NOISE AVOIDANCE PROCEDURES • Avoid residences , buildings, and farm related facilities by at least 500 feet slant range. • Avoid towns, cities, and villages by at least 1,000 meters laterally or 1500 feet AGL vertically, except when operating within approved corridors. • Avoid chicken houses, livestock and recreational areas by at least 500 feet slant range. • Avoid planted fields while hovering and/or at low airspeeds, particularly during harvest season (August – December). • Flight below 50 feet AHO shall only be conducted on approved NOE boxes and NOE routes. Transitions between and within TFTAs may be performed at terrain flight altitude at a sufficient altitude to see and avoid noise avoidance and noise sensitive areas and the before mentioned areas.
LOCAL AREA RESTRICTIONS • Do not plan a route within 1,000 meters of an active NOE box or route unless you plan to enter the NOE area or traverse the area at a minimum of 200 feet AHO. • Do not plan a route that will parallel wires within 100 Meters. • Avoid all towers (Micro-wave, water, radio, and all other tall towers) and their support structures by at least 500 meters • Course heading changes should not exceed 60°. • Avoid all RTs by 1,000 meters or overfly at a minimum of 800 feet MSL unless the appropriate radio calls have been made. (For safety purposes, planning flights within 1,000 meters of an RT should be avoided unless there is an intent to land at that RT.)
ROUTE PLANNING CARDS • A navigation card willbe completed for each flight. • Annotate all SPs, ACPs, RPs, and RTs and any other information deemed pertinent to the route of flight. • The minimum information and sequence for listing the route of flight on the navigation card shall be LOCATION, HEADING, DESTINATION, DISTANCE, GROUND SPEED, ETE, TTE, ALTITUDE, and REMARKS • No other mission planning products such as objective cards, synchronization matrices, etc. are required.
The flight time and distance from the original location to the SP and from the RP to the destination RT should be computed and considered for fuel and mission time requirements. Total time: To SP: 2+13 SP to RP: 15+03 To RT: 2+15 Total mission fuel: 19+31 The final destination line should include the destination, total distance, total time and contact frequency. As a technique, a small sketch can be inserted into the remarks block to aid in RT recognition.
TACTICAL FLIGHT MISSION PLANNING SP 1 ACP 1 3 + 05 SP 1 0 + 00 RP 1 CP CP CP CP CP CP ACP 2 6 + 25 RP 1 9 + 00 Start and Release Points: SPs and RPs will be numbered to coincide with the actual leg that they are on and entered on the flight log. SP 2 0 + 00 SP 2 ACP 4 5 + 05 ACP 3 2 + 15 RP 2 8 + 35 RP 2
TACTICAL FLIGHT MISSION PLANNING ACP 1 ACP 1 3 + 05 SP 1 0 + 00 ACP 2 CP CP CP CP CP CP ACP 2 6 + 25 RP 1 9 + 00 ACPs: ACPs will be numbered in numerical progression throughout the entire day’s mission and entered on the flight log. SP 2 0 + 00 ACP 4 5 + 05 ACP 3 2 + 15 RP 2 8 + 35 ACP 4 ACP 3
TACTICAL / TERRAIN FLIGHT PLANNING PRACTICAL EXERCISE
Our mission today is to transport two passengers from RT 400 to RT 571. The enemy threat is not likely so we will utilize the low level mode of flight and the traveling technique of movement.
Utilizing the reverse planning technique, we’ll first select our Release Point for RT 571. This area is ok but within 3 KMs of the RT. We should try and comply with the TTFMPG and use a point 3-8 KM from the RT. Both of these features will suffice. If the mission said that enemy forces were in the area you would want to select the Bridge in the lower area. But our mission is threat unlikely so the higher ground would be a good RP. The only draw backs are that the final turn may exceed the 60° turn rule and the final approach to the RT will be perpendicular to the recommended landing directions. We will initially do a map reconnaissance of the area within 8 KM of the RT and select the point that we feel will give us the best final reference for finding the RT. Even though the wires cross a light duty road, wires are safety hazards and should really never be used. ACPs RP 1 The intersection is a secondary improved road with a unimproved road. Not likely that you’ll find this point on the ground. This point is easily recognizable, 3 KM from the RT, lines us up with the final approach course and should alleviate the problem with the 60° degree turn rule. This area is totally wrong. It is a built up area that must be avoided by 1000 mtrs or overflown at 1500 ft. AGL You’re kidding ……RIGHT??????
With the RP selected, we’ll now select a good Start Point (SP) for this leg. Again, we’ll perform a map recon of the area within 8 KM of RT 400 and look for the best point at which we will begin our leg. These points meet the 3-8 KM requirement and are fairly recognizable features. However there are better points closer to the RT that will allow for us to get on our leg sooner SP 1 0+00 This area is ok but within 3 KMs of the RT. Again, we should try and comply with the TTFMPG and use a point 3-8 KM from the RT. These points meet the 3-8 KM requirement and should be more than adequate to begin our navigation leg. We should select the point that is more or less in a straight line with our destination. There are also manmade barriers to funnel us directly to our SP
Our direct route will take us through the 3 KM circle of RT 399 then through NOE Box 4 and north of the town of Glenwood. There are no towers or plotted obstacles in our projected path. RT 399 poses no real problem. The SOP allows for us to fly within the boundaries of the RT. If we don’t penetrate the 1KM boundary, all we have to do ( legally ) is monitor the RT frequency.
NOE Box 4 Must be avoided or our altitude must be changed from tactical flight altitudes. The SOP says that we must overfly all active NOE boxes at a minimum altitude of 200 ft Above the Highest Obstacle (AHO). Terrain flight is defined as 200 ft AGL. In order to fly through the box we would have to terminate terrain flight. We are going to have to modify our route by adding 1 or more ACP(s) in order to avoid the NOE box.
The first item of business is to scan for uniquely recognizable points that will alter our course enough to avoid the NOE box. We start our map recon Southwest of the southern tip of the NOE box. There are no major manmade points of interest but there is significant terrain relief. There is a significant water source (Honey Jones Mill Creek) to the southwest of the NOE box and there is a light duty improved road that crosses that creek at EV 786 958. We can reasonably assume that there will be a bridge there. Bridges make great ACPs. ACP 1
The point selected is good but it doesn’t quite clear the NOE box. RP 1 Option 1: Select another point further to the west. ( Not a great option. Any further west and we run into the 60° rule again. ) Option 2: Select another point to the north west and insert another ACP. ACP 1 SP 1
Option 2: Select another point to the north west and insert another ACP. Scan the area south of the RP and find another point that will alter the course enough to miss the NOE box. RP 1 ACP 2 EV 746 054 shows a “Y” intersection with a cemetery, and orchards. The course from ACP 1 to that point will clear the NOE box and set us up on a good course to the RP. ACP 2 ACP 1 SP 1