Download
1 / 27
270 likes | 407 Vues
FINDING AND COMPOSING A PHOTO. CHAPTER 9. LOOKING VERSUS SEEING. Have you ever lost your keys, phone, wallet, etc. and looked all over the house, and twenty minutes later you find them in your pocket, or on the table right in front of you. LOOKING VERSUS SEEING.

E N D
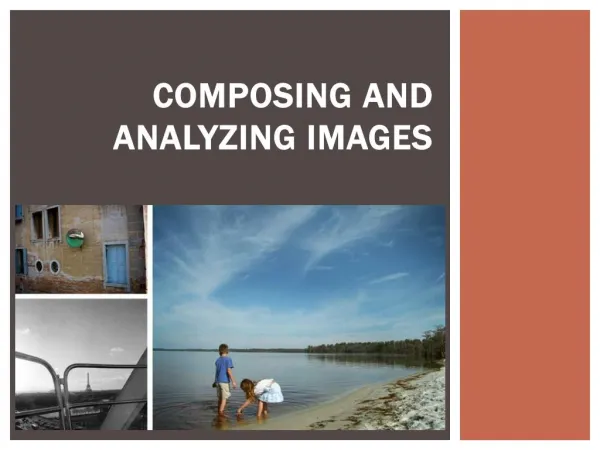
FINDING AND COMPOSING A PHOTO CHAPTER 9
LOOKING VERSUS SEEING Have you ever lost your keys, phone, wallet, etc. and looked all over the house, and twenty minutes later you find them in your pocket, or on the table right in front of you.
LOOKING VERSUS SEEING This situation occurs because although it’s very easy to look at the world, it’s far more complicated to actually see it. What is the difference between looking and seeing?
SEEING EXERCISES Photographers can train their visual senses to be more open and receptive to the world. One of the best ways to improve your seeing prowess is to remember what seeing feels like. Do this by going somewhere new. New places bring about different details.
SEEING EXERCISES Pay attention to what it feels like to see these new things, in these new places. It’s not the place that matters, its how you see it. You do not have to travel far, to activate this sense.
WARMING UP When you first step out the door to go shoot, take a picture. It doesn’t matter what it is, just take a picture. That first shot will remind you of the physically of shooting. Also looking through the viewfinder and seeing the world as your camera sees it.
MAKE AN ASSIGNMENT Chose a subject, Cars, Local Flowers, Sports, Etc. Chose a phase word, contentment, No Gain, penny Saved. The words don’t have to match the subject, this just gives you some way to view your frame from your location. A project can often be an inch wide and a mile deep.
LOOK AT OTHER PHOTOS • Go to the library, bookstore, or Google, find some work from the masters. • Pay attention to the following • How the image makes you feel • Composition • Exposure • Focal Length
LOOK AT OTHER PHOTOS Once you have an idea of the focal length, then you can start to figure out how close to their subjects they were standing. Such study will help you craft your skills and your understanding of how photographers work.
SKETCH AND DRAW Photography is a visual art form. Drawing will help you become more attuned with your visual sense. During the process of drawing something, you have to look at each shape and line that makes up that object. When you do this, you will cease to see it as an object, but rather as lines and shapes.
PAY ATTENTION/DO WHAT WORKS FOR YOU Pay attention to what it feels like to seeing effectively. Take the Card out of your camera. No Card = No Saved shots. Find shots and visualize them in the camera. Help you to remember what it feels like to be out and just seeing.
FINDING A SUBJECT A good photo requires a subject. Developing your ability to see will help you recognize images and help you understand the best way to understand them. Good pictures can happen anywhere. Usually start with an impulse, beautiful color, or a play of light.
FINDING A SUBJECT All good photos begin with light. The light will compel you towards a scene, not subject matter. Your eyes pack far more luminance-sensitive cells than it does color cells. Sunlight yields more contrast when it is shining from a low angle, (early morning, late afternoon)
FINDING A SUBJECT You’ll often work with existing light in two ways. 1) When you find an area of particularly compelling light, stop to see if theirs any type of picture to be had. 2) If you discover an interesting subject, try to assess if better light will fall onto it at some point.
FINDING A SUBJECT Atmospheric Conditions will vary your early morning/ late afternoon light. The light of early morning/ late afternoon also changes very quickly, so work quickly so you don’t lose your picture. The spring and fall causes the sun to not climb very high, which will give you more good light during the day.
PHOTOGRAPHY AS ABSTRACTION You're standing somewhere spectacular, and you think you must take a picture of this, later at home when you print out your photos, you think wow, these don’t look as spectacular as I remember. No one can take a photo that will make their viewers feel like they’re standing at the edge of the Grand Canyon.
PHOTOGRAPHY AS ABSTRACTION Although you may not be able to create a photo that truly re-creates standing at the edge of the Grand Canyon, you can create a photo that evokes some of the feeling you had while you were there. Rather than trying to capture the entire experience of where you’re standing, you need to try and identify a more refined feeling of what it is about that moment that compels you.
PHOTOGRAPHY AS ABSTRACTION Pay attention to certain things such as color, and light. You can do this by waiting for a unique cloud formation to come about, or wind to have the effect of a blowing tree.
BUILDING A SHOT Two Types of Photographic subjects, those that you take, and those that you make. If you’re standing near the Eifel Tower just as the sun comes from behind a cloud to light up a beautiful supermodel who happens to be walking by, then their might be little that you have to do to get a good shot. – Take You are working at a portrait studio, all of those photos will require you to MAKE your photos. - MAKE
BUILDING A SHOT Shooting Mode: When you’re ready to build a shot, you need to decide which mode is most appropriate. For many Program Mode is the ideal one, but take into account Depth of Field, and Motion Stopping Control.
BUILDING A SHOT White Balance: When you move into a new lighting situation, you need to think about which white balance setting is required. Metering: While Matrix Metering is good for most occasions, you’ll need to switch to a different meter to handle difficult lighting to ensure your subject is properly exposed.
CHOOSING A CAMERA POSITION AND FOCAL LENGTH After you’ve spotted a scene, you need to decide where to stand. The most recognizable location is not always the best one. Standing closer, further, or even off to the side can make a huge difference.
CHOOSING A CAMERA POSITION AND FOCAL LENGTH The great thing about a zoom lens is that it provides tremendous flexibility when you frame a shot. When zooming in or our on your subject, you can change your photo as a whole. The human eye has a field of view of about 50 -55 degrees – normal field of view.
CHOOSING A CAMERA POSITION AND FOCAL LENGTH At some point, we’ve all looked at a photo of ourselves and thought that it didn’t look like us. One reason for this, is shooting the image with a wide angle lens. In shooting a portrait photo, try and use a telephoto lens – gives off a more flattering look. Nose = not too big/ Faces = not elongated
SHOOTING SHALLOW DEPTH OF FIELD The depth of field in your scene is determined by three parameters: aperture size, size of objects in background of image, and sensor size. Larger apertures yield shallower depth of field. Shallower depth of field = lower f stop.