Download

1 / 22
370 likes | 1.24k Vues
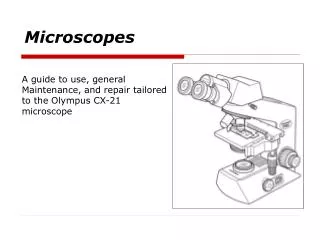
Microscopes. A guide to use, general Maintenance, and repair tailored to the Olympus CX-21 microscope. Topics. Principles of Operation Diagrams Applications History Safety Operation Preventive Maintenance Common Failure Modes Basic Troubleshooting. Principles of Operation.

E N D
Microscopes A guide to use, general Maintenance, and repair tailored to the Olympus CX-21 microscope
Topics • Principles of Operation • Diagrams • Applications • History • Safety • Operation • Preventive Maintenance • Common Failure Modes • Basic Troubleshooting
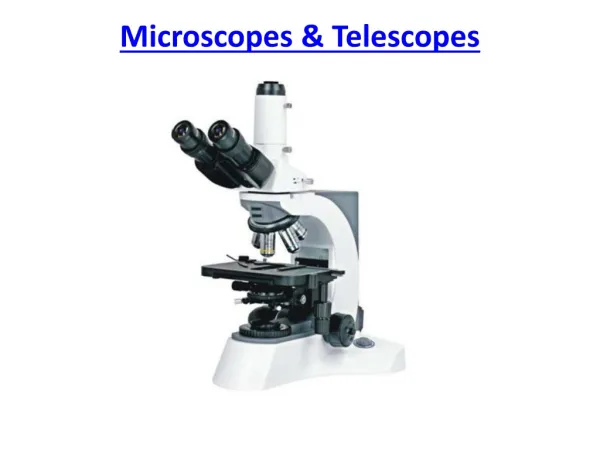
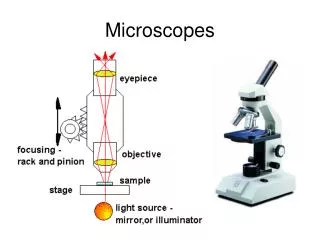
Principles of Operation • Compound optical microscopes use a light source and a series of lenses and to produce a magnified image of a specimen • The light gathering/ focusing capacity of a lens is primarily determined by its surface curvature http://www.education.com/study-help/article/physics-help-compound-microscope/
Principles of Operation • Eyepiece • Focus light onto eyes • 10x magnification • Objective • Collect light from the sample and magnify image • Labeled with magnification (i.e. 4x/10x) and numerical aperture (i.e. 0.10/0.25) • Mechanical Stage • Moves the specimen in the x and y directions on the stage
Principles of Operation • Condenser • Collects light from light sources and focuses it on the specimen • Aperture Iris Diaphragm • Controls the amount of light that reaches the specimen • Coarse and Fine Adjustment Knobs • Move stage up and down to bring specimen into focus
Applications • To view objects that are not visible to the naked eye • For cell counting • Used to view cells and diagnose disease: • Malaria • Roundworms • Tuberculosis • Dysentery • Cryptosporidium • Giardia Ring-form trophozoites of P. falciparum in a thick blood smear http://dpd.cdc.gov/dpdx/HTML/Malaria.htm
History • 2nd Century BC: Ptolemy describes a stick that appears to bend in water • 1st Century: Romans experiment with glass and observe objects appear larger when viewed through glass • 12th Century: SalvinoD’Armantemakes first eye glasses • 1590: Dutch spectacle makers mount two lenses in a tube to create first compound microscope • 1609: Galileo Galilee develops compound microscope with concave and convex lens • 1665: Robert Hooke’s book Micrographiadocuments observations through the microscope • 1674: van Leeuwenhoek achieves greater magnification allowing observation of bacteria http://www.history-of-the-microscope.org/microscope-history-timeline-design-development-inventions.php
Safety • Biological contamination: Gloves • Wear PPE • Treat all blood and bodily fluids as if they are contaminated • Before using, read the owner's manual • Grounded electrical connection • Location & Storage • Do not use under vibration • Do not store in high humidity • Do not store in dusty areas • Keep clean • Avoid intense temperatures
Operation • Place specimen on stage in bow-shaped lever • Choose objective • Always start with lowest magnification • Adjust aperture iris diaphragm to correspond to objective • Turn on light source • Bring image into focus with adjustment knobs • Adjust stage and light intensity as needed
Operation Working Distance
Operation Using the 100x immersion objective • Before engaging immersion objective (100x), place a drop of oil onto the specimen. • Engage the immersion objective • Make sure oil is free of bubbles • Use ONLY the fine adjustment knob to bring the specimen into focus • After use, remove oil from objective front lens by wiping with lens paper moistened with lens cleaner
Preventive Maintenance • Daily Preventive Maintenance • Clean • Objective (after using immersion oil) • Body of microscope • Yearly Preventive Maintenance • Microscope frame • Check observation tube: • Optical axis • Left/right axis • Revolving axis • Parfocality • Resolution • As needed • Grease replacement parts
Preventive Maintenance Inspection sheet can help serve as a troubleshooting checklist
Common Modes of Failure • Electrical/Power Failure • Light does not turn on when power switch is turned on • Light bulb burned out • Objective not placed in alignment • Dirty components • Eyepiece • Objectives • Filters • Fungus growth due to high humidity • General User Error • Not in focus • Brightness not adjusted properly • Objective not rotated fully into secured position
Troubleshooting • Electrical Unit • If lamp does not turn on when power switch is turned on, there is a problem with the electrical unit, unless…
Troubleshooting • Electrical Unit • If light bulb is not the issue, check that microscope is plugged in and outlet has power (use another device you know to be working to validate this) • Verify the cord shows no obvious damage • Verify that the fuse is intact
Troubleshooting • If the previous steps do not reveal the cause of failure • The problem is most likely the circuit board itself • Replacing individual components is not feasible, entire board needs replaced • If an identical microscope exists that is not usable for another reason, harvesting its circuit board is an option. See the manual for instructions on removing the circuit board
Troubleshooting • Coarse/Fine adjustment knobs do not turn smoothly • Knobs need to be greased
Troubleshooting • Stage falls down spontaneously or an in-focus image quickly moves out of focus • Cause: tension on coarse adjustment knob is too loose, needs to be adjusted
Troubleshooting: Stage Movement • If the stage does not move smoothly in the x or y directions, the tension of the x/y wires must be adjusted