Download

1 / 11
110 likes | 251 Vues
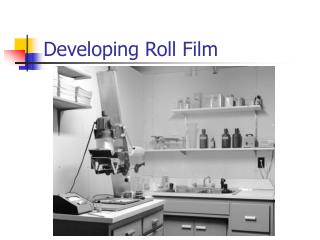
Developing Black and White Film. Write down the bold notes!. B&W Film Developing. Supplies you need: Your film Film cartridge opener Scissors Metal reel Metal tank Plastic lid. B&W Film Developing. Take supplies into the rolling closet . LOCK THE DOOR!!!

E N D
DevelopingBlack and White Film Write down the bold notes!
B&W Film Developing • Supplies you need: • Your film • Film cartridge opener • Scissors • Metal reel • Metal tank • Plastic lid
B&W Film Developing • Take supplies into the rolling closet. • LOCK THE DOOR!!! • Set everything out on the counter so that you can find it in the dark. • Turn off the lights. This MUST be done in complete darkness. Not even red/safe lights can be used. • Use the can opener to open film.
B&W Film Developing • Keep your back to the door in case some light leaks through. • Take the film out of the canister, and cut the leader straight across. • Hold the film between your thumb and forefinger with a slight arch. • Using your left hand to hold the reel, thread the film onto the reel.
B&W Film Developing • Once the film is on the reel, put it into the metal tank. • Put the lid on the tank. • Now you can turn on the lights. • Clean up the closet before you leave. • Go into the darkroom.
B&W Film Developing • Now that the film is in the tank it is safe from light, so it doesn’t matter the lighting conditions in the dkrm. • Holding the tank at a slight angle, pour in FILM DEVELOPER until full. • Watch the clock. You will keep the developer in for 7 minutes, AGITATING once every 30 seconds. • Pour the developer down the drain.
B&W Film Developing • Next, fill the tank with water from the faucet for a STOP BATH. • Agitate for 15 seconds; pour out; repeat. • Third chemical is FIXER. Holding tank at a slight angle, pour FIXER into tank until full. • Watch the clock. Keep the fixer in for 11 minutes, agitating once every minute. • Pour the fixer BACK into the bottle you got it out of.
B&W Film Developing • After fixer it is safe to bring your film into the light, so take the lid off the tank and take your reel of film out. • Place the reel/film into the WASH TUBE. • Let the flowing water wash your film for at least 5 minutes. • Carefully (because other film might be on top of yours) remove your reel.
B&W Film Developing • Put the reel/film into a tank filled with PHOTO FLO. (everyone will use the SAME tank of photo flo--no lid is necessary) • Swirl it in the photo flo for 5-10 seconds. • Remove the reel from the photo flo. • Carefully, take your film off of the reel. • Carefully, squeegee the excess water and photo flo off the film with your FINGERS over the SINK (not the floor!).
B&W Film Developing • Once the excess water is off, take the film into the classroom. • Put your NAME on a piece of masking TAPE. • Tape your film to the bar in the white film closet at the back of the room. • It will take about 15-20 minutes for your film to completely dry. You’ll know it’s dry when it curls as it hangs.
B&W Film Developing • Once your film is dry, take it down. • Get a NEGATIVE SLEEVE from the counter. • Cut your film into strips of 5 frames, and put it into the negative sleeve. • You’re done! Keep your film in a safe place until your group is in the darkroom to make prints.