Download

1 / 45
450 likes | 646 Vues
Developing Black and White Film. Steps for rolling film (short version): 1. Get items together: Canister, post, reel, light-tight top, lid, scissors and can opener 2. Secure dark area 3. Open film cartridge 4. Cut off film tongue with scissors

E N D
Steps for rolling film (short version): 1. Get items together: Canister, post, reel, light-tight top, lid, scissors and can opener 2. Secure dark area 3. Open film cartridge 4. Cut off film tongue with scissors 5. Cup the film and place in reel slot, push a few inches into reel 6. Spool the film onto the reel; cut/tear off spool at the end 7. Place post in canister 8. Push reel to the bottom of post 9. Place light-tight top on canister and lock 10. Place lid on canister and clean up area 11. Proceed to development stage
Equipment Needed • Film
Equipment Needed • Film • Tank & top • Empty film reel • Can opener (if not using a reusable film canister) • Scissors • Thermometer
Chemicals Needed • Developer .. Kodak HC110
Chemicals Needed • Developer .. Kodak HC110 • Stop .. Indicator stop bath or water rinse
Chemicals Needed • Developer .. Kodak HC110 • Stop .. Indicator stop bath or water rinse • Fixer .. Kodak Rapid Fixer
Chemicals Needed • Developer .. Kodak HC110 • Stop .. Indicator stop bath or water rinse • Fixer .. Kodak Rapid Fixer • Wetting Agent .. Photo Flo
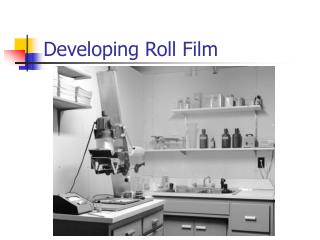
Getting Ready • Arrange needed equipment on shelf
Getting Ready • Arrange needed equipment on shelf • Film Rolling Closets A & B • Close door and be sure it is locked • Check for darkness • Front Darkroom • Make sure everybody is situated • Turn off the light
Getting film ready • Remove film from cassette • If you left the leader hanging out, pull the film all the way out • If no leader, pop the ends of the canister off • Cut off film leader
Getting film ready • Trim the corners of the film • Two very small cuts at the very edge of the film, snip each corner so that they are not sharp nor just straight across.
Getting film ready • Load the film on the reel
Getting film ready • Remove film from cassette • Cut off film leader • Trim the corners of the film • Load the film on the reel • Place reel into tank
Getting film ready • Remove film from cassette • Cut off film leader • Trim the corners of the film • Load the film on the reel • Place reel into tank • Attach the top of the tank carefully
Preparing to process • Open door and go to processing area
Preparing to process • Open door and go to processing area • Determine temperature of developer (it is usually about 75 degrees)
Preparing to process • Open door and go to processing area • Determine temperature of developer (it is usually about 75 degrees) • Check chart for time to develop
Beginning to process • Measure your chemicals carefully. • You need 10 ounces per reel.
Beginning to process • Measure your chemicals carefully. • You need 10 ounces per reel. • Pour developer into tilted tank
Beginning to process • Measure your chemicals carefully • You need 10 ounces per reel. • Pour developer into tilted tank • Begin timing as soon as developer is in tank
Developing • Agitate chemicals by inverting tank for first 30 seconds.
Developing • Agitate chemicals by inverting tank for first 30 seconds. • Rap tank on sink (gently)
Developing • Agitate chemicals by inverting tank for first 30 seconds. • Rap tank on sink (gently) • Set down tank for 25 seconds and then agitate for the next 5 seconds.
Developing • Repeat agitation every 30 seconds for 5 seconds.
Developing • Repeat agitation every 30 seconds for 5 seconds. • Begin pouring out developer during the last 10 seconds.
Stop Bath • Pour 10 ounces stop or water into tilted tank
Stop Bath • Pour 10 ounces stop or water into tilted tank • Agitate gently for 30 seconds
Stop Bath • Pour 10 ounces stop or water into tilted tank • Agitate gently for 30 seconds • Begin pouring out stop last 10 seconds.
Fixer • Pour fixer into tilted tank
Fixer • Pour fixer into tilted tank • Agitate five seconds every 30 seconds
Fixer • Pour fixer into tilted tank • Agitate five seconds every 30 seconds • Rap tank on sink (gently)
Fixer • Pour fixer into tilted tank • Agitate five seconds every 30 seconds • Rap tank on sink (gently) • Fix the film 5 minutes
Washer • Open your tank
Washer • Open your tank • Put reel in washer & turn on water
Washer • Open your tank • Put reel in washer & turn on water • Wash for 5 minutes
Washer • Open your tank • Put reel in washer & turn on water • Wash for 5 minutes • Take reel out of washer
The Wetting Agent • Place in the wetting agent which makes your negatives dry faster and cleaner
The Wetting Agent • Place in the wetting agent which makes your negatives dry faster and cleaner • Gently agitate for 30 seconds
Dryer • Remove film from reel
Dryer • Remove film from reel • Use fingers or actual squeegee to remove excess water
Dryer • Remove film from reel • Use fingers or actual squeegee to remove excess water • Hang to dry with a clip at the bottom • If processing 120mm, use two clips at the top and two at the bottom
Final Step • On next day or when completely dry, cut the film into strips • Be very gentle with your negatives. Touch the negatives ONLY by the edges
Final Step • Put film in negative envelope • Make sure your name is on the negative holder and the envelop.