Download
1 / 1
10 likes | 104 Vues
Analyzing and Calibrating P recision C ontrols on U.A.V.’s. Oscar Camacho and Jordan Gonzalez Engineering Department, Hartnell College , Salinas, CA 93901 Dr. Mark Karpenko , NSRC Research Fellow, Control and Optimization Lab. Method

E N D
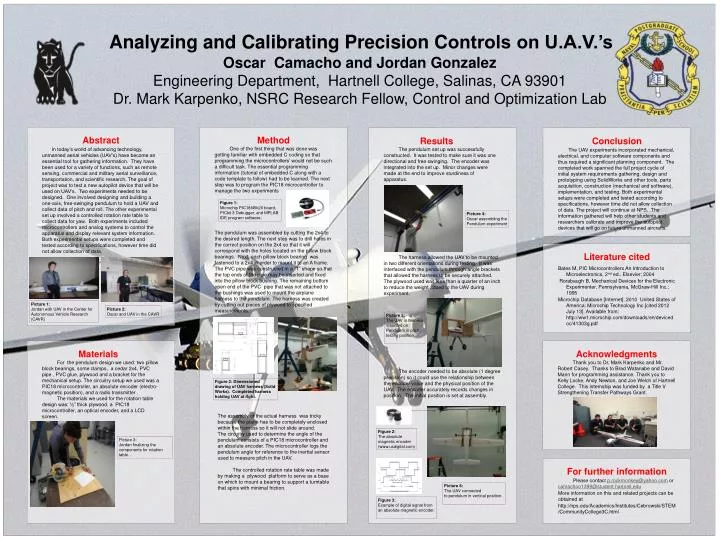
Analyzing and Calibrating Precision Controls on U.A.V.’s Oscar Camacho and Jordan Gonzalez Engineering Department, Hartnell College, Salinas, CA 93901 Dr. Mark Karpenko, NSRC Research Fellow, Control and Optimization Lab Method One of the first thing that was done was getting familiar with embedded C coding so that programming the microcontrollers’ would not be such a difficult task. The essential programming information (tutorial of embedded C along with a code template to follow) had to be learned. The next step was to program the PIC18 microcontroller to manage the two experiments The pendulum was assembled by cutting the 2x4 to the desired length. The next step was to drill holes in the correct position on the 2x4 so that it will correspond with the holes located on the pillow block bearings. Next, each pillow block bearing was fastened to a 2x4 in order to mount it to an A frame. The PVC pipe was constructed in a “T” shape so that the top ends of the pipe may be inserted and fixed into the pillow block bushing. The remaining bottom open end of the PVC pipe that was not attached to the bushings was used to mount the airplane harness to the pendulum. The harness was created by cutting out pieces of plywood to specified measurements. Abstract In today’s world of advancing technology, unmanned aerial vehicles (UAV’s) have become an essential tool for gathering information. They have been used for a variety of functions, such as remote sensing, commercial and military aerial surveillance, transportation, and scientific research. The goal of project was to test a new autopilot device that will be used on UAV’s. Two experiments needed to be designed. One involved designing and building a one-axis, free-swinging pendulum to hold a UAV and collect data of pitch and roll. The other experimental set up involved a controlled rotation rate table to collect data for yaw. Both experiments included microcontrollers and analog systems to control the apparatus and display relevant system information. Both experimental setups were completed and tested according to specifications, however time did not allow collection of data. Conclusion The UAV experiments incorporated mechanical, electrical, and computer software components and thus required a significant planning component. The completed work spanned the full project cycle of initial system requirements gathering, design and prototyping using SolidWorks and other tools, parts acquisition, construction (mechanical and software), implementation, and testing. Both experimental setups were completed and tested according to specifications, however time did not allow collection of data. The project will continue at NPS. The information gathered will help other students and researchers calibrate and improve the autopilot devices that will go on future unmanned aircrafts. Results The pendulum set up was successfully constructed. It was tested to make sure it was one directional and free swinging. The encoder was integrated into the set up. Minor changes were made at the end to improve sturdiness of apparatus. The harness allowed the UAV to be mounted in two different orientations during testing. It was interfaced with the pendulum through angle brackets that allowed the harness to be securely attached. The plywood used was less than a quarter of an inch to reduce the weight added to the UAV during experiment. The encoder needed to be absolute (1 degree precision) so it could use the relationship between the encoder value and the physical position of the UAV. The encoder accurately records changes in position. The initial position is set at assembly. Figure 1: Microchip PIC18f45k20 board, PICkit 3 Debugger, and MPLAB IDE program software. Picture 4: Oscar assembling the Pendulum experiment Literature cited Bates M, PIC Microcontrollers An Introduction to Microelectronics, 2nd ed., Elsevier; 2004 RorabaughB, Mechanical Devices for the Electronic Experimenter, Pennsylvania, McGraw-Hill Inc.; 1995 Microchip Database [Internet]. 2010 United States of America: Microchip Technology Inc.[cited 2012 July 13]. Available from: http://ww1.microchip.com/downloads/en/devicedoc/41303g.pdf Picture 1: Jordan with UAV in the Center for Autonomous Vehicle Research (CAVR) Picture 2: Oscar and UAV in the CAVR Picture 5: The UAV in harness mounted on Pendulum in pitch testing position. Materials For the pendulum design we used: two pillow block bearings, some clamps, a cedar 2x4, PVC pipe , PVC glue, plywood and a bracket for the mechanical setup. The circuitry setup we used was a PIC18 microcontroller, an absolute encoder (electro-magnetic position), and a radio transmitter . The materials we used for the rotation table design was: ½” thick plywood, a PIC18 microcontroller, an optical encoder, and a LCD screen. Acknowledgments Thank you to Dr. Mark Karpenko and Mr. Robert Casey. Thanks to Brad Watanabe and David Mann for programming assistance. Thank you to Kelly Locke, Andy Newton, and Joe Welch of Hartnell College. This internship was funded by a Title V Strengthening Transfer Pathways Grant. Figure 2: Dimensioned drawing of UAV harness (Solid Works). Completed harness holding UAV at right. The assembly of the actual harness was tricky because the plane has to be completely enclosed within the harness so it will not slide around. The circuitry used to determine the angle of the pendulum consists of a PIC18 microcontroller and an absolute encoder. The microcontroller logs the pendulum angle for reference to the inertial sensor used to measure pitch in the UAV. The controlled rotation rate table was made by making a plywood platform to serve as a base on which to mount a bearing to support a turntable that spins with minimal friction. Figure 2: The absolute magnetic encoder (www.usdigital.com) Picture 3: Jordan finalizing the components for rotation table. . For further information Please contact p.rockmonkey@yahoo.com or camachoo1399@student.hartnell.edu More information on this and related projects can be obtained at http://nps.edu/Academics/Institutes/Cebrowski/STEM/CommunityCollege3C.html Picture 6: The UAV connected to pendulum in vertical position. Figure 3: Example of digital signal from an absolute magnetic encoder.