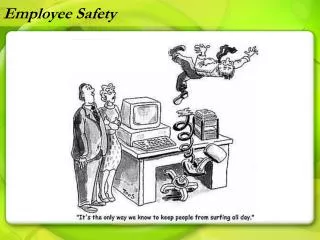
TAMU-Q EMPLOYEE SAFETY TRAINING
TAMU-Q EMPLOYEE SAFETY TRAINING. EMERGENCY RESPONSE AT TEXAS A&M UNIVERSITY AT QATAR. Emergency Response:. Illness and injury Fire Building Evacuation. Illness and Injury….

TAMU-Q EMPLOYEE SAFETY TRAINING
E N D
Presentation Transcript
EMERGENCY RESPONSE AT TEXAS A&M UNIVERSITY AT QATAR
Emergency Response: • Illness and injury • Fire • Building Evacuation
Illness and Injury… If you notice someone who is ill or witness someone get hurt while at work, notify your supervisor immediately and follow basic first aid guidelines.
Regardless of your level of skill or degree of first aid training, if you find yourself in a true medical emergency, always call QF Security at 454-0999 or 492-7999 for emergency medical assistance immediately..
Basic First Aid Only provide assistance within your ability but keep a close watch on the victim until help arrives. If the victim is conscious, ALWAYS ask if them if you can provide assistance. If they do not want your help, respect their request!
Basic First Aid If someone accepts your offer to help – remember, before providing assistance: PROTECT YOURSELF FIRST Make sure the area where the victim is located is safe for you to enter. Do NOT become a victim yourself. Safety includes an awareness of your surroundings.
Basic First Aid Before helping the victim, put on proper personal protective equipment such as gloves. Gloves are available in the first aid kits throughout the building. Many diseases are passed from one human to the next through blood and saliva.
Basic First Aid You can become infected through splashes of bodily fluids to your eyes, nose and mouth as well as from breaks in the skin. A hang nail or rash on your skin can be a route of exposure.
Basic First Aid Check to see if the victim is responsive. An indicator of the seriousness of a medical emergency is the inability to wake the victim. TIP: If the person is conscious, always ask if you can offer assistance and wait for a positive response before doing so.
Basic First Aid Before providing basic first aid assistance – make sure you or someone in the area has called for an ambulance.
Basic First Aid After caring for your own safety, checking for responsiveness and calling for help, it is important to check ABC's.
Basic First Aid ABC stands for: A B C Airway Breathing Circulation
Basic First Aid Airway: TIP: If a person's airway is blocked, he or she won’t be able to speak. If a victim is conscious, ask him or her to speak. If a victim is unconscious, put your ear close to the victim's mouth and listen for breathing. Feel for air on your cheek and look at the chest to see if it or the abdomen is rising with each breath.
Basic First Aid Breathing: If you do not see, hear or feel breathing, administer CPR immediately but only if you are trained to do so. If the victim is breathing normally, place him or her in the recovery position.
Basic First Aid Circulation: Look at the victim's color and feel his or her skin temperature to see if he or she has signs of circulation. If you do not think the victim has circulation and is not responding to you, CPR may be required.
Basic First Aid The Recovery Position – this position helps to keep the victim’s airway open. • To put the victim in the recovery position: • Grab the victim's leg and shoulder and roll him or her towards you. • Continue to roll the victim until he is on his side. Guard their head as you roll them. • Adjust the top leg so that both the hip and knee are bent at right angles • Gently tilt the head back to keep the airway open. • Keep the person warm while waiting for medical help to arrive. • If breathing or circulation stops at any time, roll the person back on to his or her back and begin CPR.
Basic First Aid - Bleeding If the victim is bleeding, follow the steps below to help control the bleeding while you wait for the ambulance to arrive: • Apply direct pressure to the wound. • Elevate the wound above the heart. • Use pressure points between the wound and the heart to help control bleeding. Note: Applying a tourniquet is rarely done as significant damage to the limb can result from application of a tourniquet. Only apply a tourniquet in extreme circumstances where a choice between life or limb must be made!
Basic First Aid - Choking If the person is sitting or standing: • Stand behind him or her. • Form a fist with one hand and place your fist, thumb side in, just below the person’s rib cage in the front. • Grab your fist with your other hand. • Keeping your arms off the person’s rib cage, give four quick inward and upward thrusts. • You may have to repeat this several times until the obstructing object is coughed out.
Basic First Aid - Choking If the person is lying down or unconscious: • Sweep your finger inside the victims mouth to ensure the object has not dislodged on it’s own. • Straddle him or her and place the heel of your hand just above the waistline. • Place your other hand on top of this hand. • Keeping your elbows straight, give four quick upward thrusts. • You may have to repeat this procedure several times until the obstructing object is coughed out.
Basic First Aid – Other Injuries If someone you are trying to help has other injuries such as burns or is exhibiting symptoms such as seizures, keep them as comfortable as you can and wait for help to arrive. Provide first aid within your capabilities. If the illness or injury is not immediately life threatening, you should only provide basic first aid if you are trained to do so.
Basic First Aid As the ambulance is responding to your emergency, there are some things you can do: • Gather the victim's personal medical information if you can. • Send someone to meet emergency crews and guide them to the victim. • Move office furniture, equipment or other items out of the way to allow access with a gurney. • Don't forget to keep an eye on the victim.
Basic First Aid Once the ambulance arrives, give way to the EMT’s and provide any and all information that you believe can be of assistance.
Fire… What is fire?
Chemistry of Fire Fire Tetrahedron In order forfire to occur four things must be present, Oxygen, Fuel, Heat, and a Chemical Chain Reaction. This is represented by the Fire Tetrahedron. When any of the four items are removed, the fire will go out. Fire extinguishers function by removing one of the four components of the Fire Tetrahedron. 26
FIRE CLASS A: wood, paper, rubber, cloth, trash having burning embers, or other ordinary combustible or fibrous material. CLASSIFICATIONS
FIRE CLASS B: Flammable liquids, such as gasoline, oil, paints, grease, kerosene, and solvents. CLASSIFICATIONS
FIRE CLASS C: Electrical equipment that is energized, such as appliances, switches, panel boxes, and power tools. CLASSIFICATIONS
FIRE CLASS D: Combustible metals, such as magnesium, titanium, potassium, and sodium, that burn at high temperatures and give off enough oxygen to ignite. These metals may react violently with water or other chemicals, and must be handled with caution. CLASSIFICATIONS
FIRE CLASS K: Fires that involve cooking oils CLASSIFICATIONS
Preventing fire is the best way to avoid injury and damage. Here are some hints…….
For ordinary combustibles (Class A fire) Keep all work and storage areas free of waste and trash. Be careful while smoking or using any other type of open flame.
For Flammable Liquids (Class B fire) Store all flammable liquids in tightly closed containers. Store flammable liquids away from sources of flame, heat or spark. Only use flammable liquids in well ventilated areas. Never refuel equipment when it is hot, when in a confined space, or in the presence of open flame. Dispose of all flammable waste in covered, metal containers. Never smoke around flammable materials.
For Electrical Equipment (Class C fire) Report any electrical hazards to your supervisor immediately. Look for old or faulty wiring, worn insulation and broken electrical fittings. Keep all electrical motors clean and in good working order. Avoid overheating electrical equipment. Always use properly rated fuses. Never overload electrical circuits and outlets. Be aware of unusual odors from electrical equipment, which could be the first sign of fire.
Which one of these things am I supposed to use!!!! Each class of fire requires a specific type of fire extinguisher. In some cases, using the wrong type of fire extinguisher can actually make the fire worse.
But it’s easy to figure out! Class A fires require a Type A extinguisher. Class B fires require a Type B extinguisher. Class C fires require a Type C extinguisher. Class D fires require a Type D extinguisher. Class K fires require a Type K extinguisher.
So how can you tell what type of extinguishers are in your area? The face plate will say if it is an A, B, C, or D extinguisher! Most extinguishers are combination extinguishers and will say A B C
So….. Look at the extinguishers in your area and be aware of what type they are!
Well, I know the classes of fires and I can identify different types of extinguishers so… How do I use this thing?
Use the PASS method P ULL THE PIN A IM THE NOZZLE AT THE BASE OF THE FLAME S QUEEZE THE TRIGGER S WEEP THE EXTINGUISHER FROM SIDE TO SIDE
P A S S REMEMBER * PULL * AIM * SQUEEZE * SWEEP
Some points to be aware of…. Never try to fight a fire when: • The fire is spreading beyond the spot where it started. • There is no escape exit behind you. • You do not have adequate fire fighting equipment. • You are not comfortable using a fire extinguisher.
And…. As few people as possible should stay and fight the fire. If you are not needed, get out while you can! Did you know the average fire extinguisher will run out of fire extinguishing media in approximately 25 seconds.
Are you required to use a fire extinguisher if fire breaks out in the building? NO! Only do so if you have been trained to use one and you feel comfortable in doing so.
EVACUATION • Unless you have been told that the fire alarm is being tested, leave the building immediately upon hearing it go off each and every time! • Try to close all windows and doors in your area. • Do not run, but walk to the nearest exit. And don’t take the elevator, use the stairwell. • Proceed to one of the identified rendezvous points . This includes faculty, staff, and students. Gather together in a small group with other people from your department. • Do not re-enter the building or leave the area until you are told to do so.
Be aware of exits and exit pathways! Take note of all of the emergency exits in the areas that you frequent. Take these exits from time to time to become familiar with where they lead. • Be aware that not all of the exits in this building lead directly to the outside perimeter of the building. • The exits into the courtyard on the academic side of the building will not lead you away from the building. You will have to go back into the building in order to find an exit that leads to the outside perimeter of the building Do NOT use courtyard exits!
Rendezvous Points – Engineering Building TAMUQ Faculty, Staff, Student and Visitor Rendezvous Point TAMUQ Faculty, Staff, Student and Visitor Rendezvous Point
Rendezvous Point – LAS Building For faculty, staff and students in the LAS Building: Evacuate the building using the nearest exit and gather together in the parking lot on the south side of the building. Qatar Foundation Security has assigned TAMUQ employees in LAS to Rendezvous Point #13. Look for the sign outside of the building. In order to stay safe you must stay as far from the building as you can get yet still be in the vicinity of Rendezvous Point #13.