Goal Seek and Solver
Goal Seek and Solver. Goal seeking helps you. Find a specific value for a target cell by adjusting the value of one other cell whose value is allowed to vary. 1 On the Tools menu, click Goal Seek.


Goal Seek and Solver
E N D
Presentation Transcript
Goal seeking helps you • Find a specific value for a target cell by adjusting the value of one other cell whose value is allowed to vary.
1 On the Tools menu, click Goal Seek. • 2 In the Set cell box, enter the reference for the cell that contains the formula you want to resolve. • 3 In the To value box, type the result you want. • 4 In the By changing cell box, enter the reference for the cell that contains the value you want to adjust.
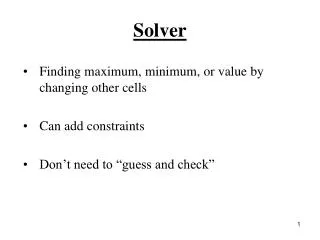
Solver • Solver is given a specific target cell whose value is to be • maximized, • minimized, or • made equal to a specific value. • It is also given a set of cells whose value is to be varied to accomplish the desired optimization or solution, together with constraints on their values, if any. • Then it tries to obtain a solution by iteratively varying the values of the variable cells.
The cells you select must be related through formulas on the worksheet. • If not related, changing one cell will not change the other. • As an example, Solver can be used to find the best choice of advertising expenditures to generate maximum profit.
Define and solve a problem by using Solver • 1 On the Tools menu, click Solver. • 2 In the Set Target Cell box, enter a cell reference or name for the target cell. The target cell must contain a formula.
3 To have the value of the target cell be as large as possible, click Max. • To have the value of the target cell be as small as possible, click Min. • To have the target cell be a certain value, click Value of, and then type the value in the box.
4 In the By Changing Cells box, enter a name or reference for each adjustable cell, separating nonadjacent references with commas. • The adjustable cells must be related directly or indirectly to the target cell. • You can specify up to 200 adjustable cells. • To have Solver automatically propose the adjustable cells based on the target cell, click Guess.
5 In the Subject to the Constraints box, enter any constraints you want to apply. • 6 Click Solve. • 7 To keep the solution values on the worksheet, click Keep Solver Solution in the Solver Results dialog box. • To restore the original data, click Restore Original Values.
Tip: • You can interrupt the solution process by pressing ESC. • Microsoft Excel recalculates the worksheet with the last values found for the adjustable cells.
To add a constraint in Solver • 1 On the Tools menu, click Solver. • 2 Click Add. • 3 In the Cell Reference box, enter the reference or name of the cell range for which you want to constrain the value.
4 Click the relationship ( <=, =, >=, Int, or Bin ) that you want between the referenced cell and the constraint. • If you click Int, "integer" appears in the Constraint box. • If you click Bin, "binary" appears in the Constraint box. • 5 In the Constraint box, type a number, a cell reference or name, or a formula.
6 To accept the constraint and add another, click Add. • To accept the constraint and return to the Solver Parameters dialog box, click OK.
Notes • You can apply the Int and Bin relationships only in constraints on adjustable cells.
When the Assume Linear Model check box on the Solver Options dialog box is selected, there is no limit on the number of constraints. • For nonlinear problems, each adjustable cell can have the following constraints: a binary constraint; an integer constraint plus upper, lower, or both limits; or upper, lower, or both limits; and you can specify an upper or lower limit for up to 100 other cells.
Change or delete a constraint in Solver • 1 On the Tools menu, click Solver.2 In the Subject to the Constraints box, click the constraint that you want to change or delete.3 To delete the constraint, click Delete.To change the constraint, click Change, and then make the changes you want.
Set Solver solution time and iterations • 1 On the Tools menu, click Solver. • 2 Click Options. • 3 In the Max Time box, type the number of seconds that you want to allow for the solution time. • 4 In the Iterations box, enter the maximum number of iterations that you want to allow.
Notes • If the solution process reaches the maximum time or number of iterations before Solver finds a solution, Solver displays the Show Trial Solution dialog box.
Set the degree of precision and convergence in Solver • 1 On the Tools menu, click Solver. • 2 Click Options. • 3 In the Precision box, type the degree of precision that you want; the smaller the number, the higher the precision.
4 In the Convergence box, type the amount of relative change you want to allow in the last five iterations before Solver stops with a solution; the smaller the number, the less relative change that is allowed.
To set the tolerance in Solver • 1 On the Tools menu, click Solver. • 2 Click Options. • 3 In the Tolerance box, type the percentage of error you want to allow in the solution.
When to start from different initial solutions • For nonlinear problems, it can be helpful to try different starting values for the adjustable cells, especially if Solver has found a solution that is significantly different from what you expected. • You can also reduce the solution time by setting the adjustable cells to values that you suspect are close to optimal.
For linear models (that is, when the Assume Linear Model check box on the Solver Options dialog box is selected), the initial values of the adjustable cells don't affect the final values or the solution time.