Lab Techniques for Flexible Partial Dentures
Lab Techniques for Flexible Partial Dentures. Introduction to Flexible Partials. Simple solution to provide a removable restoration No tooth preparation needed No metal frame needed Finished partial with one trip through the laboratory Injection Technique

Lab Techniques for Flexible Partial Dentures
E N D
Presentation Transcript
Lab Techniques for Flexible Partial Dentures
Introduction to Flexible Partials • Simple solution to provide a removable restoration • No tooth preparation needed • No metal frame needed • Finished partial with one trip through the laboratory • Injection Technique • Valplast Partials are repairable and relinable • Guaranteed not to break
Type of Material • Valplast is a type of Nylon Thermoplastic • Injection Molded • Denser than acrylic • Lower Water Absorption than PMMA • Flexural modulus around 470MPa at body temperature (making it both flexible and sturdy) • In use since 1953
Lab Procedure - Overview • Design, block and relieve master model • Duplicate stone model • Try-in (if required) or Set-up on Master • Transfer set-up to duplicate model • Wax with prefabricated patterns • Invest, Sprue, Wax Elimination • Process with Manual Injector • Finish and Polish
Visually Survey Model • Visualize design • Aesthetics • Path of Insertion • Comfort • Accuracy of Model Remove Discrepancies
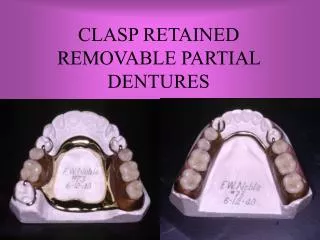
Wrap-Around Clasp • Most Common Clasp • Hugs Tissue • Minimal Coverage of Tooth • Stability against vertical and rotational movement Design is made with Red Pencil
Split Wrap-Around • Clasp Separated from Flange • Similar to “Roach” Clasp • Flexibility along Horizontal and Vertical Axes
Maxillary Wax Relief • Relief Wax placed along Buccal Periphery • Necessary on All Maxillary Cases Use Hot Wax for Relief
Mandibular Wax Relief • Junction of clasp with saddle is more rigid area. • Undercut toward periphery must be relieved
Blocking and Relieving • Lingual Undercuts Relieved • Interproximal Spaces Closed • Obstructive Undercuts Removed
Final Preparation • Beading Post Dam • Etching Design
Duplication • Soak Model • Prepare Flask • Pour Gel • Let set 15 minutes in air… • …and 15 minutes in water
Waxing After Setup • Use of Prefabricated Forms is Recommended to Insure Proper Thickness and Uniformity
Palatal Waxing • Soften Palate • Press to Position • Seal all Borders
Buccal Waxing • Using Prefabricated Form: • Cut Form to Size • Press to Model • Seal all Borders
Pre-Finishing Econo-Cutter Trimmer Dark Grinding Wheels
Vulcanite Burs Fitting and Rubberizing Brown Rubber Wheels
Advising Clinician on Insertion and Adjustment • Partial must be placed in very hot water (150°F or more) for a minute prior to insertion and allowed to cool to a tolerable temperature. • This process makes the partial as flexible as it would be at body temperature. This minimizes adjustments
Adjustments • Minor clasp tightening or loosening can be done by heating the clasp again in very hot water and bending it severely in the needed direction. This will purposely warp the area enough to change its position • Grinding should be done as a last resort. • Use a Standard Green Mounted Stone (used usually for porcelain) to adjust Valplast. 20K to 30K rotation and constant motion
Small Additions - Welding • Using hot air welder and welding rod, build up a boxing in the addition site to secure a new tooth • Select a matching acrylic tooth. • Break a porcelain tooth to obtain pins • Heat each of two pins in flame to cherry red and embed in the partial half way (pin head protruding) • Cure scooped stock tooth over pins using tooth-shade or pink acrylic.
Large Additions – Injection • Wax new section on duplicate model to original partial • Invest, Sprue, Wash out wax • Prepare bonding site with acid etch solution (Val-Fuse Repair Liquid) • Inject, finish, and polish
Relines • Take Putty Matrix to record tooth position • Strip teeth from partial (in blocks) while duplicating the model. • Rewax new base using matrix to position teeth • Invest and process using repair technique to bond top-half exposed Valplast to new base. • Finish and Polish
Clinical Prep for Tooth Addition • Clinician should take overall alginate impression to lift out case • Counter-model for bite • Before pouring the model, any deposits or adhesives should be removed from surface or the process will lead to an unintended reline.
Clinical Prep for Reline • Closed-mouth rubber-base reline impression. • Pick-up overall alginate impression. • Counter not necessary