Eclipse™ Soft Tissue Anchor – General Technique Guide
Eclipse™ Soft Tissue Anchor employs MedShape’s shape memory PEEK Altera® technology for soft tissue fixation procedures in the shoulder, elbow, hand, knee, wrist, foot and ankle. Read this file to learn about the general technique guide of this innovative product from MedShape. For more information visit www.medshape.com.
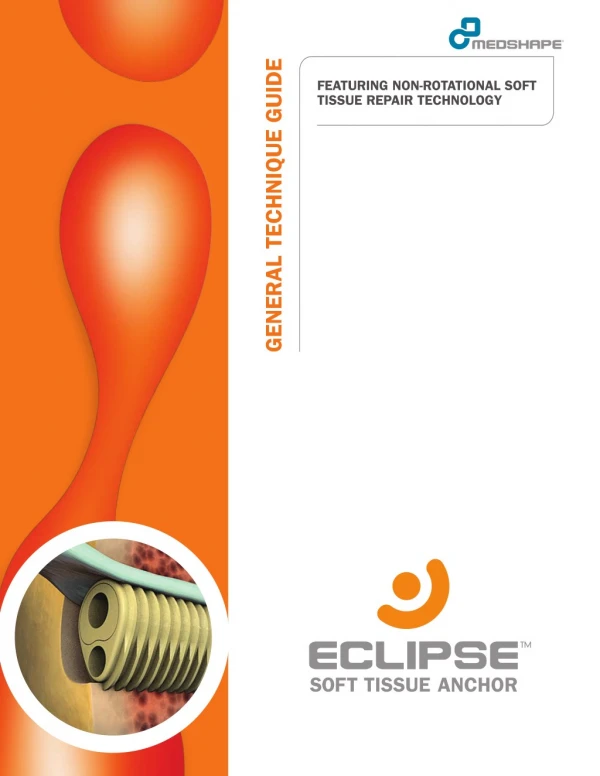

Eclipse™ Soft Tissue Anchor – General Technique Guide
E N D
Presentation Transcript
PRODUCT OVERVIEW The Eclipse Soft Tissue Anchor employs MedShape’s shape memory PEEK Altera® technology for soft tissue fxation procedures in the shoulder, elbow, knee, hand & wrist, and foot & ankle. Eclipse features a low-profle geometry that expands to compress soft tissue within the bone tunnel upon insertion. The non-rotational deployment provides several unique clinical advantages including strong fxation, easy insertion, proper maintenance of soft tissue orientation and tension, and protection of the soft tissue graft from laceration. SUTURE CLEAT DRIVE CANNULA KNOB LOCK IMPLANT SHEATH BULLET STRIKE PLATE KNOB DEPLOYMENT TRIGGER DISPOSABLE DEPLOYMENT GUN TRIGGER LOCK INITIAL UNDEPLOYED SHAPE FINAL DEPLOYED SHAPE BULLET EXPANDED PROFILE COMPRESSED PROFILE BULLET SHEATH SHEATH TIP
ACCESSORY INSTRUMENTATION Universal Tenodesis Procedure Pack Disposable kit that contains instruments needed to aid in bone tunnel and soft tissue preparation. 1 − Soft Tissue Sizer 2 − 2.4 mm SurgiBit® Stainless Steel Drill Tipped Passing Pin, Laser Marked 3 − Stainless Steel Tendon Fork, Laser Marked 4 − 0.7 mm Suture Lasso QuikWhip™ #2 Co-Braid Ultra-High Molecular Weight Polyethylene Surgical Suture ? High Tensile Strength ? Offered in Green and White/Green Co-Braid to help distinguish between soft tissue bundles ? Looped design provides easy method to rapidly stitch soft tissue ends ? Loaded with 51 mm straight round body needle for easy handling Cannulated Drill and Reamers ? Cannulated Drill, 4 mm, Laser Marked ? Cannulated Acorn Reamer, 5 mm, Laser Marked ? Cannulated Acorn Reamer, 6 mm, Laser Marked ? Cannulated Acorn Reamer, 7 mm, Laser Marked ? Cannulated Acorn Reamer, 8 mm, Laser Marked ? Cannulated Acorn Reamer, 9 mm, Laser Marked 3
SIZING GUIDE BONE TUNNEL & IMPLANT SIZING The Eclipse Soft Tissue Anchor is available in a range of sizes from 4 to 9 mm in diameter and 10 to 20 mm in length. Selecting the appropriate Implant size should take into account the tendon size and bone quality. SELECTING BONE TUNNEL DIAMETER Measure the tendon diameter using the MedShape Soft Tissue Sizer. The bone tunnel diameter should measure 1 mm larger than the tendon diameter. If the tendon measures in a half-mm increment (e.g. 5.5 mm), size the tunnel 1.5 mm larger than the tendon diameter. SELECTING IMPLANT DIAMETER In good, healthy bone where there is a suffcient cortical layer, the Implant should measure 1 mm less than the tunnel diameter (e.g. for a 7 mm tunnel, select a 6 mm Implant). In poor quality bone, the Implant diameter should equal the tunnel diameter (e.g. for a 7 mm tunnel, select a 7 mm Implant). SELECTING IMPLANT LENGTH When anatomy permits, always select the Implant with the greatest length (e.g. 4x17 mm or 5x20 mm). The 10 and 12 mm length Implants should ONLY be used when there is not suffcient bone anatomy to accommodate the 17 and 20 mm lengths, respectively. SELECTING BONE TUNNEL LENGTH When drilling a blind bone tunnel, the tunnel should be drilled slightly deeper than the length of the Implant. For a 10 mm Implant, drill a 15 mm tunnel. For a 12 mm Implant, drill a 15 mm tunnel. For a 17 mm Implant, drill a 20 mm tunnel. For a 20 mm Implant, drill a 25 mm tunnel.
DEPLOYMENT GUIDE STEP 1: PREPARE THE GRAFT If performing a soft tissue reattachment or transfer, harvest the tendon(s) according to the surgeon’s preferred technique. Using the Soft Tissue Sizer, measure the diameter of the tendon and select the appropriate size Implant (Refer to Sizing Guide on page 4). Using QuikWhipTM #2 Surgical Suture, whipstitch the end of the tendon. Note: If anchoring the tendon in a blind bone tunnel, tension the tendon and mark where the tendon aligns with the desired insertion site. Make a second marking where the tendon should reach the bottom of the bone tunnel. Using QuikWhipTM #2 Surgical Suture, whipstitch the region between the two markings and trim off any excess tendon. STEP 2: PREPARE THE BONE TUNNEL Determine the desired anatomical insertion site. Drill the 2.4 mm Drill Tipped Passing Pin to the appropriate depth by measuring directly off the laser marks of the Passing Pin (Refer to Sizing Guide on page 4 for recommended drill depth guidelines). Drill over the Passing Pin with a cannulated reamer 1 mm larger than the diameter of the tendon. 5
DEPLOYMENT GUIDE STEP 3: TENDON MANAGEMENT There are three options available for managing and inserting the tendon depending on the type of bone tunnel drilled. Step A: Tendon Fork If a blind bone tunnel is drilled, the Tendon Fork can be used to insert the tendon PRIOR to Implant insertion. Using the dual-pronged tip of the Fork, grasp the end of the tendon-suture complex and push the tendon to the bottom of the bone tunnel. Verify that the tendon is inserted to the appropriate depth by reading the laser mark measurements on the Tendon Fork. Remove the Tendon Fork. Note: To maintain tension on the tendon, the Fork may be left in place during the initial Sheath insertion (Step 4). Step B: Passing Pin If a transosseous tunnel is drilled, the Passing Pin can be used to insert and tension the tendon PRIOR to Implant insertion. With the drill tip of the Passing Pin placed inside the tunnel, thread the suture strands of the whipstitched tendon through the eyelet of the Passing Pin. Draw the tendon into the tunnel by pulling the Passing Pin completely through the tunnel until the suture strands emerge from the opposing side. Note: Pull the suture strands to maintain tendon tension during Steps 3 - 6.
DEPLOYMENT GUIDE Step C: Suture Lasso Alternatively, the Suture Lasso may be used for tendon management in a blind or transosseous tunnel. Feed the rod end of the Lasso through the Sheath, thread one suture strand through the Suture Lasso eyelet, and pull the suture strand through the Sheath. The second suture strand should run along the outside of the Implant Sheath. Adjust the tendon so that it rests in the compressed profle of the Sheath. Cleat the threads on the Suture Cleat and insert the Sheath and tendon simultaneously into the bone tunnel. Note: After deployment, remember to uncleat the sutures before releasing the Gun from the Implant. STEP 4: POSITION THE IMPLANT Refer to Sizing Guide on page 4 for selecting Implant size. Position the Sheath in the tunnel so that the compressed profle is adjacent to the tendon. Manually advance the Sheath into the tunnel until the Sheath is 1 - 2 mm sub-fush. If necessary, lightly mallet the metal Strike Plate on the Gun Knob to assist in advancing the Sheath into the bone tunnel. Note: To prevent possible damage to the Implant, ensure the trajectory of the Sheath is aligned with the tunnel axis. Note: If extensive malleting is required to advance the Sheath, increase the tunnel size by 0.5 - 1 mm. 7
DEPLOYMENT GUIDE STEP 5 (Optional): ROTATE THE GUN BODY If desired, push forward on the blue Knob Lock to allow free rotation of the Gun Body. The Gun Body can now rotate to the desired deployment position for surgeon comfort without disturbing Implant alignment in the tunnel. Push back on the Knob Lock to re-engage with the Gun Knob, preventing further rotation of the Gun Body. STEP 6: DEPLOY THE IMPLANT To release the Deployment Trigger, squeeze the Deployment Trigger while pulling down on the blue Trigger Lock. While maintaining slight forward pressure on the Gun, squeeze the Trigger to advance the Bullet into the Sheath. Signifcant resistance to squeezing the Trigger indicates deployment. When the Trigger pull no longer exhibits resistance (i.e. bottoms out), the Implant is fully deployed (approximately 2 trigger pulls). Note: Be sure to apply slight forward pressure while pulling the Trigger to ensure that the Implant remains seated in the tunnel.
DEPLOYMENT GUIDE STEP 7: RELEASE THE GUN Push forward on the Knob Lock. Turn the Knob counterclockwise until the Gun releases from the Implant. STEP 8: FINAL FIXATION Proceed with the procedure per surgeon preference. 9
PRODUCT CATALOG ECLIPSE SOFT TISSUE ANCHOR Part No. 1500-00-0410 1500-00-0417 1500-00-0512 1500-00-0520 1500-00-0612 1500-00-0620 1500-00-0712 1500-00-0720 1500-00-0820 1500-00-0920 Description Eclipse, 4 x 10 mm, with Disposable Gun Eclipse, 4 x 17 mm, with Disposable Gun Eclipse, 5 x 12 mm, with Disposable Gun Eclipse, 5 x 20 mm, with Disposable Gun Eclipse, 6 x 12 mm, with Disposable Gun Eclipse, 6 x 20 mm, with Disposable Gun Eclipse, 7 x 12 mm, with Disposable Gun Eclipse, 7 x 20 mm, with Disposable Gun Eclipse, 8 x 20 mm, with Disposable Gun Eclipse, 9 x 20 mm, with Disposable Gun SINGLE USE INSTRUMENTS Part No. 1101-03-000 1101-04-000 1500-01-040 1500-01-050 1500-01-060 1500-01-070 1500-01-080 1500-01-090 Description QuikWhip Green Co-Braid USP #2 Suture, Sterile QuikWhip White/Green Co-Braid USP #2 Suture, Sterile Cannulated Drill, 4 mm, Sterile Cannulated Acorn Reamer, 5 mm, Sterile Cannulated Acorn Reamer, 6 mm, Sterile Cannulated Acorn Reamer, 7 mm, Sterile Cannulated Acorn Reamer, 8 mm, Sterile Cannulated Acorn Reamer, 9 mm, Sterile 1500-02-000 Universal Tenodesis Procedure Pack, Sterile For further product information or to arrange a product demonstration, please contact your local MedShape representative or call Customer Service at 877-343-7016. You can also visit www.medshape.com. MedShape, Inc. 1575 Northside Drive, NW Suite 440 Atlanta, GA 30318 T: 877-343-7016 F: 877-343-7017 CAUTION: Federal (USA) law restricts this device to sale by or on the order of a physician. © MedShape, Inc., 2015. All rights reserved. Printed in the USA. Protected by Patent No.: US 8,069,858. Other U.S. and International Patents Pending. MK-10133 Rev 00. Issued 12/2015. PEEK Altera is a registered trademark of MedShape, Inc. QuikWhip is a trademark of Medshape, Inc. SurgiBit® Technology is protected by US Patent No.: D523313, D523398, & US 7,892,2235 B2. Foreign patents and design application pending and granted. All other trademarks are trademarks of their respective owners or holders.