Download
1 / 8
80 likes | 199 Vues
The Morphix® Suture Anchor is designed for the reattachment of soft tissue (tendons and ligaments) to the bone in tenodesis, tendon transfer, and ligament repair procedures. Read this file to learn about the lateral ankle ligament repair – surgical technique guide using Morphix® Suture Anchor System. For more information visit www.medshape.com.

E N D
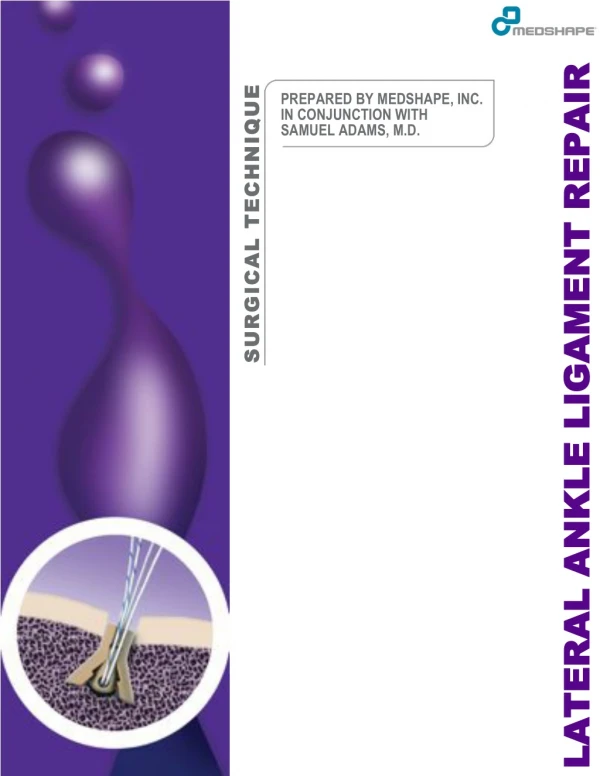
LATERAL ANKLE LIGAMENT REPAIR LATERAL ANKLE LIGAMENT REPAIR ! URGICAL TECHNIQUE !! S SURGICAL TECHNIQUE PREPARED BY MEDSHAPE, INC. IN CONJUNCTION WITH SAMUEL ADAMS, M.D.
Lateral Ankle Ligament Repair ! Lateral Ankle Ligament Tears Ankle sprains are the most common injuries sustained during sporting activities.1 Although approximately 80% of ankle sprains make a full recovery, the remaining 20% develop mechanical or functional instability leading to chronic ankle instability.2 Chronic ankle instability results in continued pain, diminished recreational activities, and potentially early degenerative changes in the ankle. The majority of ankle injuries involve the lateral ankle ligament complex, which is comprised of the anterior talofibular ligament (ATFL), the calcaneofibular ligament (CFL), and the posterior talofibular ligament (PTFL). The mechanism of lateral ligament injury is most often forced plantar flexion and inversion of the ankle as the body’s center of gravity rolls over the ankle.1 The ATFL is the weakest of the lateral ankle ligaments; therefore, it is the most frequently torn. In fact, of the 105 sprained ankles surgically explored by Brostrom, two-thirds were found to have ATFL tears and one-quarter involved combined ATFL and CFL tears.3 Indications for Lateral Ankle Ligament Repair Indications for lateral ankle ligament repair include at least six months of persistant symptomatic instability despite failed conservative treatment of functional rehabilitation. Anatomic Lateral Ankle Ligament Repair A myriad of surgical procedures have been described to treat lateral ankle ligament instability. These procedures can be classified as anatomic repairs, anatomic reconstructions, or non-anatomic reconstructions. Herein, we describe a technique for anatomic repair. Brostrom first described midsubtance repair of the ATFL and CFL in 1966.4 Gould further modified this technique by incorporating repair of the inferior extensor retinaculum.5 Karlsson et al. reported an additional modification to ligament repair, wherein the lateral ligaments are reattached to the fibula through drill holes.6 Today, the latter technique is typically performed utilizing suture anchors in the fibula to imbricate the ATFL and possibly the CFL with additional repair of the inferior extensor retinaculum and fibular periosteum. 1Chan, K.W., B.C. Ding, and K.J. Mroczek, Acute and chronic lateral ankle instability in the athlete. Bull NYU Hosp Jt Dis, 2011. 69(1): p. 17-26. 2Baravarian, B., et al., Treatment of chronic lateral ankle instability and associated pathology. Foot Ankle Spec, 2008. 1(6): p. 359-62. 3Brostrom, L., Sprained ankles. 3. Clinical observations in recent ligament ruptures. Acta Chir Scand, 1965. 130(6): p. 560-9. 4Brostrom, L., Sprained ankles. VI. Surgical treatment of "chronic" ligament ruptures. Acta Chir Scand, 1966. 132(5): p. 551-65. 5Gould, N., D. Seligson, and J. Gassman, Early and late repair of lateral ligament of the ankle. Foot Ankle, 1980. 1(2): p. 84-9. 6Karlsson, J., et al., Reconstruction of the lateral ligaments of the ankle for chronic lateral instability. J Bone Joint Surg Am, 1988. 70(4): p. 581-8.a Morphix® Design Highlights DEPLOYMENT WINGS EXPAND 200% FOR HIGH BEARING AREA AND SECURE FIXATION PRE-COMPRESSED LOW PROFILE GEOMETRY FOR EASY INSERTION Eyelet Lock prevents eyelet migration after deployment Compressed Wings Suture Eyelet Deployment Wings expand 200% Suture Channel Suture Cleats INSERTER HANDLE FOR SIMPLIFIED DEPLOYMENT BY TAP-IN TECHNIQUE Cannula Inserter Knob Profile of Inserter Handle Wings shows direction of wing expansion during deployment Page 1
Lateral Ankle Ligament Repair ! Place the patient in the supine position with a bump under the ipsilateral iliac crest to internally rotate the foot. Alternatively, the patient can be placed in a semi-lateral position with a deflatable beanbag device. Make a longitudinal incision centered over the distal fibula and curving anteriorly past the fibula. Alternatively, a five to six cm curvilinear incision can be made along the anterior and inferior border of the lateral malleolus. 1 Dissect the subcutaneous tissues down to the level of the fibular periosteum, the anterior talofibular ligament (ATFL), and the inferior extensor retinaculum (A). If there is concern for peroneal tendon pathology, the peroneal tendons can be inspected at this point by making a longitudinal incision in the peroneal tendon sheath just posterior to the fibula. Use blunt dissection anteriorly to ensure that the superficial peroneal nerve is not trapped in the soft- tissues that will be used for the repair (B). 2 B A Page 2
Lateral Ankle Ligament Repair !! In a curvilinear fashion, carefully detach the anterior and distal ATFL and calcaneal fibular ligament (CFL) directly from the distal fibula as a full thickness flap (A). Care must be taken to not damage the peroneal tendons along the most distal portion of the fibula, as the CFL is the “floor” of the peroneal tendon sheath. Avoid plunging with the scalpel blade as the talar articular cartilage is immediately deep to dissection. Inspect the lateral talar dome for any osteochondral pathology. Carefully peel the fibular periosteum off of the anterior and distal fibula (B). Using a burr or rongeur, decorticate the anterior and inferior border of the distal fibula to create a bleeding bone trough (C). 3 A B C Using a 3.5 mm Drill Bit and Drill Guide (found in the Morphix Procedure Pack), drill two to three tunnels on the anterior and inferior border of the distal fibula. Drill until the hard stop on the Drill Bit reaches the back of the Drill Guide to achieve appropriate tunnel depth (A). Ensure that the bone tunnels do not converge or enter the ankle joint (B). 4 A B Page 3
Lateral Ankle Ligament Repair !!! Select a 3.5 mm Morphix Suture Anchor with two USP #0 sutures with needles. With the Inserter Knob in the “locked” position, fully insert the Morphix anchor eyelet into the hole until the cannula on the handle is seated on the cortex (A-B). Pearl #1. The wings of the MorphixSuture Anchor will deploy in the same orientation as the Inserter Handle Wings. Ensure that the device is inserted so that the wings will deploy in sagittal plane and not the coronal plane to avoid penetration into the ankle joint (A). Pearl #2. To prevent possible damage to the eyelet assembly, ensure that the insertion trajectory matches the trajectory of the hole created by the drill bit and the metal cannula is firmly seated on the bone (B). 5 A B Rotate the Inserter Knob one-quarter turn counter-clockwise into the “unlocked” position, indicated by an open padlock symbol (A). Manually depress the Inserter Knob to deploy the anchor. A mallet may be used to gently tap on the Inserter Knob to fully deploy the anchor (B). The anchor is fully deployed when the top of the Morphix Suture Anchor is slightly countersunk to the surface of the bone and the Inserter Knob is flush with the Inserter Handle. 6 B A Page 4
Lateral Ankle Ligament Repair !!! Unwind the sutures from the suture slot in the Inserter Handle. Disengage the Inserter Handle using a counter-clockwise motion to disconnect the eyelet from the Inserter (A). Gently pull back the Inserter Handle to remove. 7 A B Repeat Steps 5 though 7 as needed with additional 3.5 mm Morphix Suture Anchors (B). Pass the sutures through the distal limb of the transected ATFL, CFL, and extensor retinaculum in a horizontal mattress fashion, making sure that the sutures are grouped according to color and anchor (A). Ensure that the sutures are placed so that the tissues to be repaired will be appropriately positioned on the distal fibula. With the ankle in neutral dorsiflexion and slight eversion, tie the coordinating sutures over the repaired tissue so that it is flush to the fibula (B). If using these sutures for an additional row of repair, do not cut off the needles. 8 A B Page 5
Lateral Ankle Ligament Repair !!!! Pass these same sutures through the fibular periosteum (A) and tie them in a horizontal mattress fashion, creating a “vest-over-pants” reinforcement. Trim off the free ends of the sutures (B).Close the incisions as per surgeon preference. 9 A B Page 6
Product Ordering Information !!!!!!! MORPHIX®SUTURE ANCHOR Part No. 1000-03-225 1000-03-235 1000-04-125 1000-04-235 1000-04-245 1000-04-255 Description Morphix, 2.5 mm Diameter, 2 USP #2 Sutures Morphix, 3.5 mm Diameter, 2 USP #2 Sutures Morphix, 2.5 mm Diameter, 1 USP #0 Suture Double Armed with Tapered Needles Morphix, 3.5 mm Diameter, 2 USP #0 Sutures Double Armed with Tapered Needles Morphix, 4.5 mm Diameter, 2 USP #2 Sutures Double Armed with Tapered Needles Morphix, 5.5 mm Diameter, 2 USP #2 Sutures Double Armed with Tapered Needles SINGLE USE INSTRUMENTS Part No. 1000-10-025 1000-10-035 1000-10-045 Description 2.5 mm Procedure Pack, Single Use, Sterile 3.5 mm Procedure Pack, Single Use, Sterile 4.5 mm Procedure Pack, Single Use, Sterile Morphix® Procedure Pack includes Drill Guide and 160 mm Drill Bit. This brochure is presented to demonstrate the surgical techniques utilized by Samuel Adams, M.D. MedShape, as the manufacturer of this device, does not practice medicine and does not recommend this or any other surgical technique for use on a specific patient. The surgeon who performs any procedure is responsible for determining and utilizing the appropriate techniques for such procedure for each individual patient. MedShape is not responsible for selection of the appropriate surgical technique to be utilized for an individual patient. Always refer to the package insert, product label and/or product instructions prior to using any MedShape product. For further product information or to arrange a product demonstration, please contact your local MedShape representative or call Customer Service at 877-343-7016. You can also visit www.medshape.com. MedShape, Inc. 1575 Northside Drive, NW Suite 440 Atlanta, GA 30318 T: 877-343-7016 F: 877-343-7017 CAUTION: Federal (USA) law restricts this device to sale by or on the order of a physician. ©MedShape, Inc., 2014. All rights reserved. Printed in the USA. Protected by Patent No.: US 8,069,858. Other U.S. and International Patents Pending. MK-10118 Rev 00. Issued 06/2014. PEEK Altera and Morphix are registered trademarks of MedShape, Inc. All other trademarks are trademarks of their respective owners or holders. Page 7