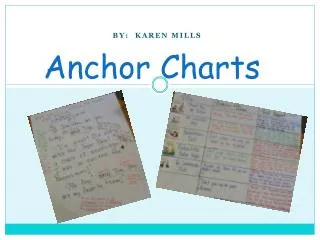
Anchor Charts
Anchor Charts. By: Karen mills . Anchor Charts. Read over the information about anchor charts. Use your highlighter tape to mark 3-4 important ideas you want to remember. . Anchor Charts. Anchor charts are created WITH students. They serve as wonderful display of our thinking!

Anchor Charts
E N D
Presentation Transcript
Anchor Charts By: Karen mills
Anchor Charts Read over the information about anchor charts. Use your highlighter tape to mark 3-4 important ideas you want to remember.
Anchor Charts • Anchor charts are created WITH students. • They serve as wonderful display of our thinking! • They allow students to independently review content they have not yet mastered.
Flashbacks By: Karen mills
Flashbacks • Used daily to review previously taught material (We do them on Monday-Thursday and revise short answers on Friday if needed.) • Combination of multiple choice and short answer • Clickers provide immediate results and allow for instant class, small group, or individual re-teaching opportunities. • See Resource page for ideas of places to find passages that can be used for flashbacks.
Reading Flashbacks Reading Flashback Answer Sheet
Language Arts Flashback Sample of Language Arts Flashback
Vocabulary 49 essentials words
Literature Circles By: Kelli Sparks
Literature Circles.. Are… Are Not… • Groups of readers formed by book choice • Reader response centered • Structured for student independence, responsibility, and ownership • Guided by student’s questions • Flexible groups • Teacher centered • Teacher assigned groups formed solely by ability • Unstructured-uncontrolled “talk time” • Guided primarily by teacher
Selecting Books • Choosing Books: • Model “I Choose, We Choose, and You Choose.” • Introducing Books: • Field trip to the library.
How Often Do I Do Literature Circles? Usually takes about 3-4 weeks to complete a book. • 3 Days a Week • Tuesday • Wednesday • Friday
What Do Literature Circles Look Like? Student Led Students in groups of four First complete their role sheet Then discuss Teacher discussing with each group
Literature Circle Role Sheets The most important role sheet is the Discussion Director.
Literature Circle Role Sheets Next, you have the Word Wizard.
Literature Circle Role Sheets Then, you have the Literary Luminary.
Literature Circle Role Sheets Finally, you have the Connector.
Literature Circle Role Sheets If you decide that you want five students in a group, or you want to switch out the role sheets, here is one more; the Illustrator Mapper
On Demand Writing Elements of: Introduction Body Conclusion & Distinguished words
Coffee House & iMovie Low Tech High Tech Character Sketch Rubric iMovie Tutorial
Hands-On Tools By: Karen mills Hands-On Tools Ideas Obtained From Books & Presentations by Anne Beninghof.
Highlighter Tape Cards Laminate index cards Place about 8 strips of highlighter tape on each card. (I use 2 different colors and do 4 of each color.) Tab the edges so they are easy for students to peel them off the card. One set will usually last for the entire school year.
Plastic Report Covers Place worksheets, graphic organizers into these report covers and write on with dry erase markers. Marks can be easily erased and covers reused. We prefer these over page protectors because they can also fit around pages in books and/or magazines so that students can mark up this text as well.
Highlighter Strips Cut strips of different colored report covers. Students use these to follow along while text is read aloud and/or could be used for independent reading as well.
Poker Chips & Dice To encourage students to participate during classroom discussions, give each student so many poker chips, and tell them they have to contribute to the conversation at least that many times. Each time they add something to the discussion, they throw in a poker chip. Dice can be used for a variety of things. . . You could have a list of options 1-6. . .whatever number is rolled is what students do. They could also roll it at the end of class. If it lands on a three, they turn and tell their partner three things they learned during the lesson that day. Endless possibilities. . .
Book Discussion Chips Decide on different ways students could participate in book discussions. These were created by making templates on labels and punching them out with 1 inch circle punch. Circles were then stuck to counting chips (Could also use poker chips.) As students discuss books in book clubs, literature circles, etc. they can throw each chip in. (For example, if they share a connection, they throw in the connection chip.) Bookmarks were created with the same visuals as on the chips. Students had the bookmarks as they read and could record various responses they may want to share in their response journal.
Stretch ‘Ems Laminate index cards and cut in half. Place a thin strip of elastic through slits at the top of each card. Students can write on the cards with dry erase markers. Can be used as students are learning to segment words. (Individual letters/sounds can be placed on each card or syllables.)
Focus Tool Laminate cardstock cut into 4-6 inch squares. Use double sided tape to place a different colored report cover strip on each side. Students can write under each color what they are focusing on. Editing/Revising Tool for students to check their own writing
Resources www.lauracandler.com www.teacherspayteachers.com www.pinterest.com www.readwritethink.org www.teachervision.fen.com www.readingrockets.org www.readworks.org www.scholastic.com www.edmodo.com www.commoncoreconversation.com/ela-resources.html www.studyisland.com www.masteryconnect.com www.k12reader.com